Claire Saffitz’s Rhubarb Cake

SUMMER = RHUBARB SZN!

I’m new to this rhubarb game, but from what I know of it, rhubarb can be tart, which is right up my alley. My mom and I were invited up to Maine to celebrate her friend’s husband’s birthday. I was digging through my cookbooks to figure out something good to bake and BAM, I come across this recipe from our girl Claire. As we know I love a recipe that features seasonal produce and so when I saw a rhubarb cake I was in! It is absolutely delicious, sweet and tart, and incredibly moist. Claire notes to bake this cake longer than you think & I totally agree, I would have baked mine an additional 10 minutes. For the life of me I could not find Demerara sugar that she calls for so I just used regular sugar.

Ingredients

You will need an 4 1/2 x 8 1/2 in loaf pan

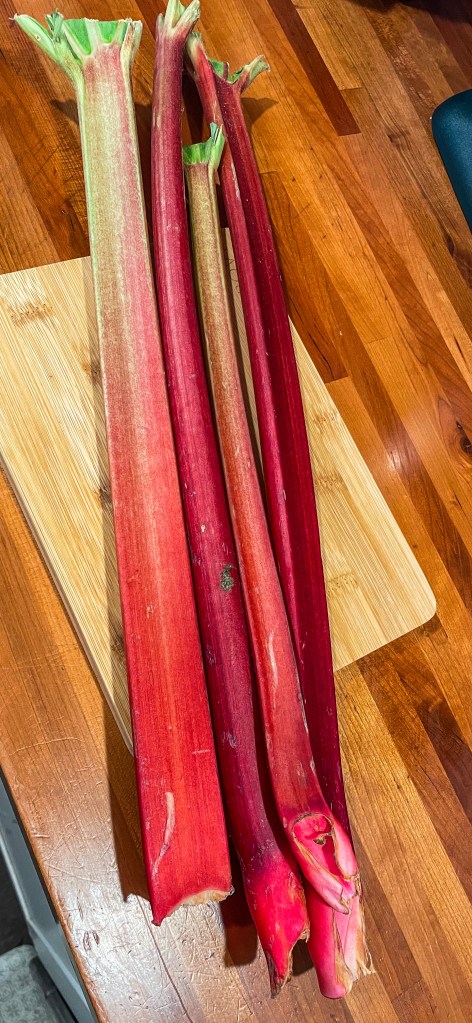
  • 1 LB (454g) Rhubarb Stalks
  • 1/2 TSP Baking Soda
  • Butter & Demerara Sugar for the pan
  • 1 3/4 (228g) Cups All Purpose Flour
  • 2 1/2 TSP Baking Powder
  • 3/4 TSP Salt
  • 1 1/4 Cup Granulated Sugar
  • 1 Stick Unsalted Butter, melted and cooled
  • 2 Large Eggs
  • 1 1/2 TSP Orange, finely grated
  • 1/3 Cup Plain Whole-Milk Greek Yogurt
  • 1 TSP Vanilla Extract
  • Demerara Sugar for sprinkling on top [I used regular sugar]

Let’s Get Baking

Preheat the oven to 350F and coat the pan with butter. Line with parchment paper and sprinkle sugar on the bottom.

Choose the thinnest rhubarb stalks, or trim accordingly, making about 4-5 pieces that are about 8 1/2 in in length. Set these pieces aside.

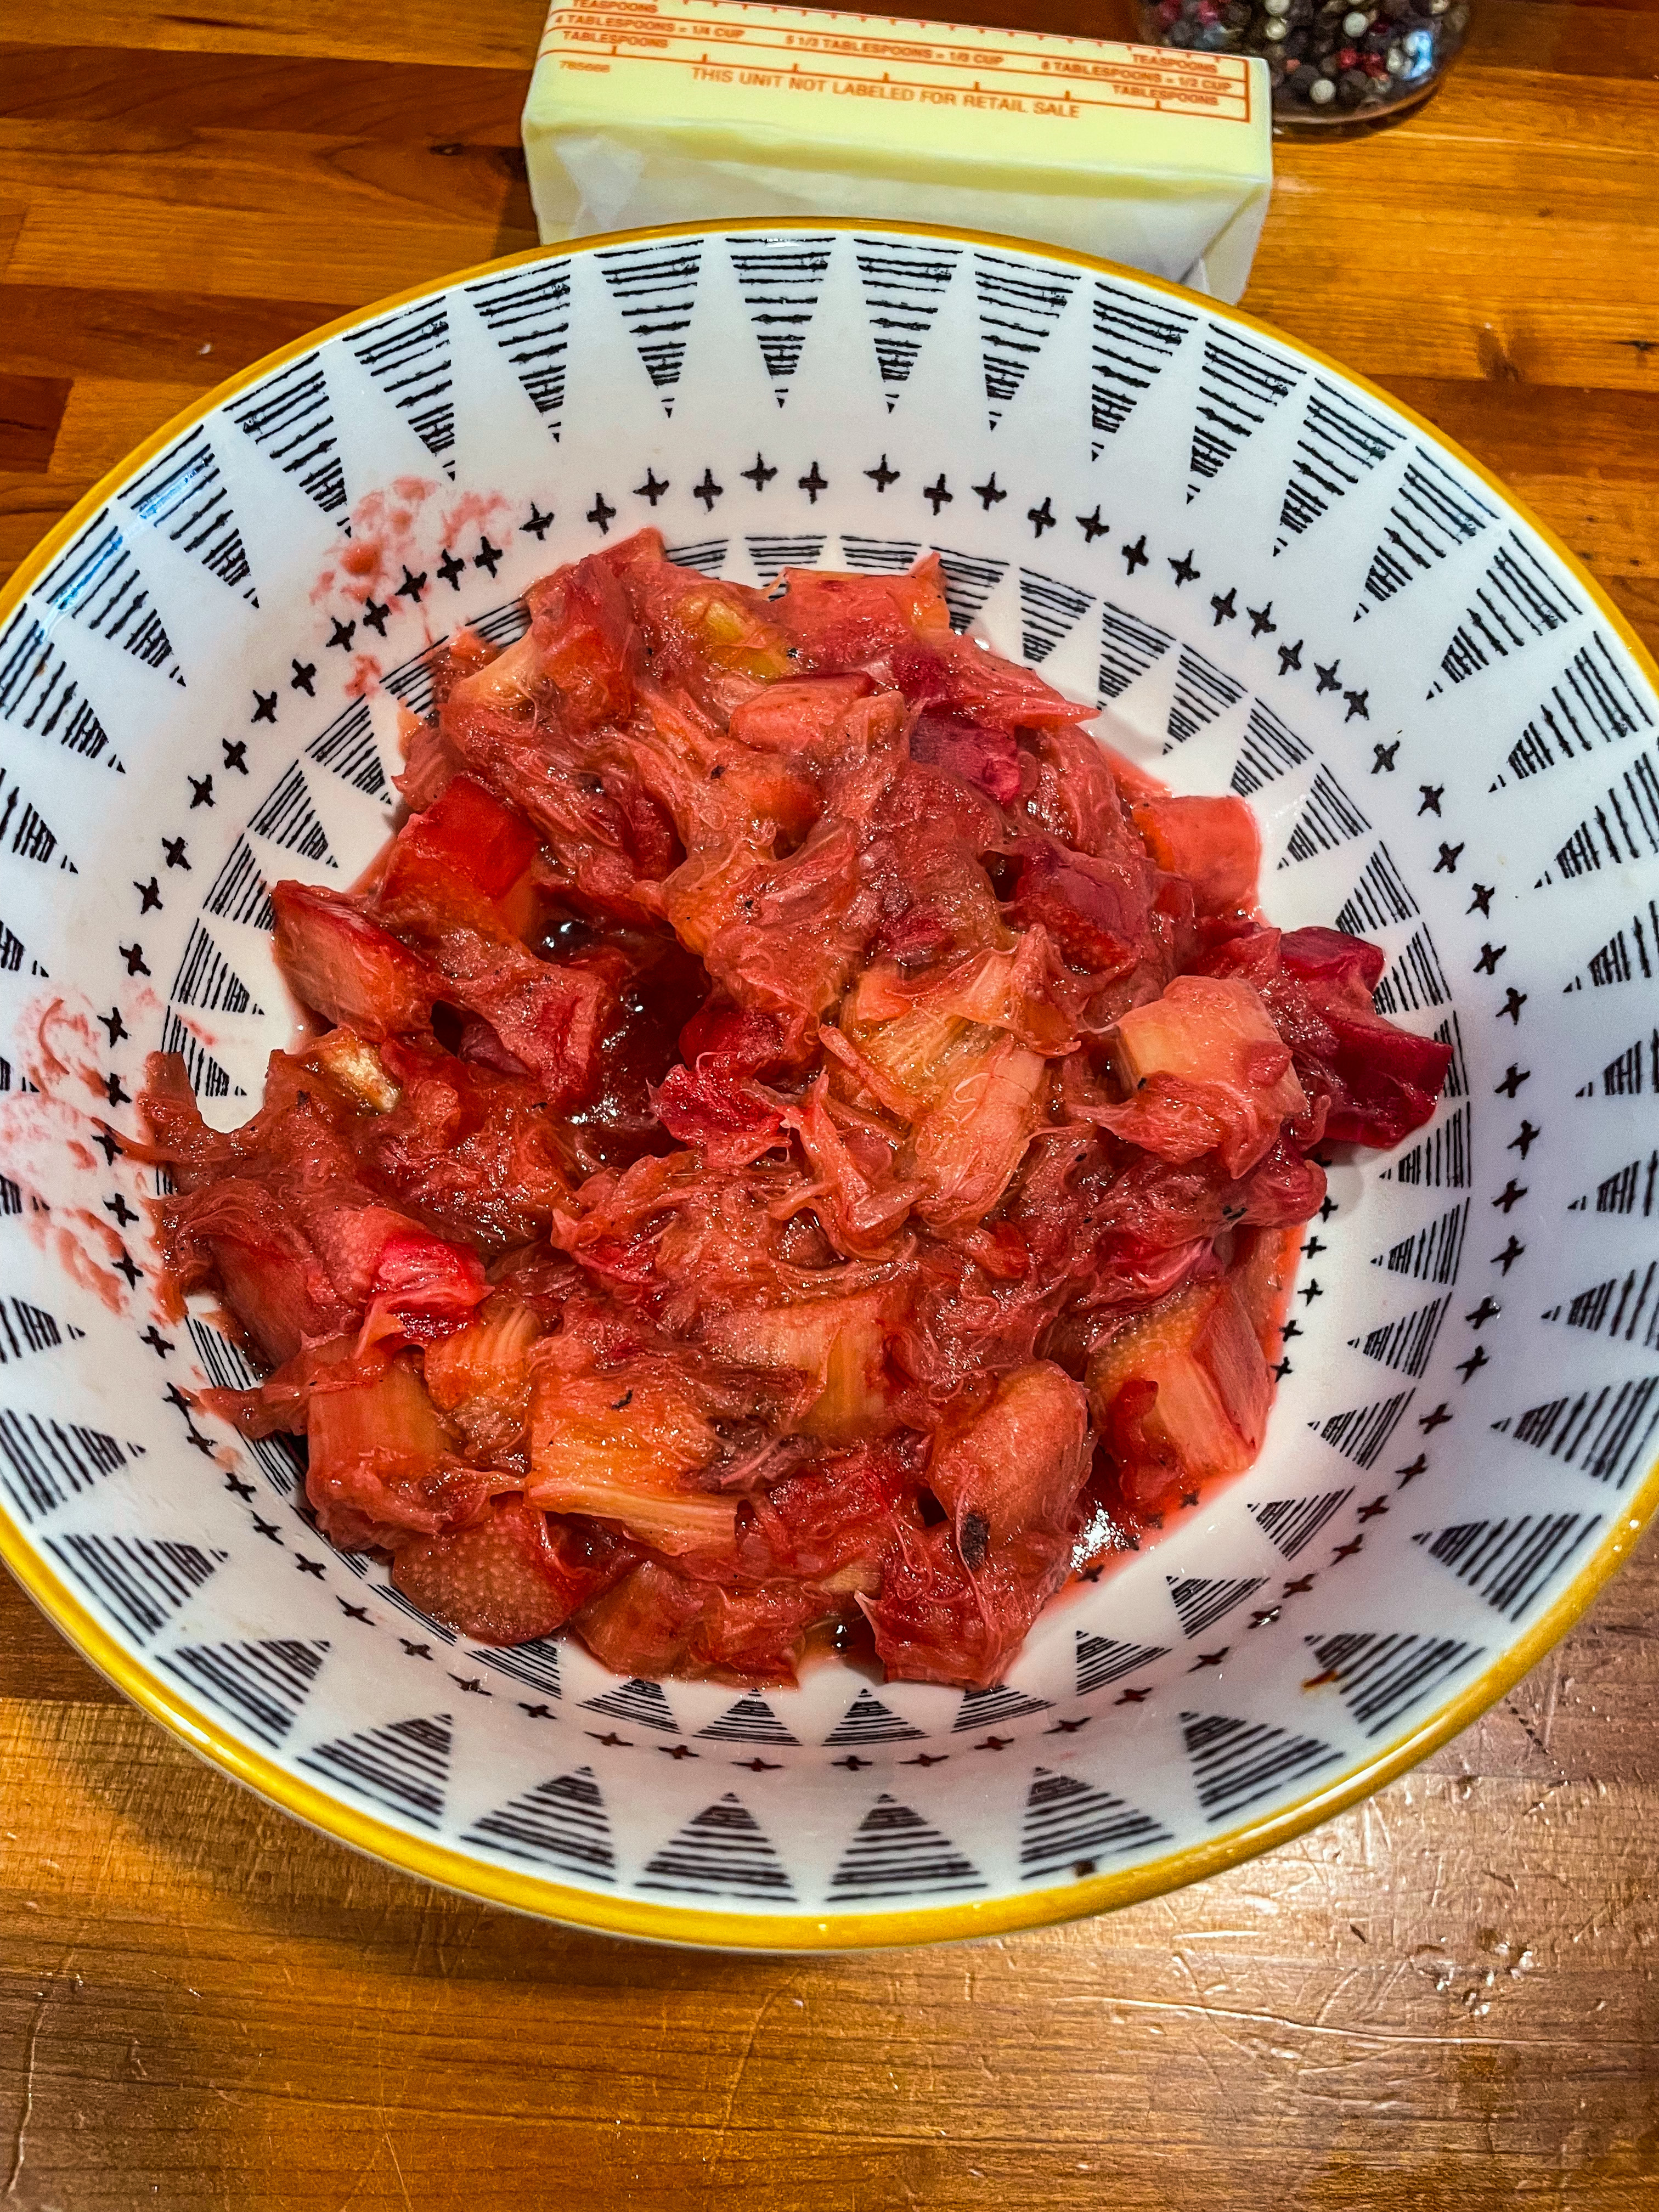
Chop up the remaining rhubarb into 1/2 in pieces. Transfer 227g into a small sauce pan and set aside the remaining 113g to fold into the batter later.

Add 1 TBSP water to the saucepan and cook the chopped rhubarb over MED heat, stirring often and mashing with the back of a wooden spoon, until the pieces have broken down. Claire notes the mixture should begin to resemble applesauce, which will take about 5-7 minutes. Remove from heat and set aside to cool. Once the mixture is cooled, stir in the baking soda, it will bubble and turn a grayish color which is normal! Set mixture aside.

In a medium bowl, whisk the flour + baking powder + salt, set aside.

In a large mixing bowl, whisk together the granulated sugar + melted butter + eggs + orange zest. Whisk in the yogurt, vanilla, and rhubarb mush until smooth. Scrape the bowl as needed until all the dry ingredients disappear. Switch to a flexible spatula and fold in the remaining 113g of chopped rhubarb into the batter.

Scrape the batter into the prepared pan and smooth the top. Place the reserved rhubarb stalks over the top of the batter in parallel lines. Sprinkle with Demerara sugar [ or regular sugar] and bake for 60 minutes. Reduce the temp tp 325F and cook for an additional 30-40 minutes or until the cake tester comes out clean. Tent the top with foil if it starts to get too brown.

Let cool for 20 minutes in the pan before removing it from the pan and letting it cool completely.

If you’re a rhubarb person, trust me you’ll love this!

Made with Love,

Hannah

Snoop Dog’s ‘Mack & Cheese’

I first off want to clarify that this is Snoop Dog’s WIFE’s, Shante Broadus’s, mac and cheese recipe. I feel that is important to point out because she deserves all the credit here. The original recipe calls for 5 cups of extra sharp cheddar. Instead, I did half with Colby-jack but you do not have to! I bought fall-shaped noodles from ALDI so I was incredibly excited to make this. I have nothing more to say about this recipe other than you need to make it and the nutmeg is game-changing.

Ingredients

  • 2 TSP Salt + more for the water
  • 1lb Elbow macaroni, or cute fall shapes
  • 2 Cups Whole Milk
  • 1 Cup Heavy Cream
  • 4 TBSP Unsalted Butter
  • 2 1/2 Cups Shredded Extra Sharp Cheddar
  • 2 1/2 Cups Shredded Colby Jack
  • 1/4 Cup All-Purpose Flour
  • 2/3 Cup Sour Cream
  • 1 TSP Cracked Black Pepper
  • 2 TSP Dry Mustard
  • 1/2 TSP Ground Nutmeg
  • 2 TSP Worchestershire Sauce
  • 1/4 TSP Cayenne Pepper

Let’s Get Cooking

Preheat the oven to 400F. Lightly butter a 9×13 in baking dish.

Bring a large pot of water, heavily salted, to boil. Add in the macaroni and cook 1 minute less than the package instructions. Drain and set aside.

In a small saucepan over MED heat, combine the milk and cream and gently heat. Be careful not to boil.

While the milk heats, in a large skillet over MED heat, melt the butter. Sprinkle the flour and whisk constantly for 2-3 minutes. Gradually add in the warmed milk. Cook for 2 minutes whisking frequently or until thickened. Adjust the heat as needed so the milk does not boil.

Gradually add in half of the Colby jack and half the cheddar cheese. Whisk until fully incorporated and smooth. Add in the sour cream and whisk until smooth. Add in pepper + dry mustard + cayenne + Worcestershire sauce + nutmeg. Season with salt.

Add the cooked macaroni to the cheese sauce and stir until combined. Spoon the mixture into the buttered dish and top with the remaining cheese. Bake for 25-30 minutes or until golden and bubbly.

Serve warm and enjoy.

Made with Love,

Hannah

Molly Baz’s Cold & Crunchy Green Beans with Garlic Pistachio Vinaigrette

I hope everyone is winding down from a wonderful thanksgiving. I spent the day cooking a feast with my mom and brother and it was absolutely worth it. My brother brought along these green beans as a cold side and OMG were they exactly what we needed. They are snappy and garlicky and absolutely delicious. The recipe comes from Molly Baz’s cookbook.

Ingredients

  • 1 1/2 lbs Green Beans, ends trimmed
  • 1 Small Garlic Clove, grated
  • 2 Lemons
  • 1 1/2 oz Grated Parmesan Cheese (about 1/2 cup)
  • 3/4 Cup Roasted, Salted Pistachios, finely chopped
  • 1/3 Cup Olive Oil
  • Salt + Pepper

Let’s Get Cooking

Bring 4 quarts of water + 1 1/2 cups salt to a boil (its a lot of salt Molly knows, but trust her okay)

Stir the beans into the boiling water and cook until tender, about 5-6 minutes. While the beans are cooking fill a large bowl with ice and water. Use tongs to transfer the cooked beans into the ice bath to stop them from cooking. Once cool remove from water and pat dry.

Add the grated garlic + zest of one lemon into a medium bowl. Add the juice from both lemons and whisk to combine.

Slowly pour in the olive oil, whisking as you go. Stir in the parm + salt + pepper + pistachios.

Add in the green beans and toss well to coat. Serve up cold! This makes a perfect winter or summer side dish to share with fam & friends.

Made with Love,

Hannah

Claire’s Focaccia

We all love Claire Saffitz, right? High-key very happy she left Bon Appetit and the now madness that is that magazine. But that’s besides the point. I got her book Dessert Person for Christmas and finally got around to making one of her recipes. I decided to go with the Focaccia, it’s so crispy and warm and soft on the inside, UGH. I’d be lying if I said that I didn’t stand in front of the oven and try and eat it when it was still incredibly hot. It’s recommended that you have a stand mixer for this, I do not have one in my little apartment and it still turned out good; just have a strong arm on stand-by. Eat this on it’s own, slice in half for sandwich bread, do whatever you want with it really I don’t care, just enjoy it.

Ingredients

  • 1 Package Active Dry Yeast
  • 6 Cups/780g Bread Flour
  • 2 TBSP/17g Kosher Salt
  • 1/2 Cup/110g Extra Virgin Olive Oil + 1/4 Cup for topping and for oiling hands
  • Additional toppings: 4 Cloves crushed garlic [or whatever you’d like]

Let’s Get Baking

First we are going to dissolve the yeast. In a small sauce pan, warm 1/2 cup water over low heat, just until it’s lukewarm, about 105F. Pour the water into the bowl of the stand mixer and whisk in the yeast to dissolve. Set this aside until the mixture is cloudy and slightly puffed, will take about 5 minutes.

Add 2 1/2 cups [567g] room-temp water to the yeast mixture + add in the flour and kosher salt. Using the dough hook, mix on the lowest speed until a loose dough comes together, for about a minute. Then increase the speed to med-high and mix until the dough is smooth and wrapping around the hook, about 5 minutes. Cover the bowl and allow the dough to rest for 10 minutes. Mix again on med-high speed, the dough should be smooth, elastic, and pulling away from the bowl, for about 10-15 minutes. ** THE DOUGH WILL BE STICKY**

In a separate bowl, pour 1/4 cup of the oil into a separate large bowl and coat. Scrape the dough into the bowl and coat the dough. Take a photo before covering so you can gauge the rise. Cover with a damp towel and let rise for 1-1 1/2 hours.

While the dough is rising, prepare your toppings. For this recipe that involves crushing and chopping the garlic.

Drizzle 1/4 cup oil across a cookie sheet, coating the entire thing. With your oiled hands, slide your hand around either side of the dough and lift it out of the bowl. Let the dough weigh itself down back into the bowl. Rotate the bowl 90 degrees and repeat this process two more times. This allows the dough to rise more. Place the dough on the oiled baking sheet. Stretch the dough out in all directions, it’s not going to fully cover the pan yet, don’t stress. Cover and let sit for 15 minutes.

Uncover and stretch the dough again so it fits all the sides of the sheet. Cover again and let rise in the fridge for 24 hours. OR you can let is sit for another 40-55 minutes before cooking.

Preheat the oven to 450F, place two oven racks on the highest and lowest positions. Uncover the risen dough with oiled hands and with wide hands, press your finger tips into the dough making dimples across the surface.

Top the focaccia as wanted: I added 1/4 cup olive oil+ chopped garlic + salt.

Bake on the lower rack for about 20-25 minutes and then transfer to the top rack until it begins to brown for about 5 minutes. Pay attention to the color here.

Let cool in the pan for about 10 minutes [hardest 10 minutes ever]. Scrape out with a spatula and let cool on a wire rack.

Enjoy in whatever way you wish!

Always Hungry,

Hannah