I like the idea of ‘deconstructed’ recipes, and I was intrigued by this ‘California roll’ cucumber salad on TikTok [@NutritionBabe]. I made mine differently, keeping the avocado on the side so it didn’t get brown and yucky when I meal-prepped. I highly recommend trying this recipe, as it is SO delicious and perfect for weekday lunches/dinners!
Ingredients
1 Cucumber, finely sliced
1 Package Imitation Crab, shredded
1 Avocado, sliced
2 TSP Sesame Oil
2 TBSP Kewpie Mayo or whatever mayo you have at home
1 TSP Rice Wine Vinegar
Cooked Rice
Let’s Get Cooking
Prep all your ingredients and grab a large bowl.
Combine the shredded imitation crab + sliced cucumber + 2 TSP Sesame Oil + 1 TSP Rice Wine Vinegar + 2 TBSP Kewpie Mayo in a large bowl. Mix well to make sure everything is evenly coated.
Plate up the salad with some cooked rice + sliced avocado. Feel free to top with some sesame seeds as well & enjoy!
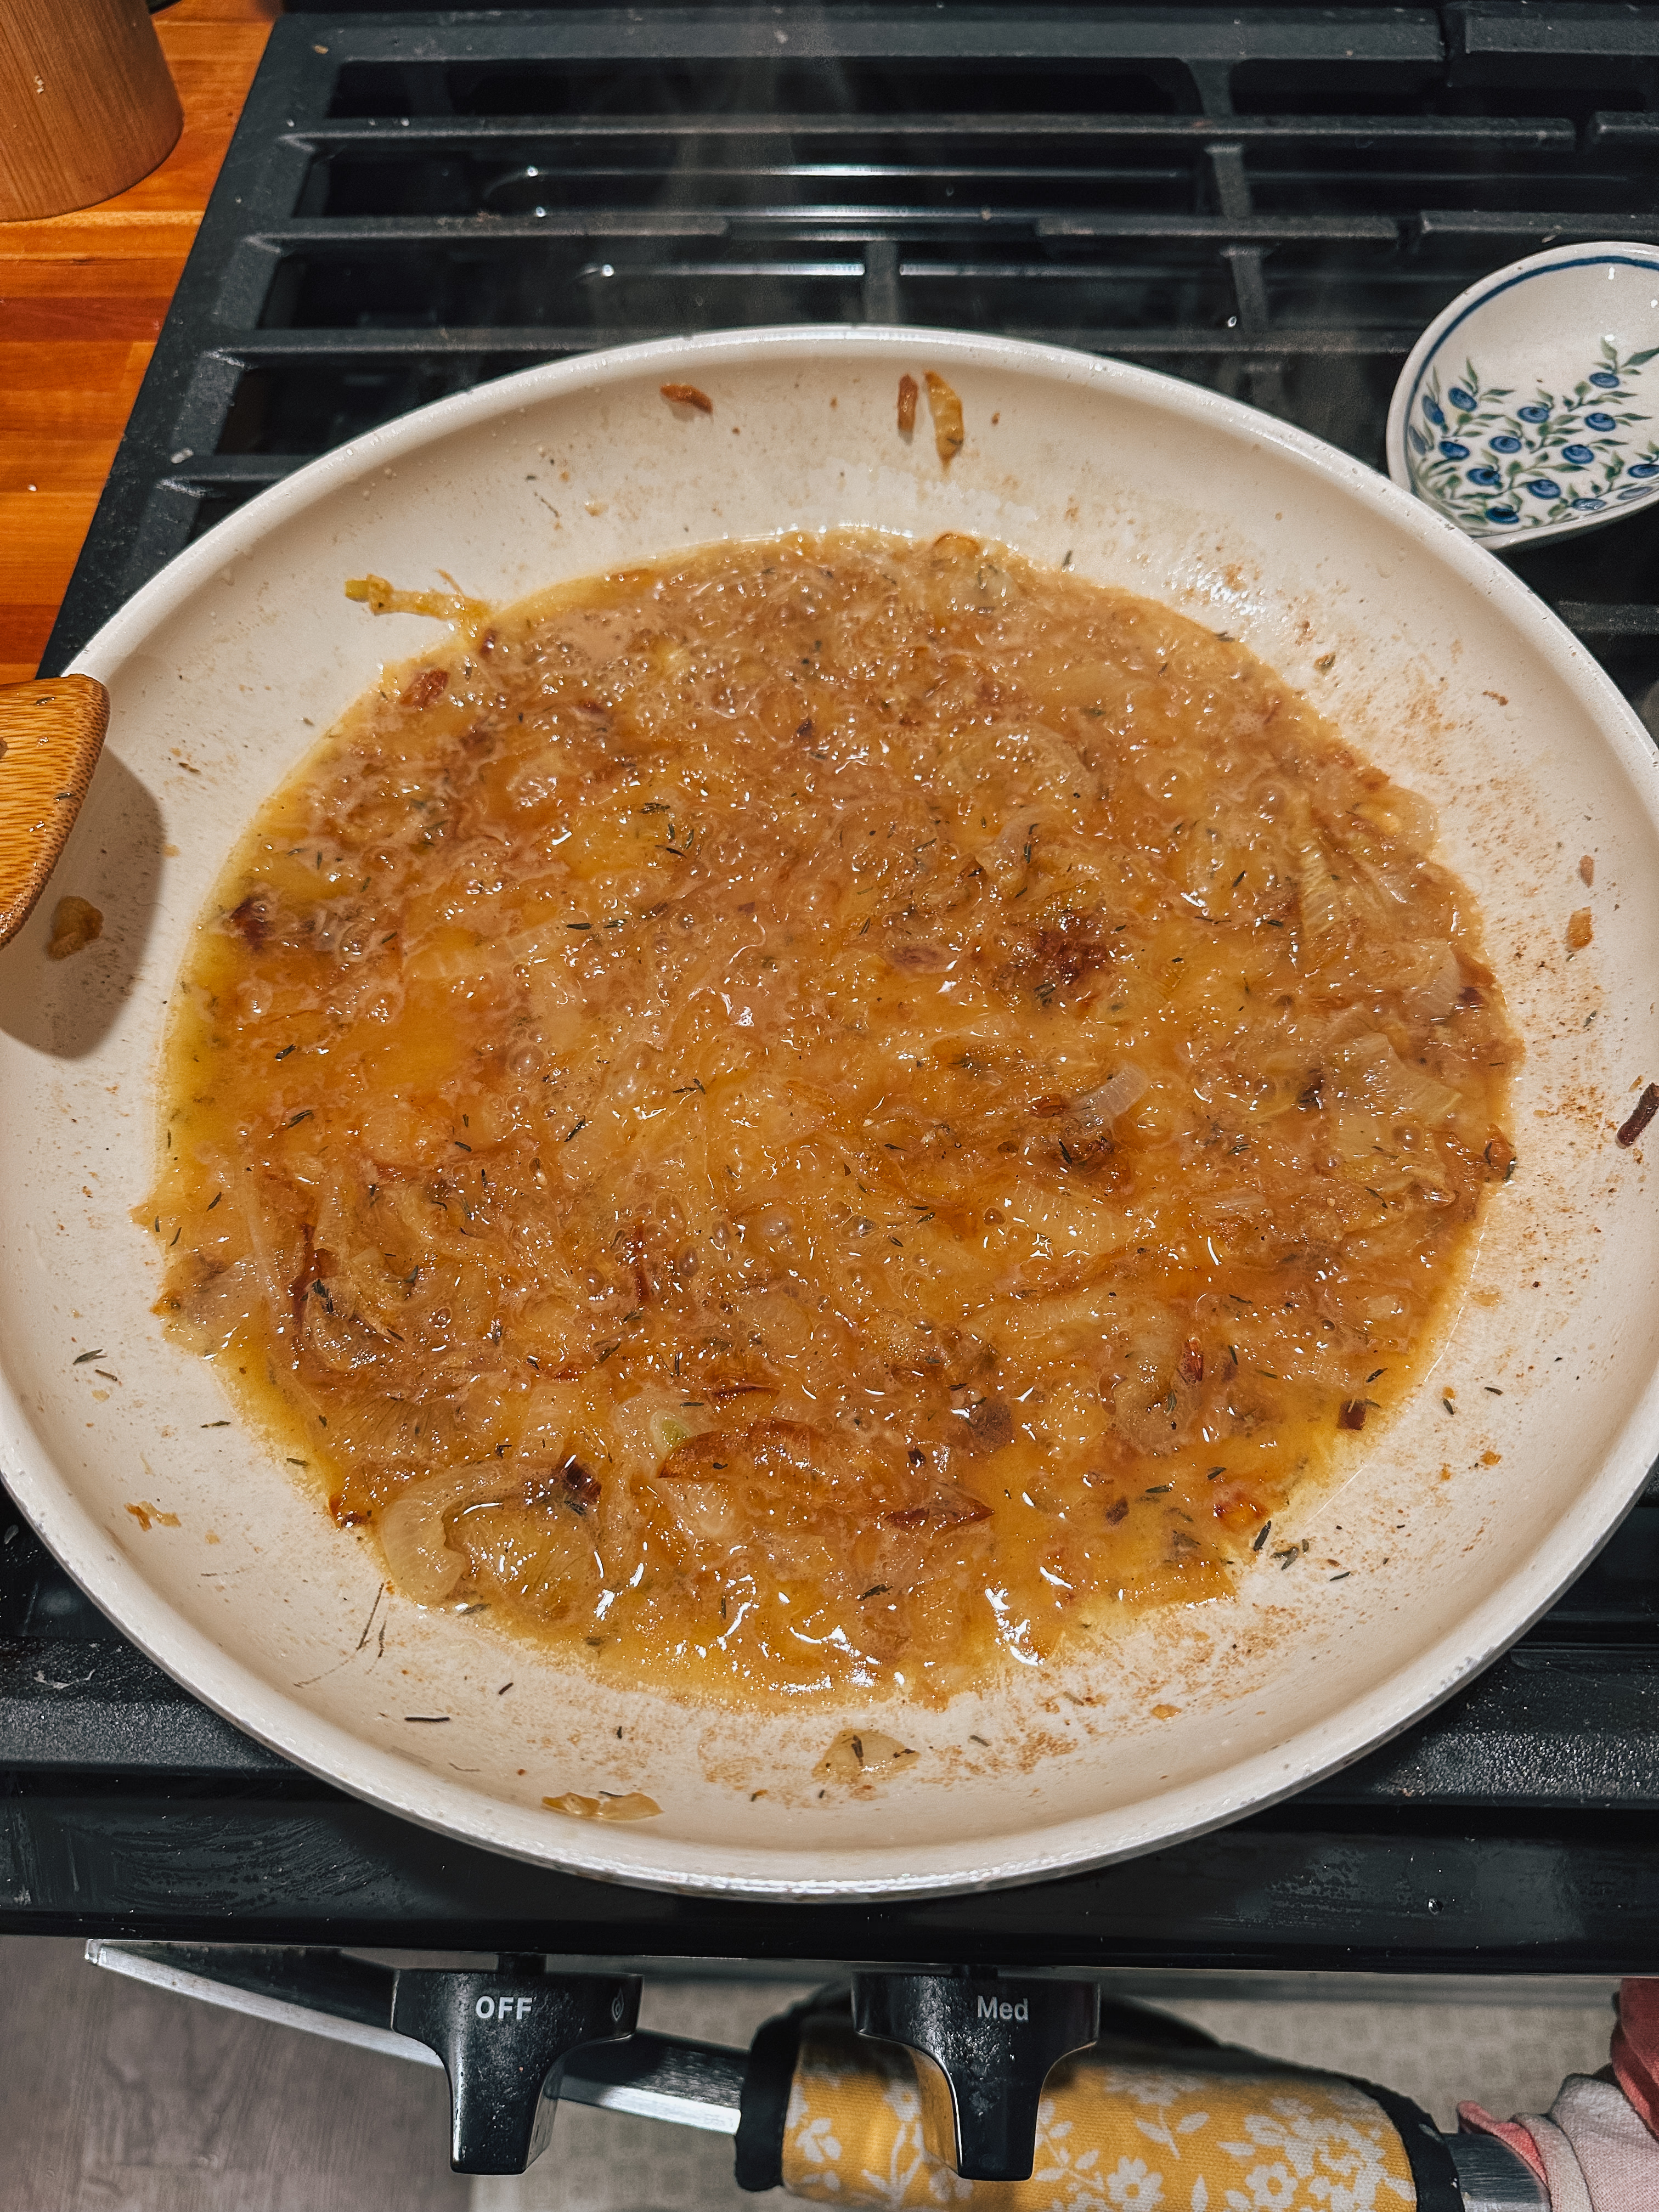
I have been seeing French Onion Pasta EVERYWHERE, and I finally got the opportunity to make it. If you love French Onion Soup, I strongly recommend this dish. It’s sweet with the caramelized onions, it’s savory with the beef broth and gruyere, it’s everything you want in a pasta dish. Make sure you don’t rush it and give yourself some time to let those onions caramelize. At first, you’re going to think, I don’t need 3 large onions chopped, but yes you absolutely do!
Ingredients
500 grams pasta of choice, I used Rigatoni
2 tbsp olive oil
1/3 cup butter
3 garlic cloves, minced
3 large yellow onions, sliced
1 tbsp Worcestershire
1/2 cup dry white wine, like a chardonnay
6.5 cups beef stock
1/2 cup heavy cream
1/4 tsp black pepper
1 TSP Dried Thyme
1 cup gruyere, shredded
Let’s Get Cooking
Start with slicing your onions and set aside. In a large deep pan, add your olive oil and butter and set to medium heat. Add your onions and begin sautéing for at least 30 minutes, stirring frequently. Turn the heat to low to prevent them from burning and to ensure they caramelize. Be patient with this, it may take longer than expected!
Once your onions are caramelized and a deep brown color, add your garlic + nutmeg + pepper + fresh thyme and sauté for an additional 2 minutes. Deglaze the pan with your white wine + Worcestershire, scrapping all bits from the bottom of the pan. Let simmer for 1-2 minutes, or just until the wine is reduced by half.
Add your pasta and beef broth, ensuring the broth just covers the pasta. Cover and let simmer on medium heat for 10-12 minutes, or until the pasta is cooked and the broth has been absorbed.
Remove from heat, carefully add your heavy cream + shredded gruyere, and mix until combined, making sure to scrape up all the onions.
Serve immediately & top with more cheese if you’d like!
I am so excited to share that I got my grubby little paws on my dad’s jambalaya recipe. Jambalaya is one of my FAVORITE meals ever and I finally have been present to observe the process from behind the curtain. Marky Mark makes some edits to the recipe – like doing half sweet half hot sauage – you could do 2LB of one or the other if you prefer. He stressed that the most important part of the recipe is making your own chicken broth, or ‘liquid gold’ as he calls it. Plan for two days to make this, so you can make the broth the day before. Makes about 8-10 servings but I don’t recommend sharing. I also highly recommend asking your loved ones for their recipes, food strengthens connections.
Ingredients
Chicken Broth:
1 small fryer chicken
1 rib celery with leaves
1 onion, halved
1 clove garlic
Jambalaya:
2 cups long grain rice
1 LB Ground Italian sausage
1 LB Ground Hot Sausage
½ stick butter
1/2 cup chopped yellow pepper
1/2 cup chopped red pepper
¼ cup chopped fresh parsley
2 cloves garlic, minced
1 (6-ounce) can tomato paste
1 large bay leaf
¼ teaspoon thyme
2 teaspoons salt.
½ teaspoon pepper
¼ teaspoon Tabasco
1 cup chopped yellow onion
Shredded chicken
Let’s Get Cooking
In a large pot, cover chicken with water; add celery, onion, garlic; boil until tender, about 1 hour. Reserve stock.
Remove chicken meat from bones once cooled and reserve. In 5 cups stock, cook rice until all liquid is absorbed, about 25 minutes.
In a Dutch oven, cook the ground sausage until cooked thoroughly about 5-8 minutes. Remove meat. Add butter to pan and sauté onion, pepper, and parsley until tender, about 3 minutes. Add chicken abd sausage; stir in garlic, tomato paste, bay leaf, thyme, salt, pepper, and Tabasco. Add cooked rice and mix thoroughly. Cook over low heat for 15 minutes, sitrring frequently.
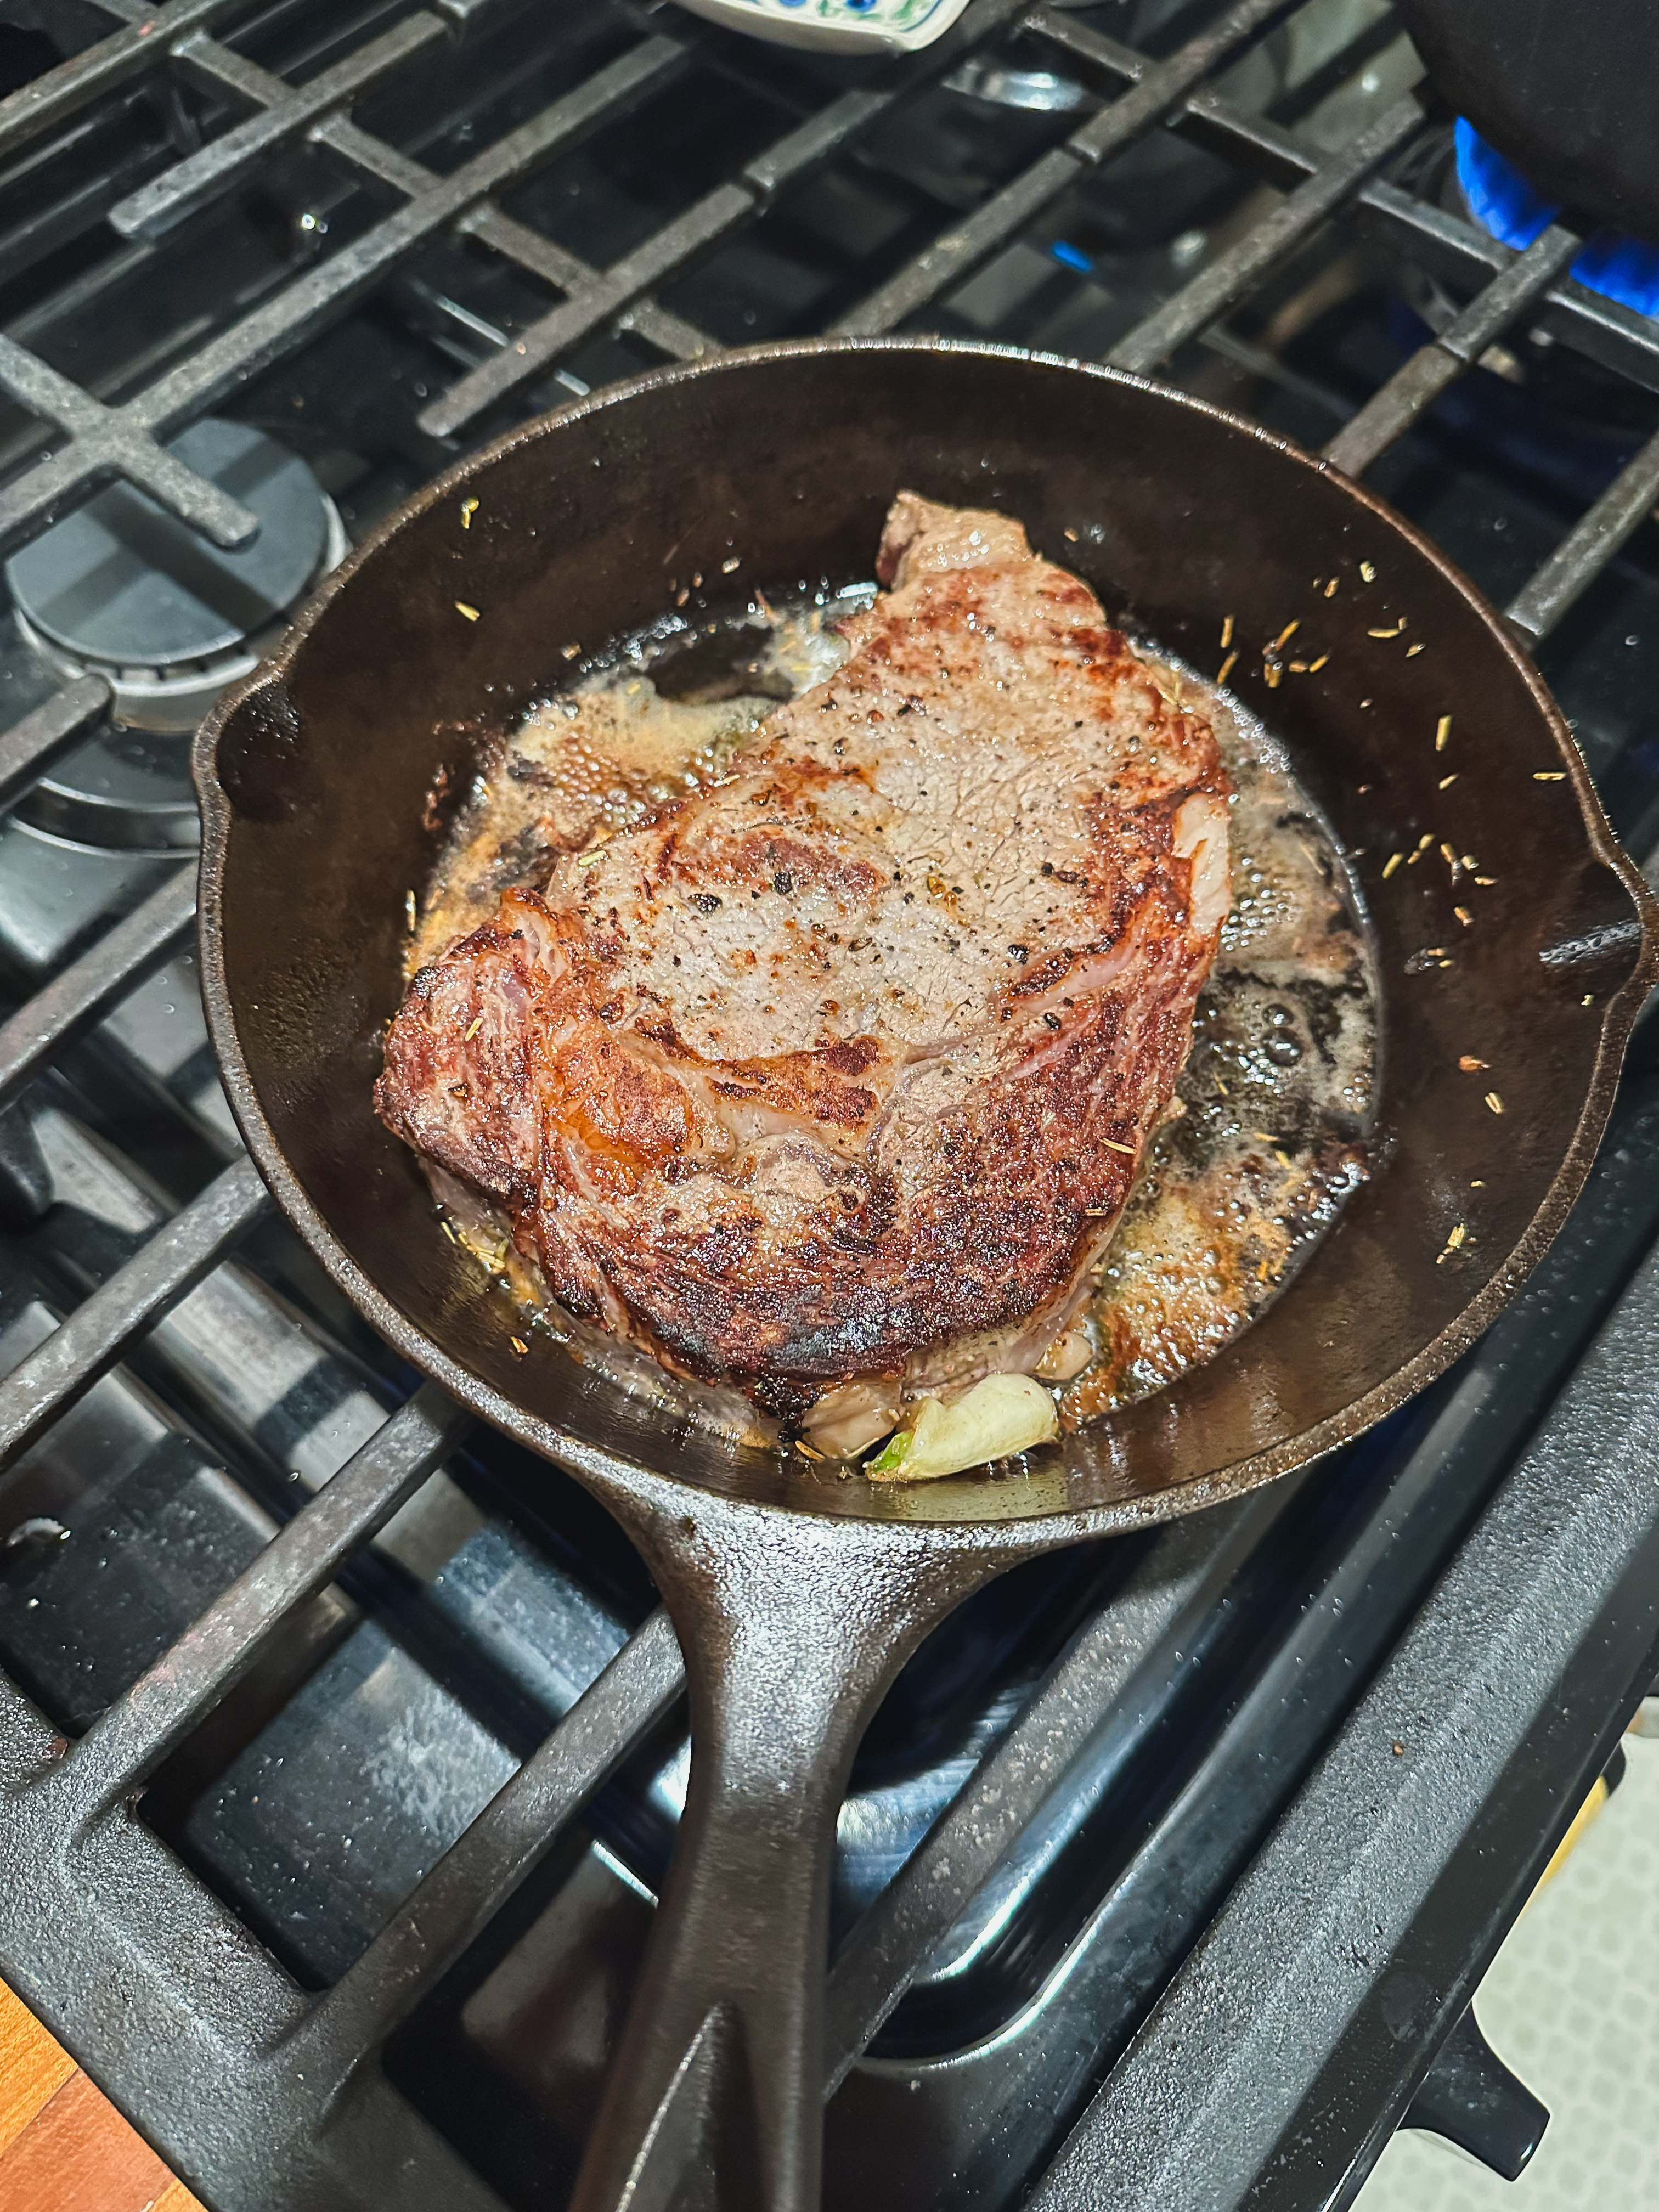
I love making myself a delicious dinner. It is an act of self-love. I choose the best ingredients, pick out a delicious wine, and treat myself to a meal I don’t always get [but I think about regularly]. For me, a Steak dinner with all the trimmings is the epitome of deliciousness: good quality steak, creamy blue cheese sauce, a buttery baked potato, and some sort of vegetable. Make it for yourself or share it with someone you love but make sure you really love them because after this meal you won’t be able to get rid of them. Shout out to Spruce Eats for additional guidance on the blue cheese sauce.
Ingredients
Steak
One good quality Steak [I prefer a ribeye of sorts]
1/3 LBS Blue Cheese, crumbled [Now you can get all sorts of different blue cheeses like Roquefort, Gorgonzola]
1 TSP Worcestershire Sauce
Cracked Black Pepper
Let’s Get Cooking
Remove your steak from the fridge, season each side with salt and pepper, and let rest on the counter for 30 minutes.
While the steak is resting, make your blue cheese sauce
In a small saucepan, pour in the heavy cream and simmer on MED-LOW for about 3-5 minutes, continue to stir constantly. Add in half of your blue cheese and stir until the large crumbles have broken down and the sauce has thickened slightly. Add in the Worcestershire sauce and stir until completely mixed. Stir in the rest of the blue cheese + cracked black pepper, turn off the heat, and remove the pan from the heat. Warm to serve.
Once your steak has rested, grab your cast iron and melt your butter on LOW. Before adding in your steak, add in your herbs and minced garlic and allow to saute for 1 minute. Place your steak in the pan and sear on MED-HEAT for 5 minutes [if going for MED-RARE], basting the steak with the butter and herbs. Flip the steak and repeat the same process for 5 minutes. Cook for a longer time if you would like a more well-done steak.
Remove steak from the pan and allow to rest on a cutting board for about 10 minutes.
Serve your steak with the blue cheese sauce and any additional delicious accouterments.
I have this Habanero Hot Honey from Akron Honey and I have been dying to use it! Akron honey is a local business that has the best honey & I love their seasonal flavors. I knew I wanted to make a pizza with it but I wanted to go a little extra with it. I got some inspiration for a Nashville Hot Chicken pizza but I decided that I wanted to make it my way. My way includes brining the chicken breast in pickle juice for 4-6 hours, a ranch base for the sauce, and using a homemade sourdough crust. If you want to make your own crust be sure to start a day early!
Brine your chicken breast in pickle juice for 4-6 hours.
Afterwards, Rinse and cube. Prep your dredge. In one bowl, combine flour + salt + pepper + chili powder paprika + garlic powder. In another bowl, whisk together egg, milk, and hot sauce. Finally, pour the panko bread crumbs onto a plate.
Time to dredge your chicken. Start by dredging the chicken in flour, then the egg mixture, and finally, in the panko. Once all coated, place on a lined baking sheet and place in the fridge for 30 minutes.
After the 30 minutes, air fry the chicken in batches at 400F for 15-20 min. Once all cooked, toss in the Nashville hot sauce.
Preheat the oven to 375F.
Place your pizza dough on a prepared pan. Spread ranch on the dough, then add sliced red onions, the cooked chicken, pickles, and blue cheese crumbles. Top with mozzarella cheese and bake for 25-30 minutes. Remove from the oven and drizzle over the hot honey & extra Nashville hot sauce.
Resist the temptation and wait a few moments before biting into this deliciousness so you don’t burn off your taste buds!
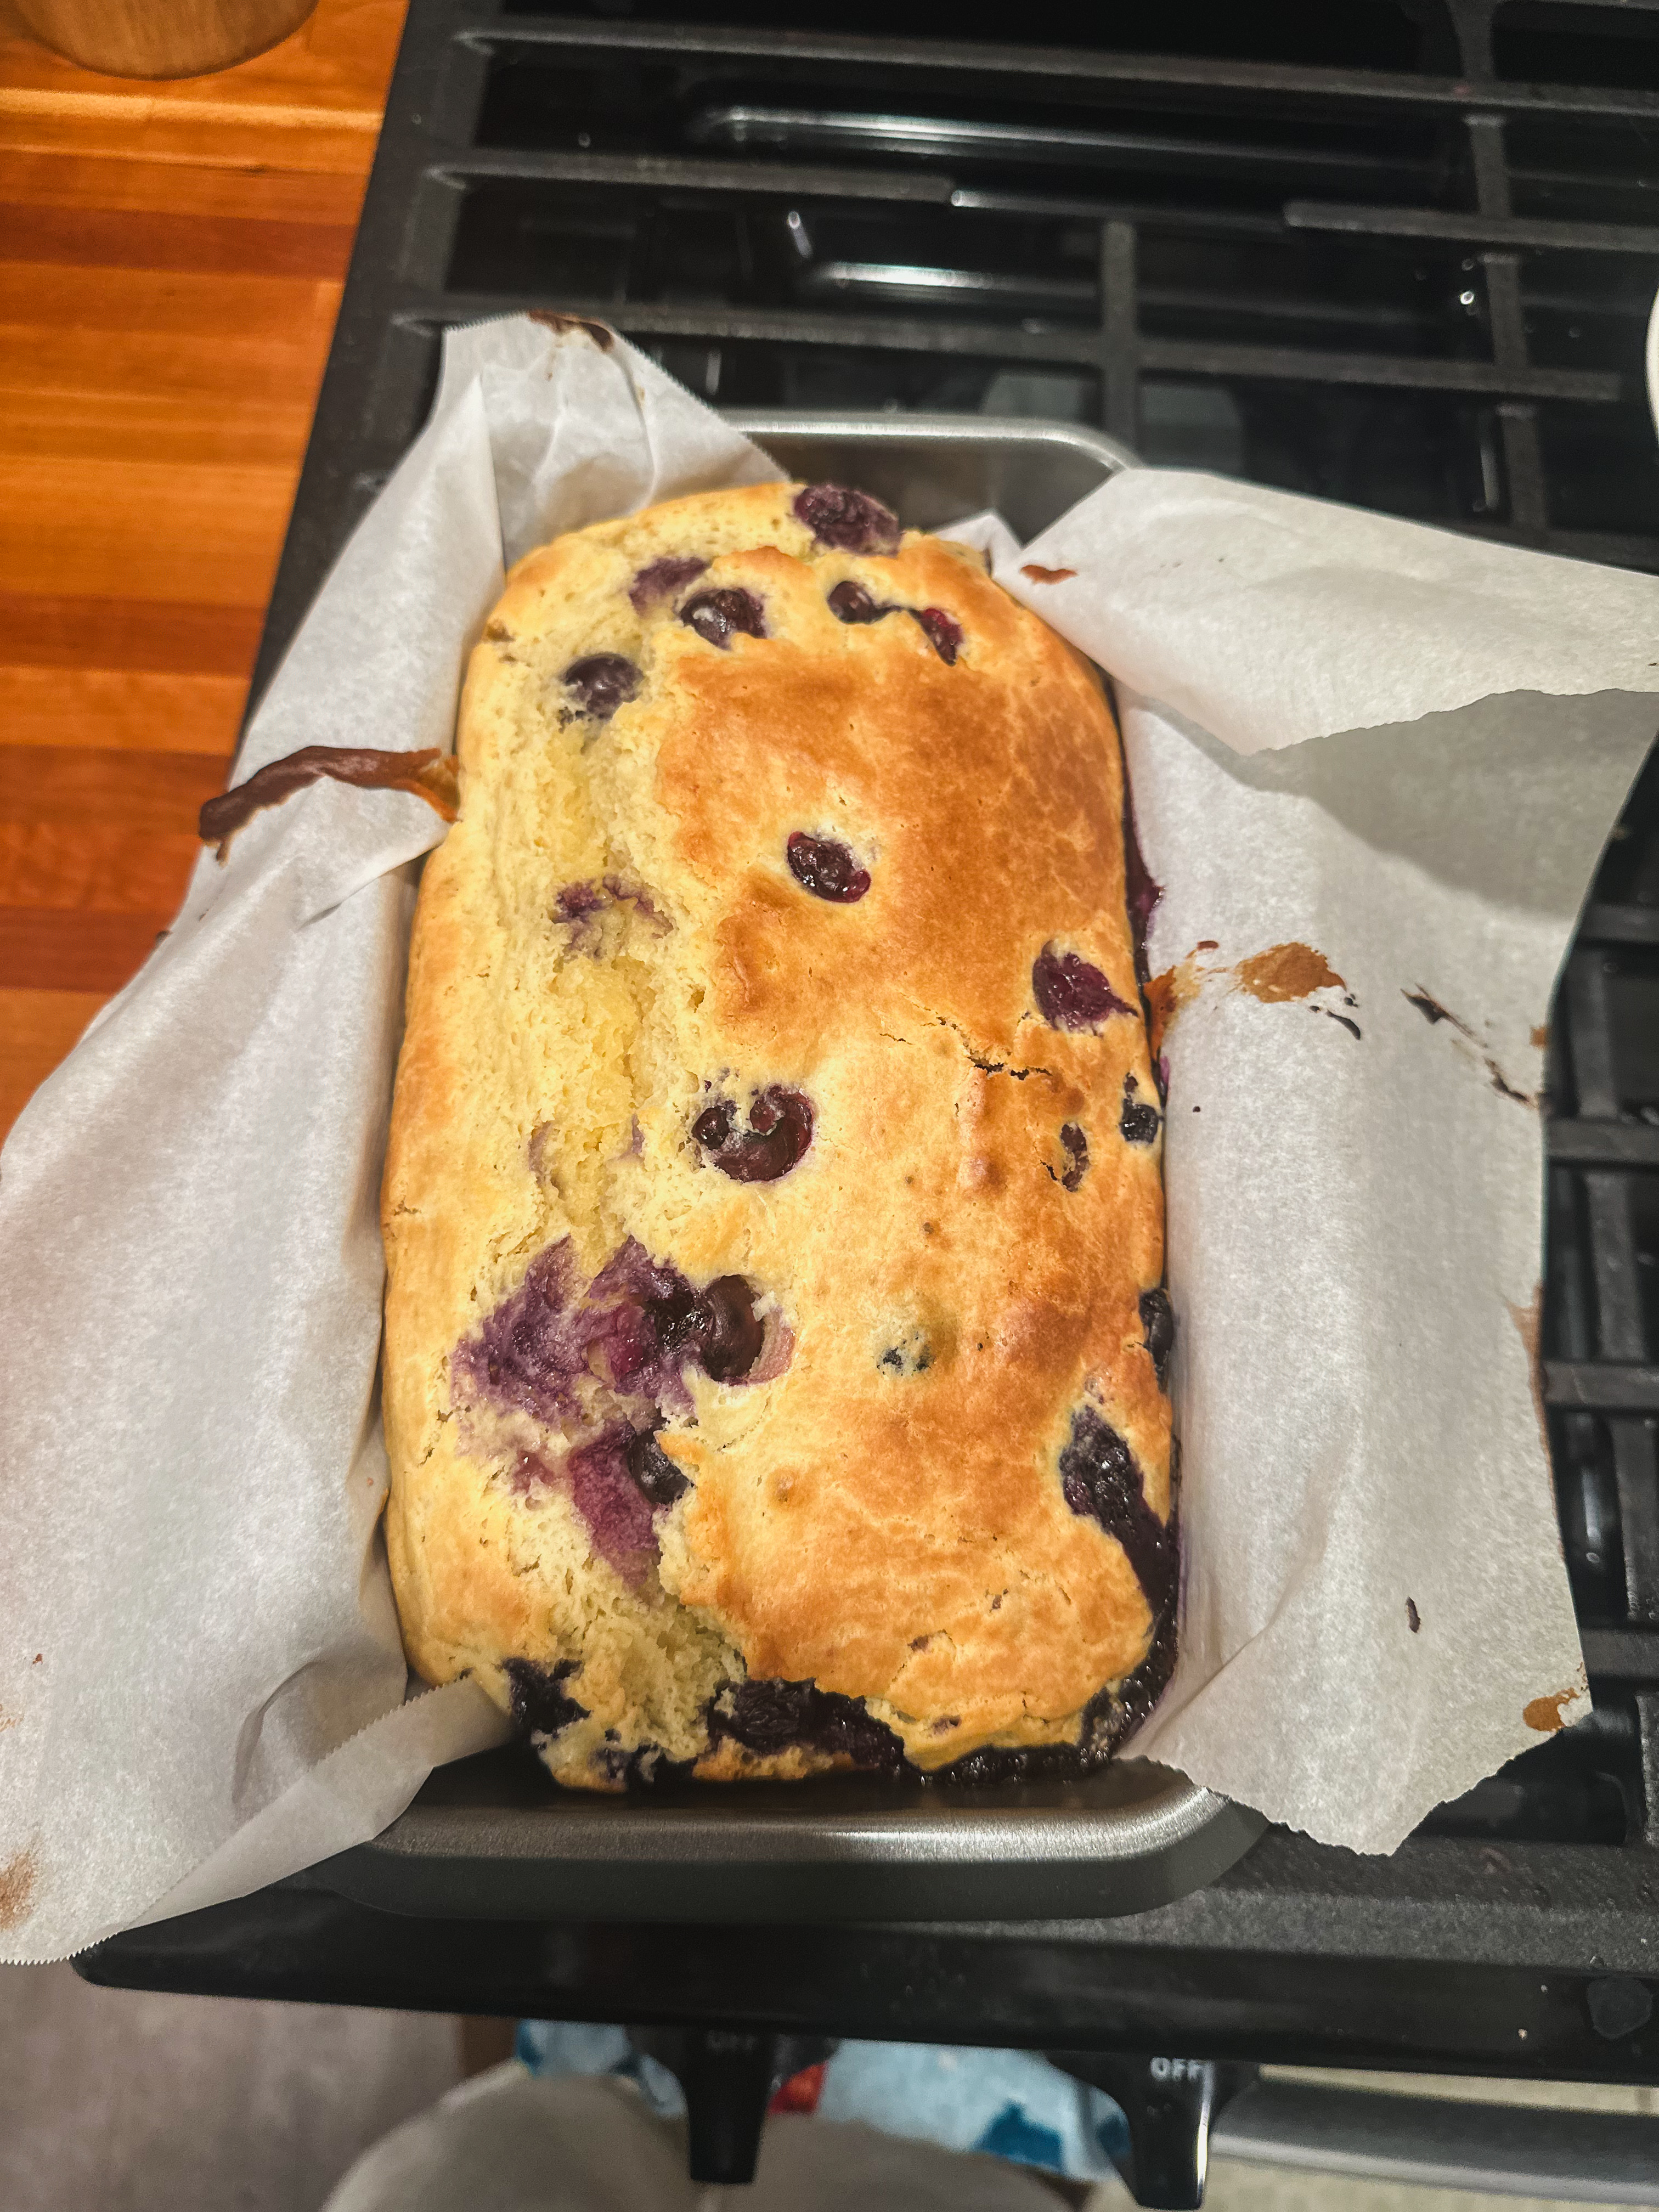
A friend recently requested a blueberry lemon loaf and I was more than happy to oblige as blueberry + lemon is the supreme combo. I have my tried and true recipe, however, I have been wanting to use my sourdough starter in more recipes and I figured this was the perfect opportunity. Shout out to Idie’s Farm for the guidance on how to make this recipe starter-friendly! I went with the long-fermented option because I wanted that tangy sourdough taste.
Ingredients
Dry Ingredients
2 Cups All Purpose Flour
1 TSP Baking Powder
1 TSP Baking Soda
1/2 TSP Salt
Zest of 1 Lemon
Wet Ingredients
1 Cup Sourdough Discard or active starter
3/4 Cup Light or Dark Brown Sugar
1/2 Cup Melted Butter
2 Large Eggs
Juice of 1 Lemon
1/4 Cup Milk
1 Cup Blueberries
Lemon Glaze
1/4 Cup Powdered Sugar
1 TBSP Lemon Juice
Let’s Get Cooking
Begin the batter 16-18 hours before you plan to bake!
In a large bowl whisk together 2 Cups All Purpose Flour + 1 TSP Baking Powder +1 TSP Baking soda 1/2 TSP Salt + Zest of 1 Lemon.
In another bowl combine 1 Cup Sourdough Discard or active starter + 3/4 Cup Light or Dark Brown Sugar+ 1/2 Cup Melted Butter+ 2 Large Eggs + Juice of 1 Lemon + 1/4 Cup Milk.
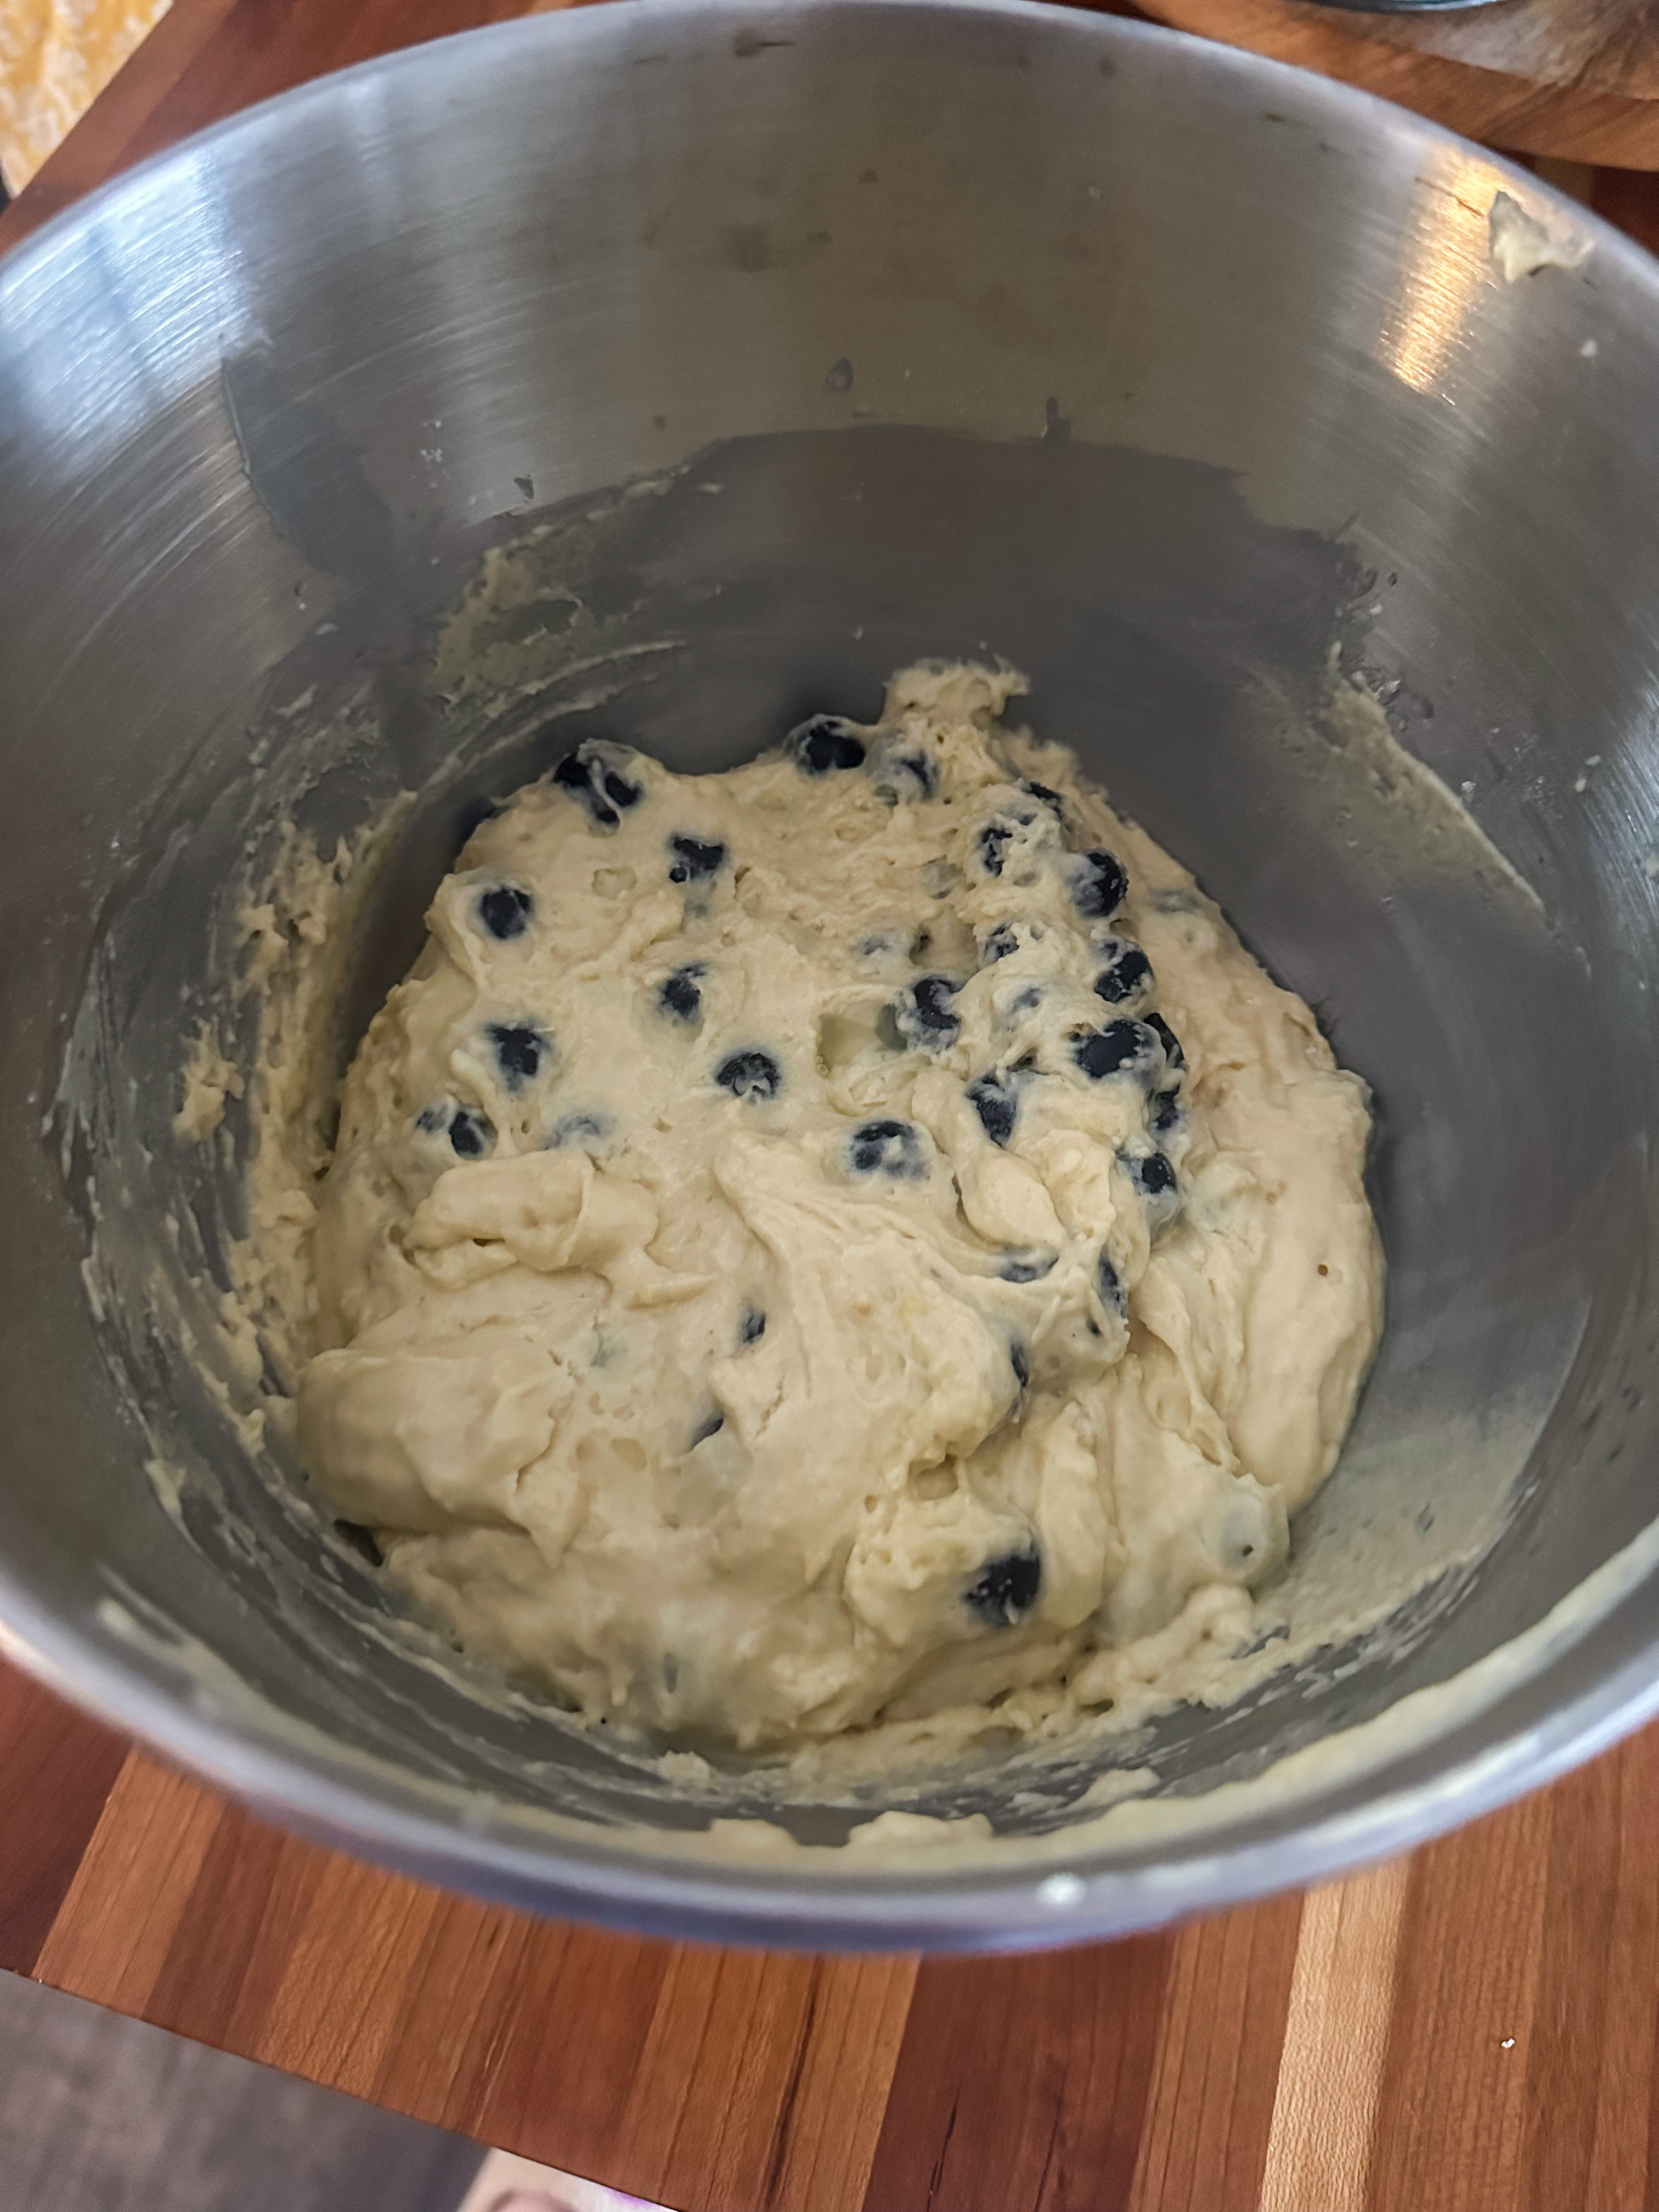
Add the wet ingredients to the dry and stir until the batter has just come together. Be aware to not over mix. Fold in the blueberries and cover with a damp towel or plastic wrap.
Allow to rise for 4-6 hours, I like to put mine in the oven with the light on. Place dough in the fridge for a second rise overnight or for 12 hrs.
The next day; preheat the oven to 350F.
Give the dough a few good stirs and then pour it into the prepared pan.
Bake for 55-65 minutes or until the toothpick comes out clean. Let cool in the pan for 10 minutes before moving to a wire rack to cool.
Combine the glaze ingredients and pour over the blueberry loaf.
About 5 years ago when I was still a sourdough newby I attempted to make sourdough donuts. I had failed miserably. Since Brad [my starter] turns 5 this year it is the perfect time to redeem myself. Aberle Home helped guide me to success. Though I don’t have a oil thermometer it would be recommended by me to get one [it’s on my list as well] as ensuring the oil is at the right temperature is the hardest part of these donuts. This is a two day process so make sure you are planning ahead but OMG are they worth it.
Tangzhong (Scald)Dough before first proof
Ingredients
Tangzhong (Scald)
180g whole milk
38g unbleached bread flour
Dough
Cooled tangzhong
200g ripe sourdough starter (100% hydration)
375g unbleached bread flour (12.7% protein)
3 Large eggs
38g granulated sugar
2 teaspoon pure vanilla extract
12g kosher salt
100g salted butter, cold and cut into small cubes
Vanilla Glaze
70g Whole Milk
230g Powdered Sugar
1 TBSP Salted Butter, melted, cooled
1/2 TSP Vanilla Extract
Pinch of Salt
Additional
Vegetable Oil for Frying
Donut Cutter [or create your own at home like I did with a container lid and smaller cookie cutter]
Parchment Paper
Let’s Get Baking
Day One
Feed your starter 6hrs in advance and allow it to peak.
Prepare the tangzhong mixture: whisk together 180g milk + 38g flour in a small saucepan over medium heat. Cook and stir constantly with a rubber spatula until it thinkens to the consistency of mashed potatoes. Spread flat on a dinner plate and refridgerate until cool.
In a stand mixture fitted with a dough hook, add the cooled tangzhong + 200g Ripe Starter + 3 Large eggs + 38g granulated sugar + 2 TSP vanilla extract + 375g unbleached bread flour. Mix on low speed for 1 minute until combined. Cover with plastic wrap and allow to rest for 30 minutes.
After 30 minutes, add in the 12g of salt and knead on low speed for 10 minutes. Add in half the butter cubes and continue needing until the butter is incorporated and no longer visible. Add in the second half of the butter cubes. The dough is done when it cleans itself off the sides of the bowl and clings to the dough hook, this may take 10-15 minutes.
With damp hands form the dough into a smooth ball. Place in a large bowl, cover, and set in a warm plave until it has nearly doubled in size. After the dough has risen, cover tightly, and refridgerate overnight.
Day 2
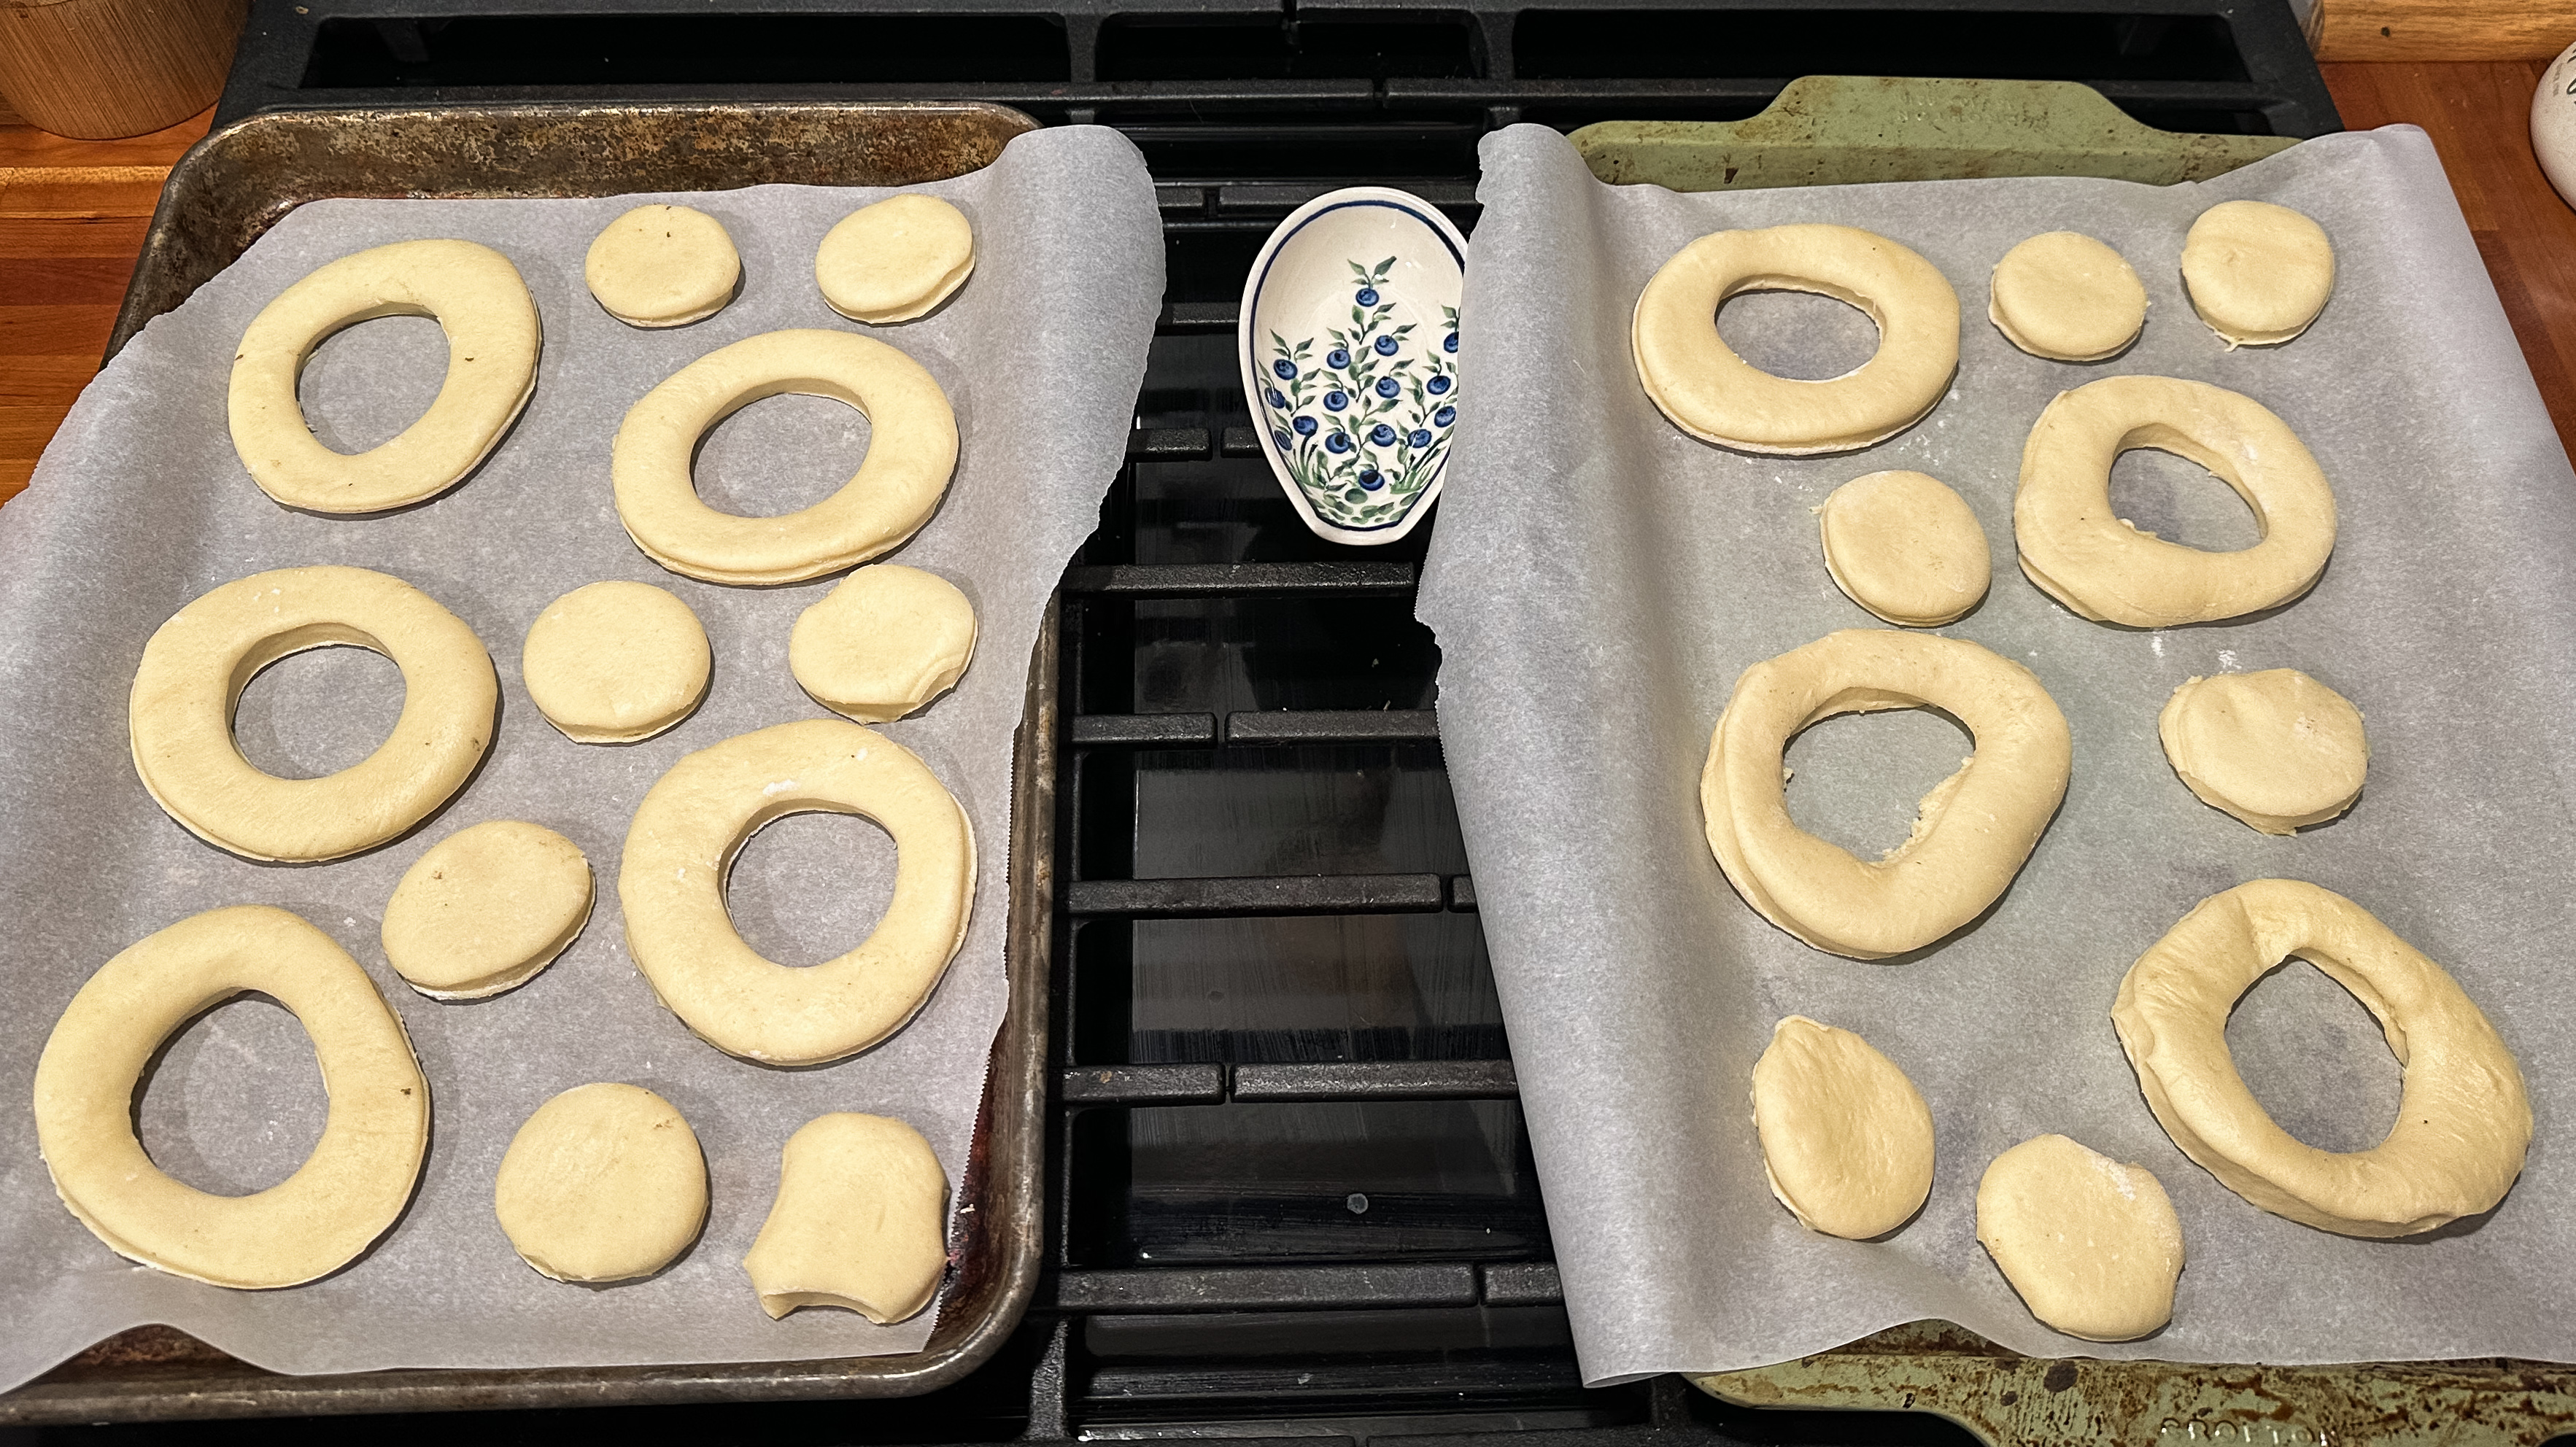
Line two sheet pans with parchment paper, lightly dust them with flour. Lightly flour your counter and turn out the cold dough. Roll evenly to 1/2-inch thickenness. Use your donut cutter and cut as closely spaced together, placing them on the parchment paper.
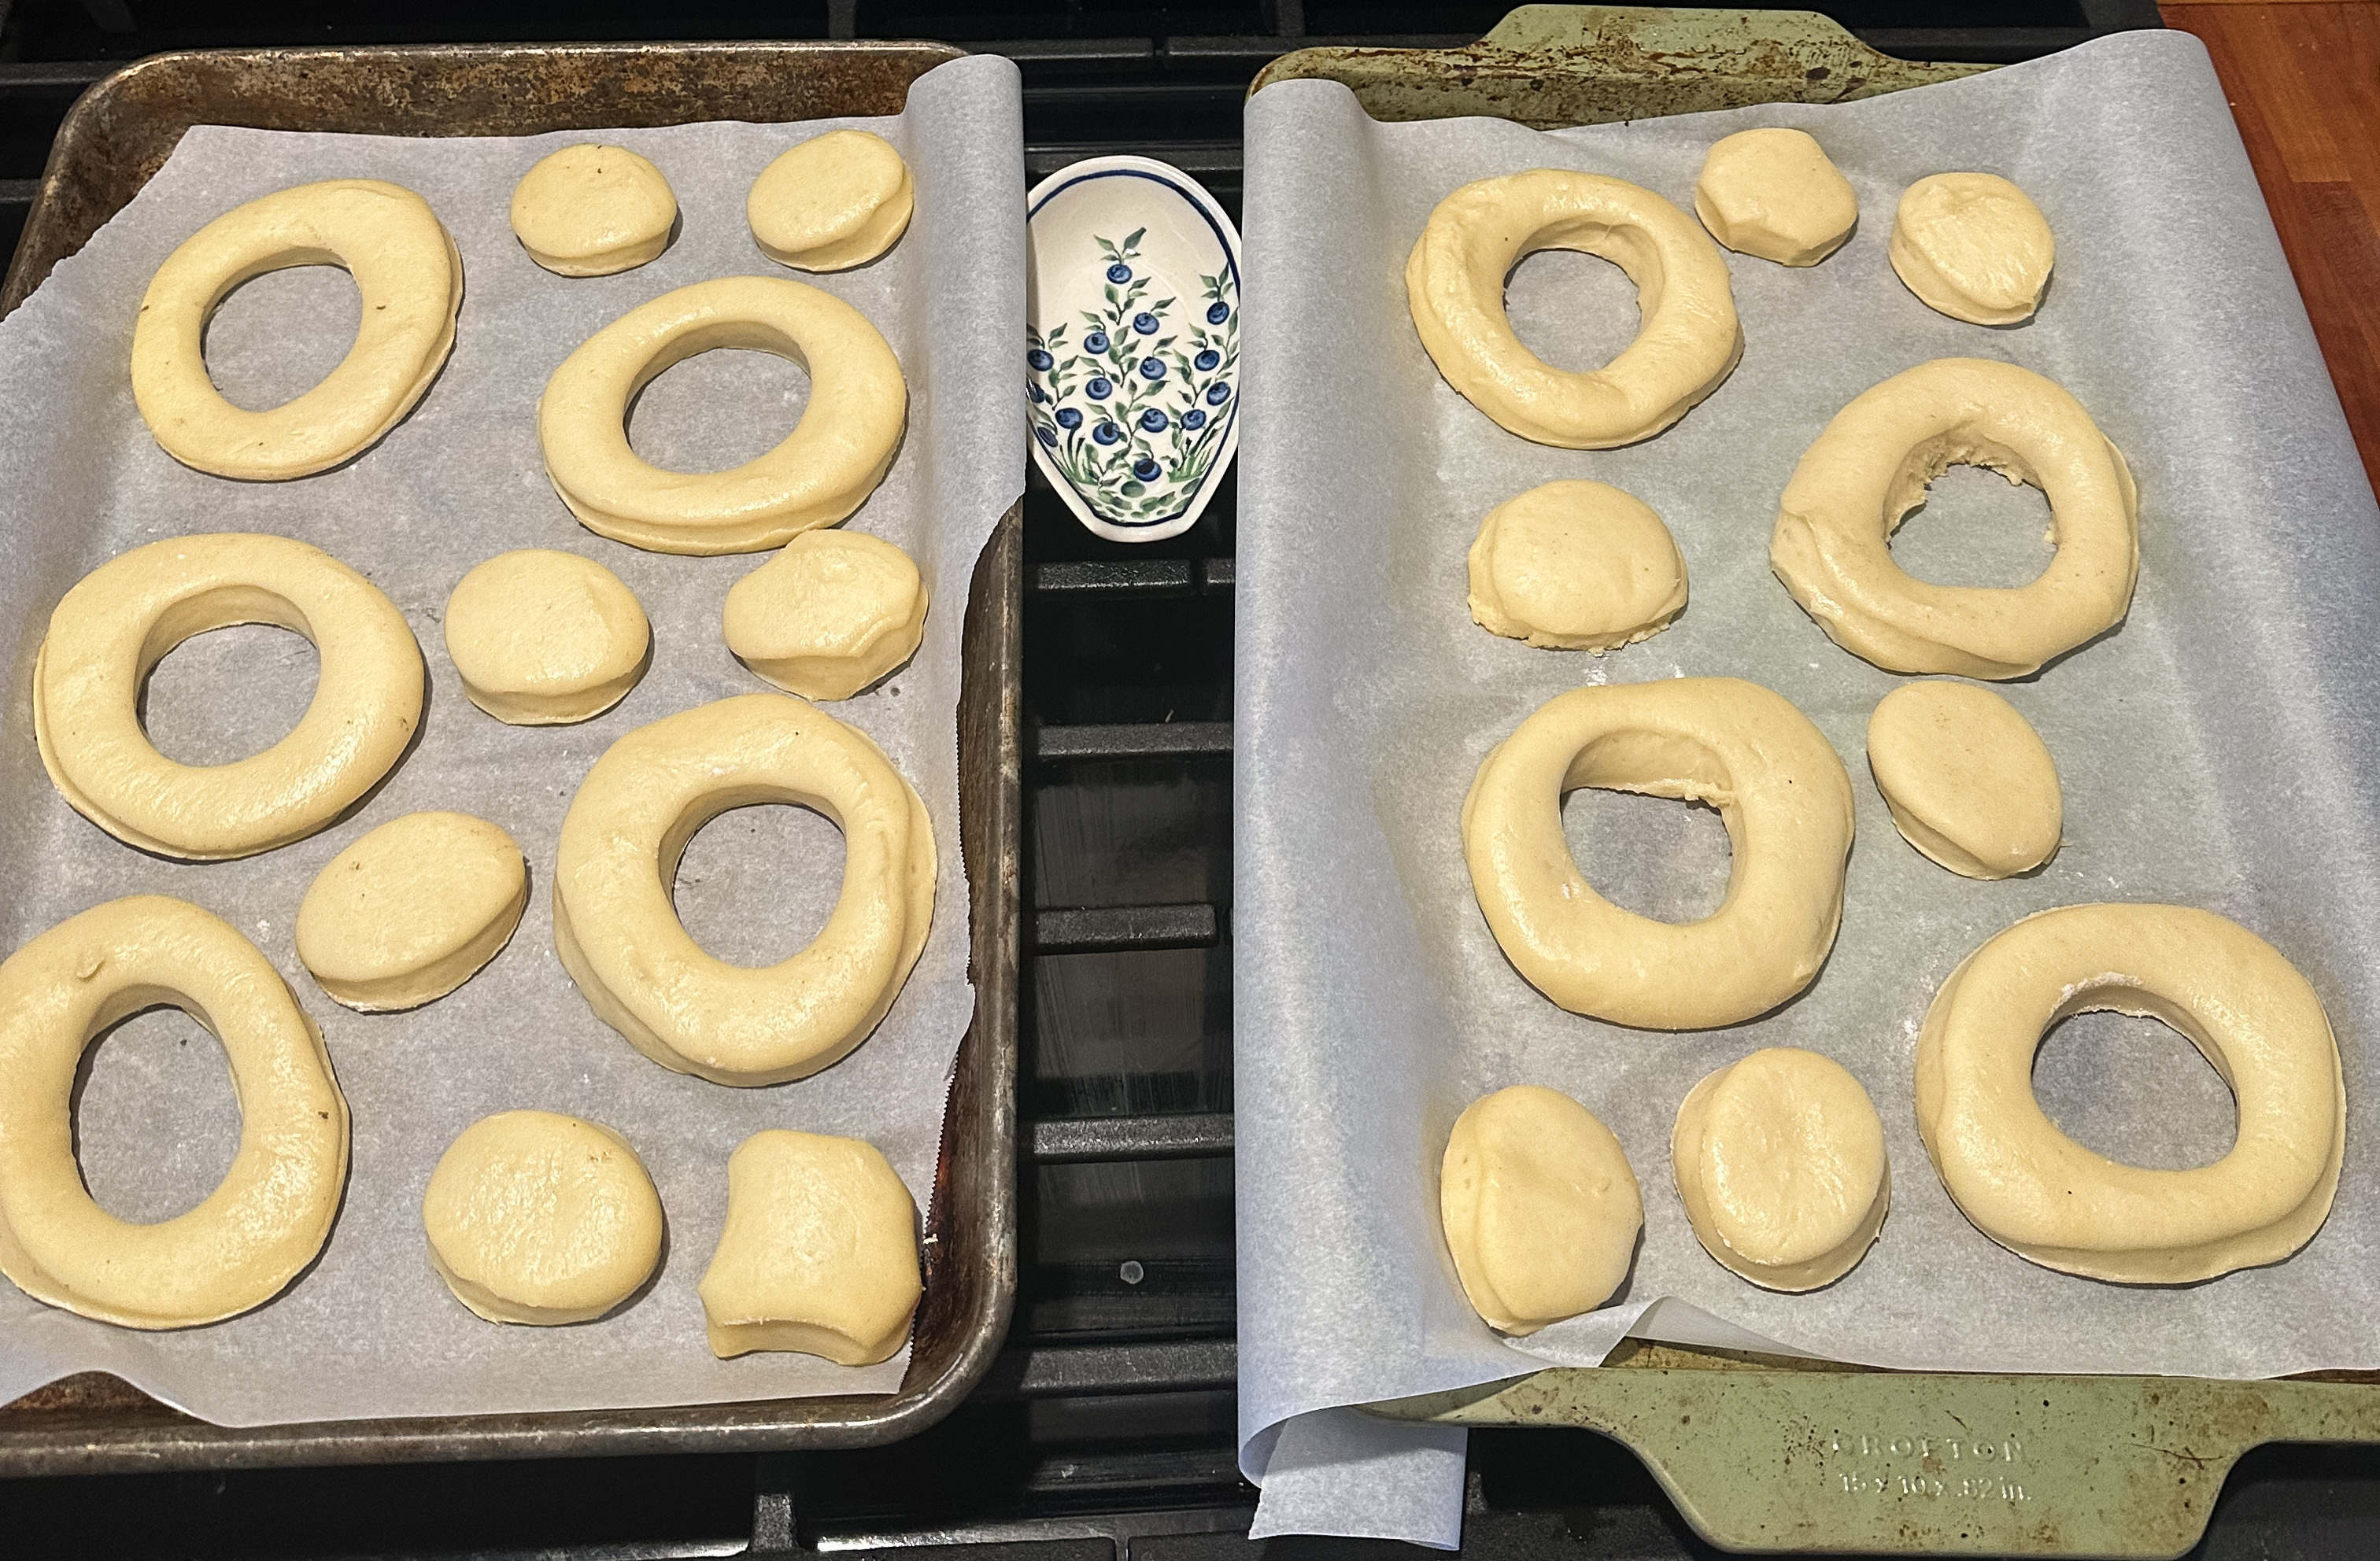
Cover the pans with plastic wrap and set in a warm place to proof until the donuts are puffy and soft to the touch.
Before Proof After Proof
When the donuts are about ready, fill a heavy bottomed pot with 2 inches of frying oil. Line a cooling rack with paper towels underneath and begin frying when the oil reaches 360F. Fry about 2 donuts at a time, fry about 2 minutes per side or until they are golden brown.
Make the vanilla glaze: combining 230g powdered sugar + 70g whole milk + 1 TBSP melted butter + 1/2 TSP vanilla extract + salt. Mix well until all combined. Once donuts have cooled, dip them in the glaze and place glazed side up on the cooling rack.
Enjoy immediately! Trust me you’re not going to be able to stop.
It’s the holidays. For me the holidays are different this year, with the loss of Cooper we are embracing new traditions and being flexible with old ones. What I love about the holidays is how much food plays an important role in gathering people together. I was testing out some new cookies that I would like to bake for the holidays as cooking/baking continues to be a relaxation during this grief. I found these almond croissant cookies and OMG are they delicious! They are chewy and have this wonderful delicious almond flavor that goes perfectly with my morning coffee. They are definitely cooper-approved!
Ingredients
250g Butter, melted
150g Light Brown Sugar
170g Sugar
1 Cup All Purpose Flour
1 1/2 TSP Baking Powder
1/4 TSP Salt
100g Almond Flour
1 1/2 Cups All Purpose Flour
1 Egg + 1 Egg Yolk
1 TBSP Vanilla Paste [I used liquid vanilla and it worked perfectly]
100g flaked almonds
Powdered Sugar to decorate
Let’s Get Baking
Melt your butter and allow it to cool slightly
In a mixing bowl combine 150g of light brown sugar + 170g sugar + melted butter and mix until well combined. Add in the egg + egg yolk + vanilla paste and combine.
Make your self-rising flour: In a small bowl combine 1 cup of all-purpose flour + 1 1/2 TSP Baking Powder + 1/4 TSP Salt
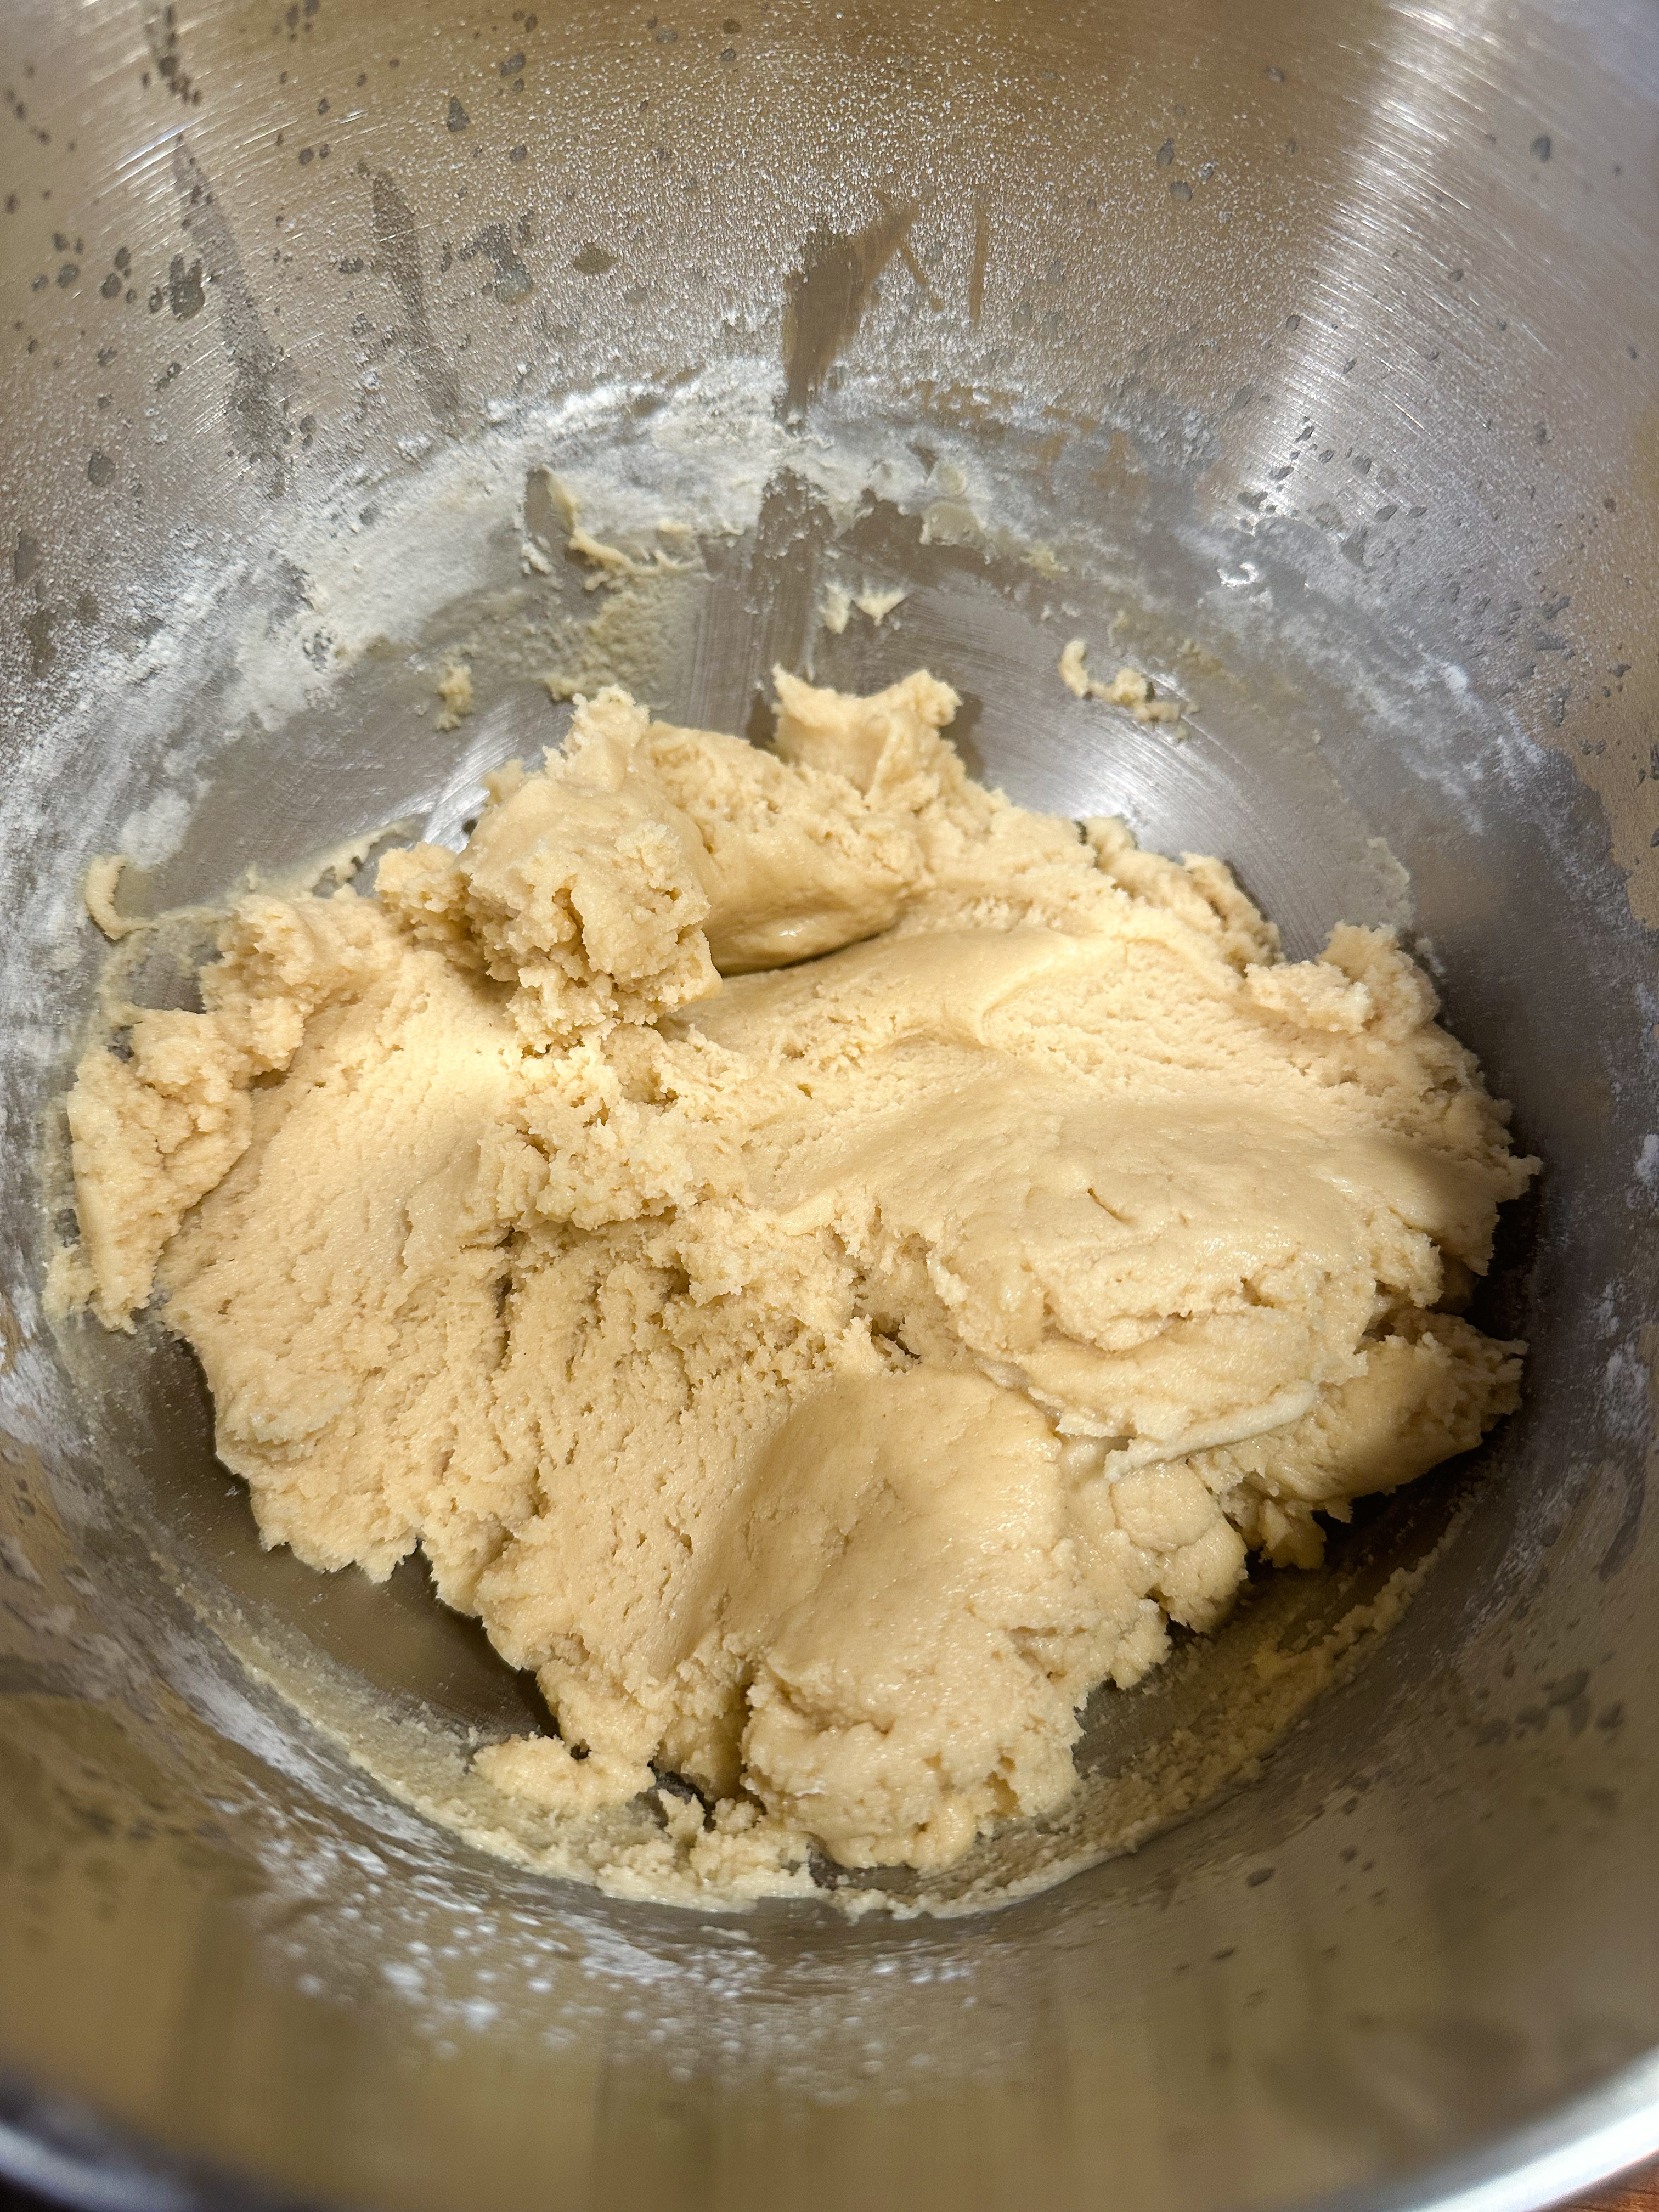
Gradually add in the self-rising flour + 100g almond flour + 1 1/2 Cups All purpose flour to the butter mixture until a dough forms.
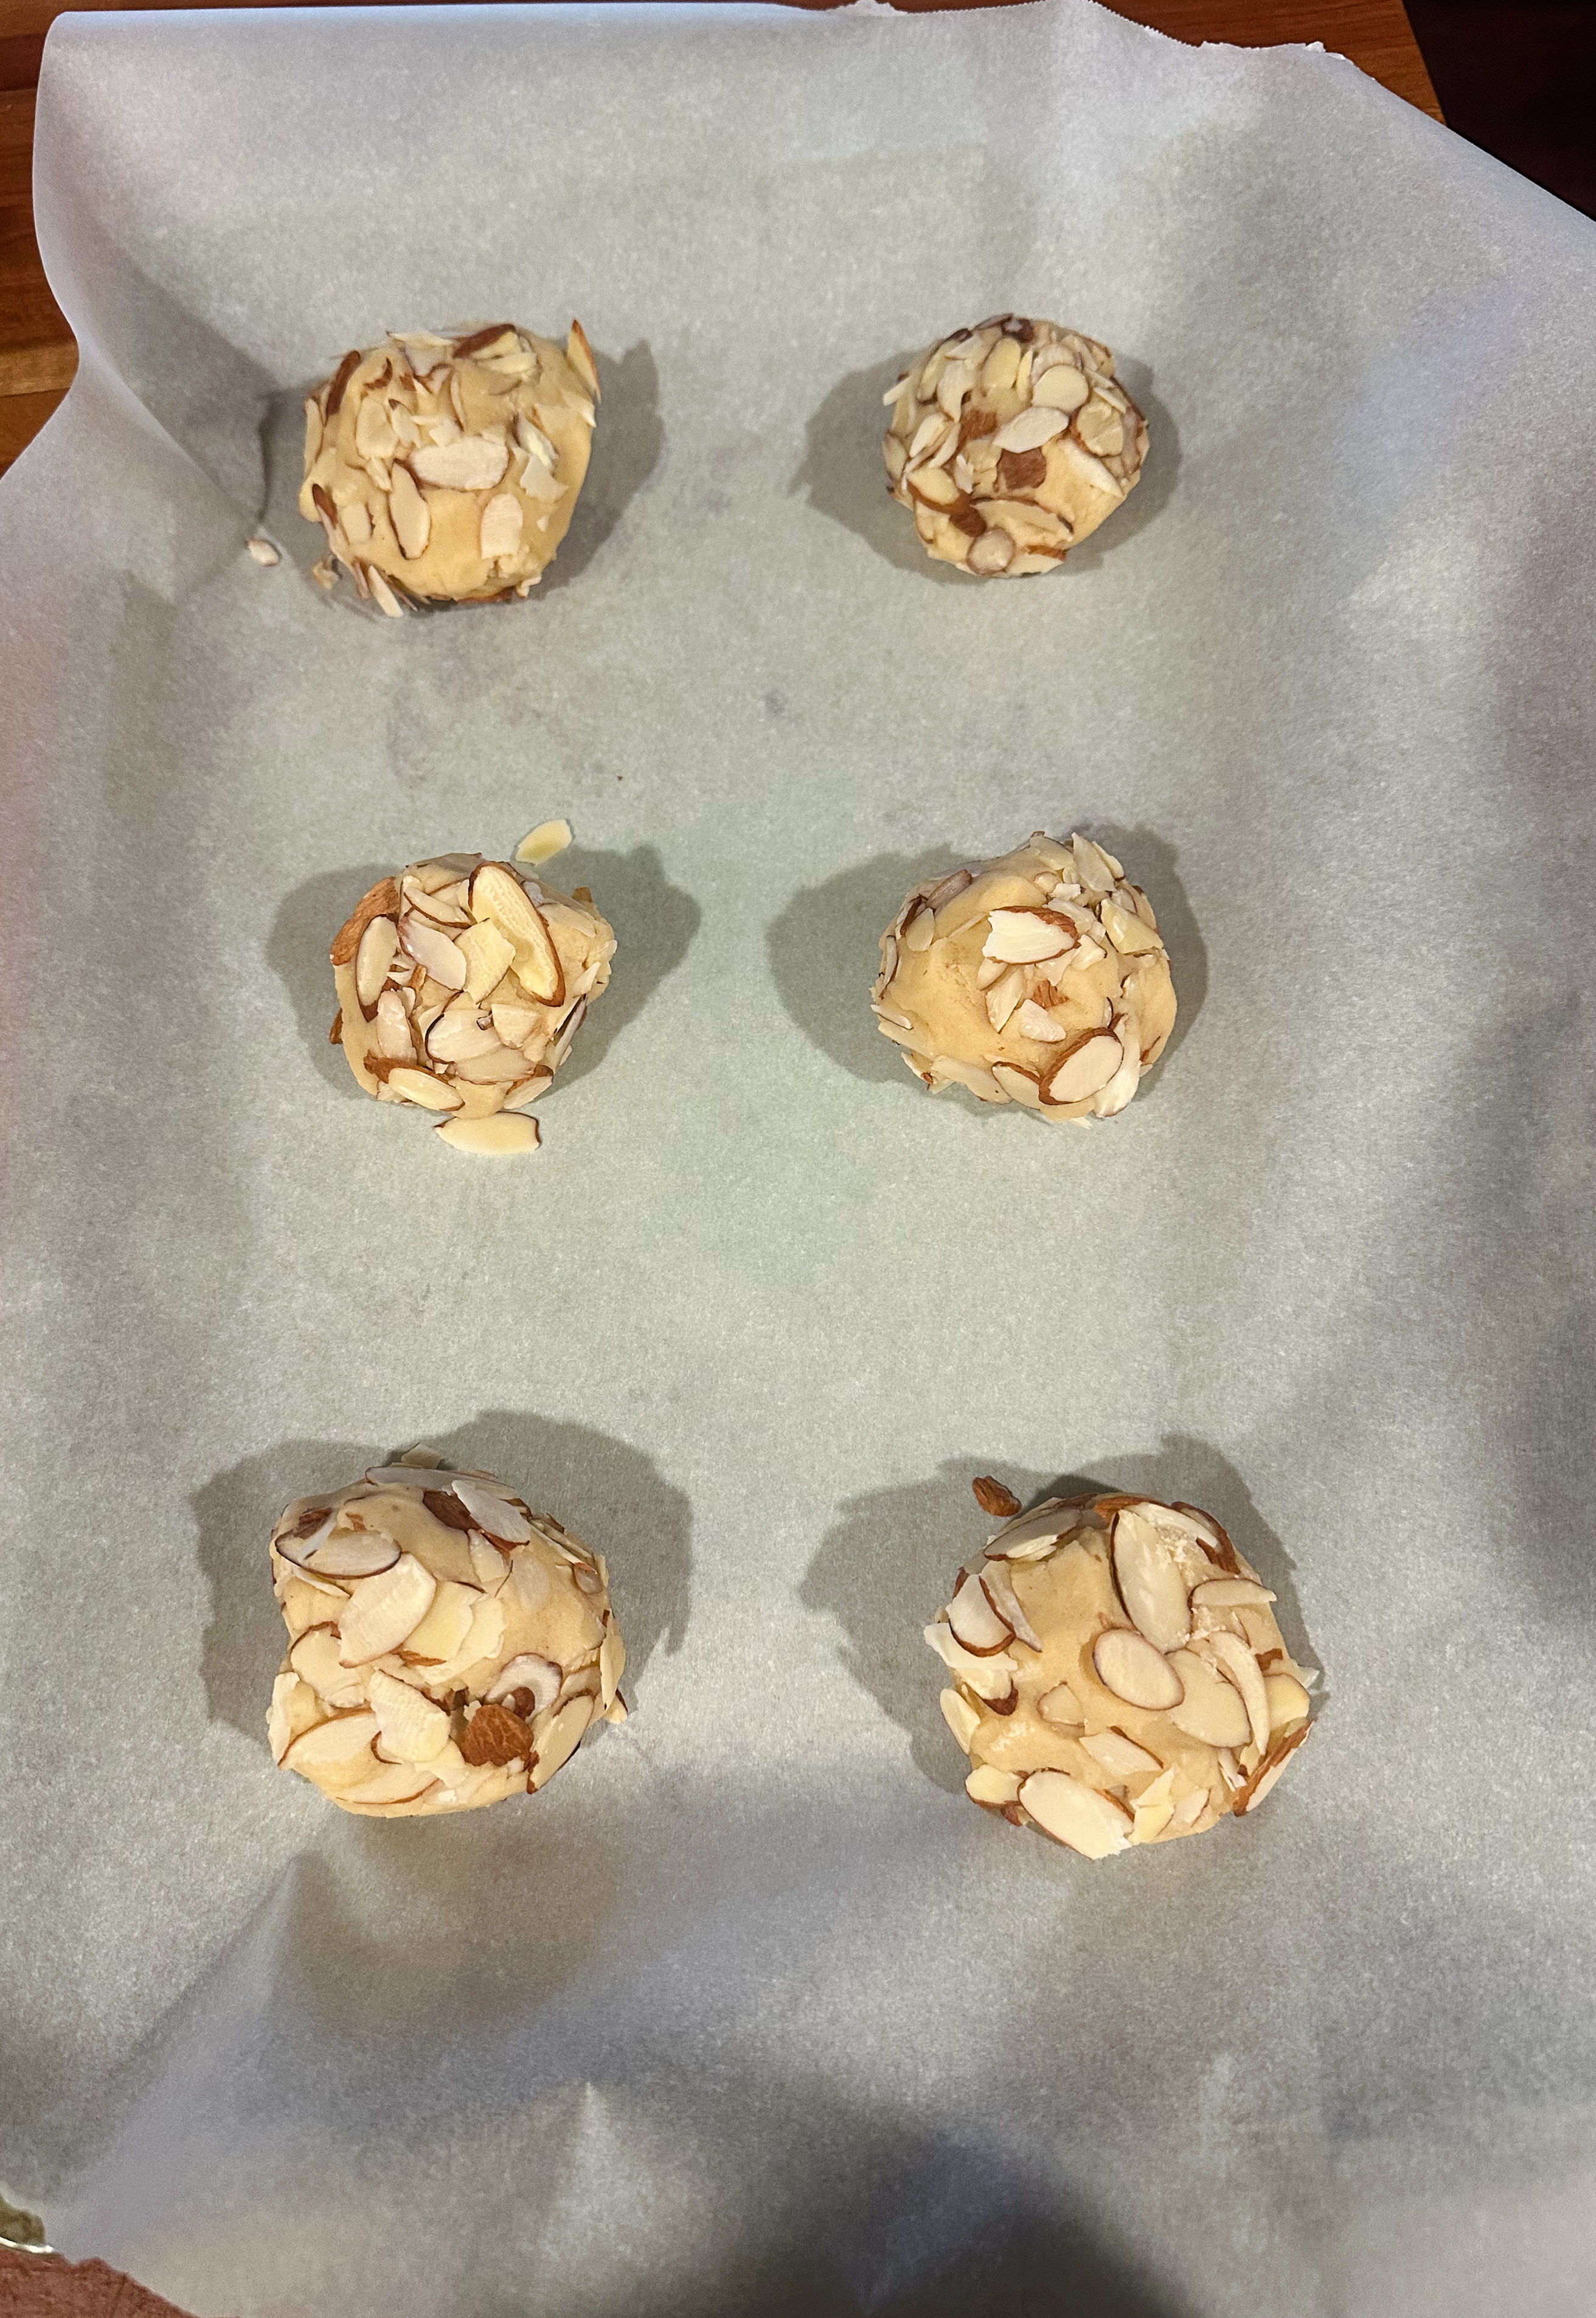
Prepare a baking sheet with parchment paper and pour the almond flakes into a separate bowl.
Portion the dough out to your preferred cookie size, roll the ball in the almond flakes and place it on the prepared baking sheet.
Freeze the dough balls for about 30 minutes.
Preheat the oven to 350F and bake the cookies for about 15-25 minutes [depending on how big you made them], or until the edges are slightly golden.
Remove from the pan and allow to cool on a wire rack. Once cooled dust with powdered sugar.
My dog, more like little brother, Cooper crossed the rainbow bridge early in December. I am so grateful for the 15 years we spent together but it has not made the loss any less devastating. My grief brain has made it hard to complete any one task and I end up looking lost with many unfinished projects. Cooking is always something that is grounding for me and though it has taken some time to get my appetite back, there is nothing like a comforting soup when you are feeling sad. This spicy potsticker soup was helpful for me to take some time to care for myself and it was not a complicated recipe for a weeknight meal.
Ingredients
3 TBSP Sesame Oil
2 TSP Fish Sauce
1 Bok Choy, greens chopped
2 Shallots, chopped
1 Cup Sliced Mushrooms
2 Garlic cloves, minced
1 Inch Fresh Ginger, peeled and grated
6 Cups Chicken Broth
3 TBSP Soy Sauce
2 TBSP Rice Vinegar
20-30 Frozen Wontons/Dumplings/Potstickers
Chili Oil, I love Lao Gan Ma
Let’s Get Cooking
Heat 2 TBSP sesame oil over MED-HIGH heat in a large pot, add in the bok choy and cook for about 4-5 minutes. Remove and transfer to a plate
Add the remaining 1 TBSP of sesame oil to the same pot. Add in the mushrooms + shallots + garlic + ginger. Cook for 3-5 minutes, until fragrant. Stir in the broth and bring to a boil. Add in the wontons and cook until the float, about 2-3 minutes. Stir in the bok choy + soy sauce + rice vinegar + fish sauce. Remove from heat.
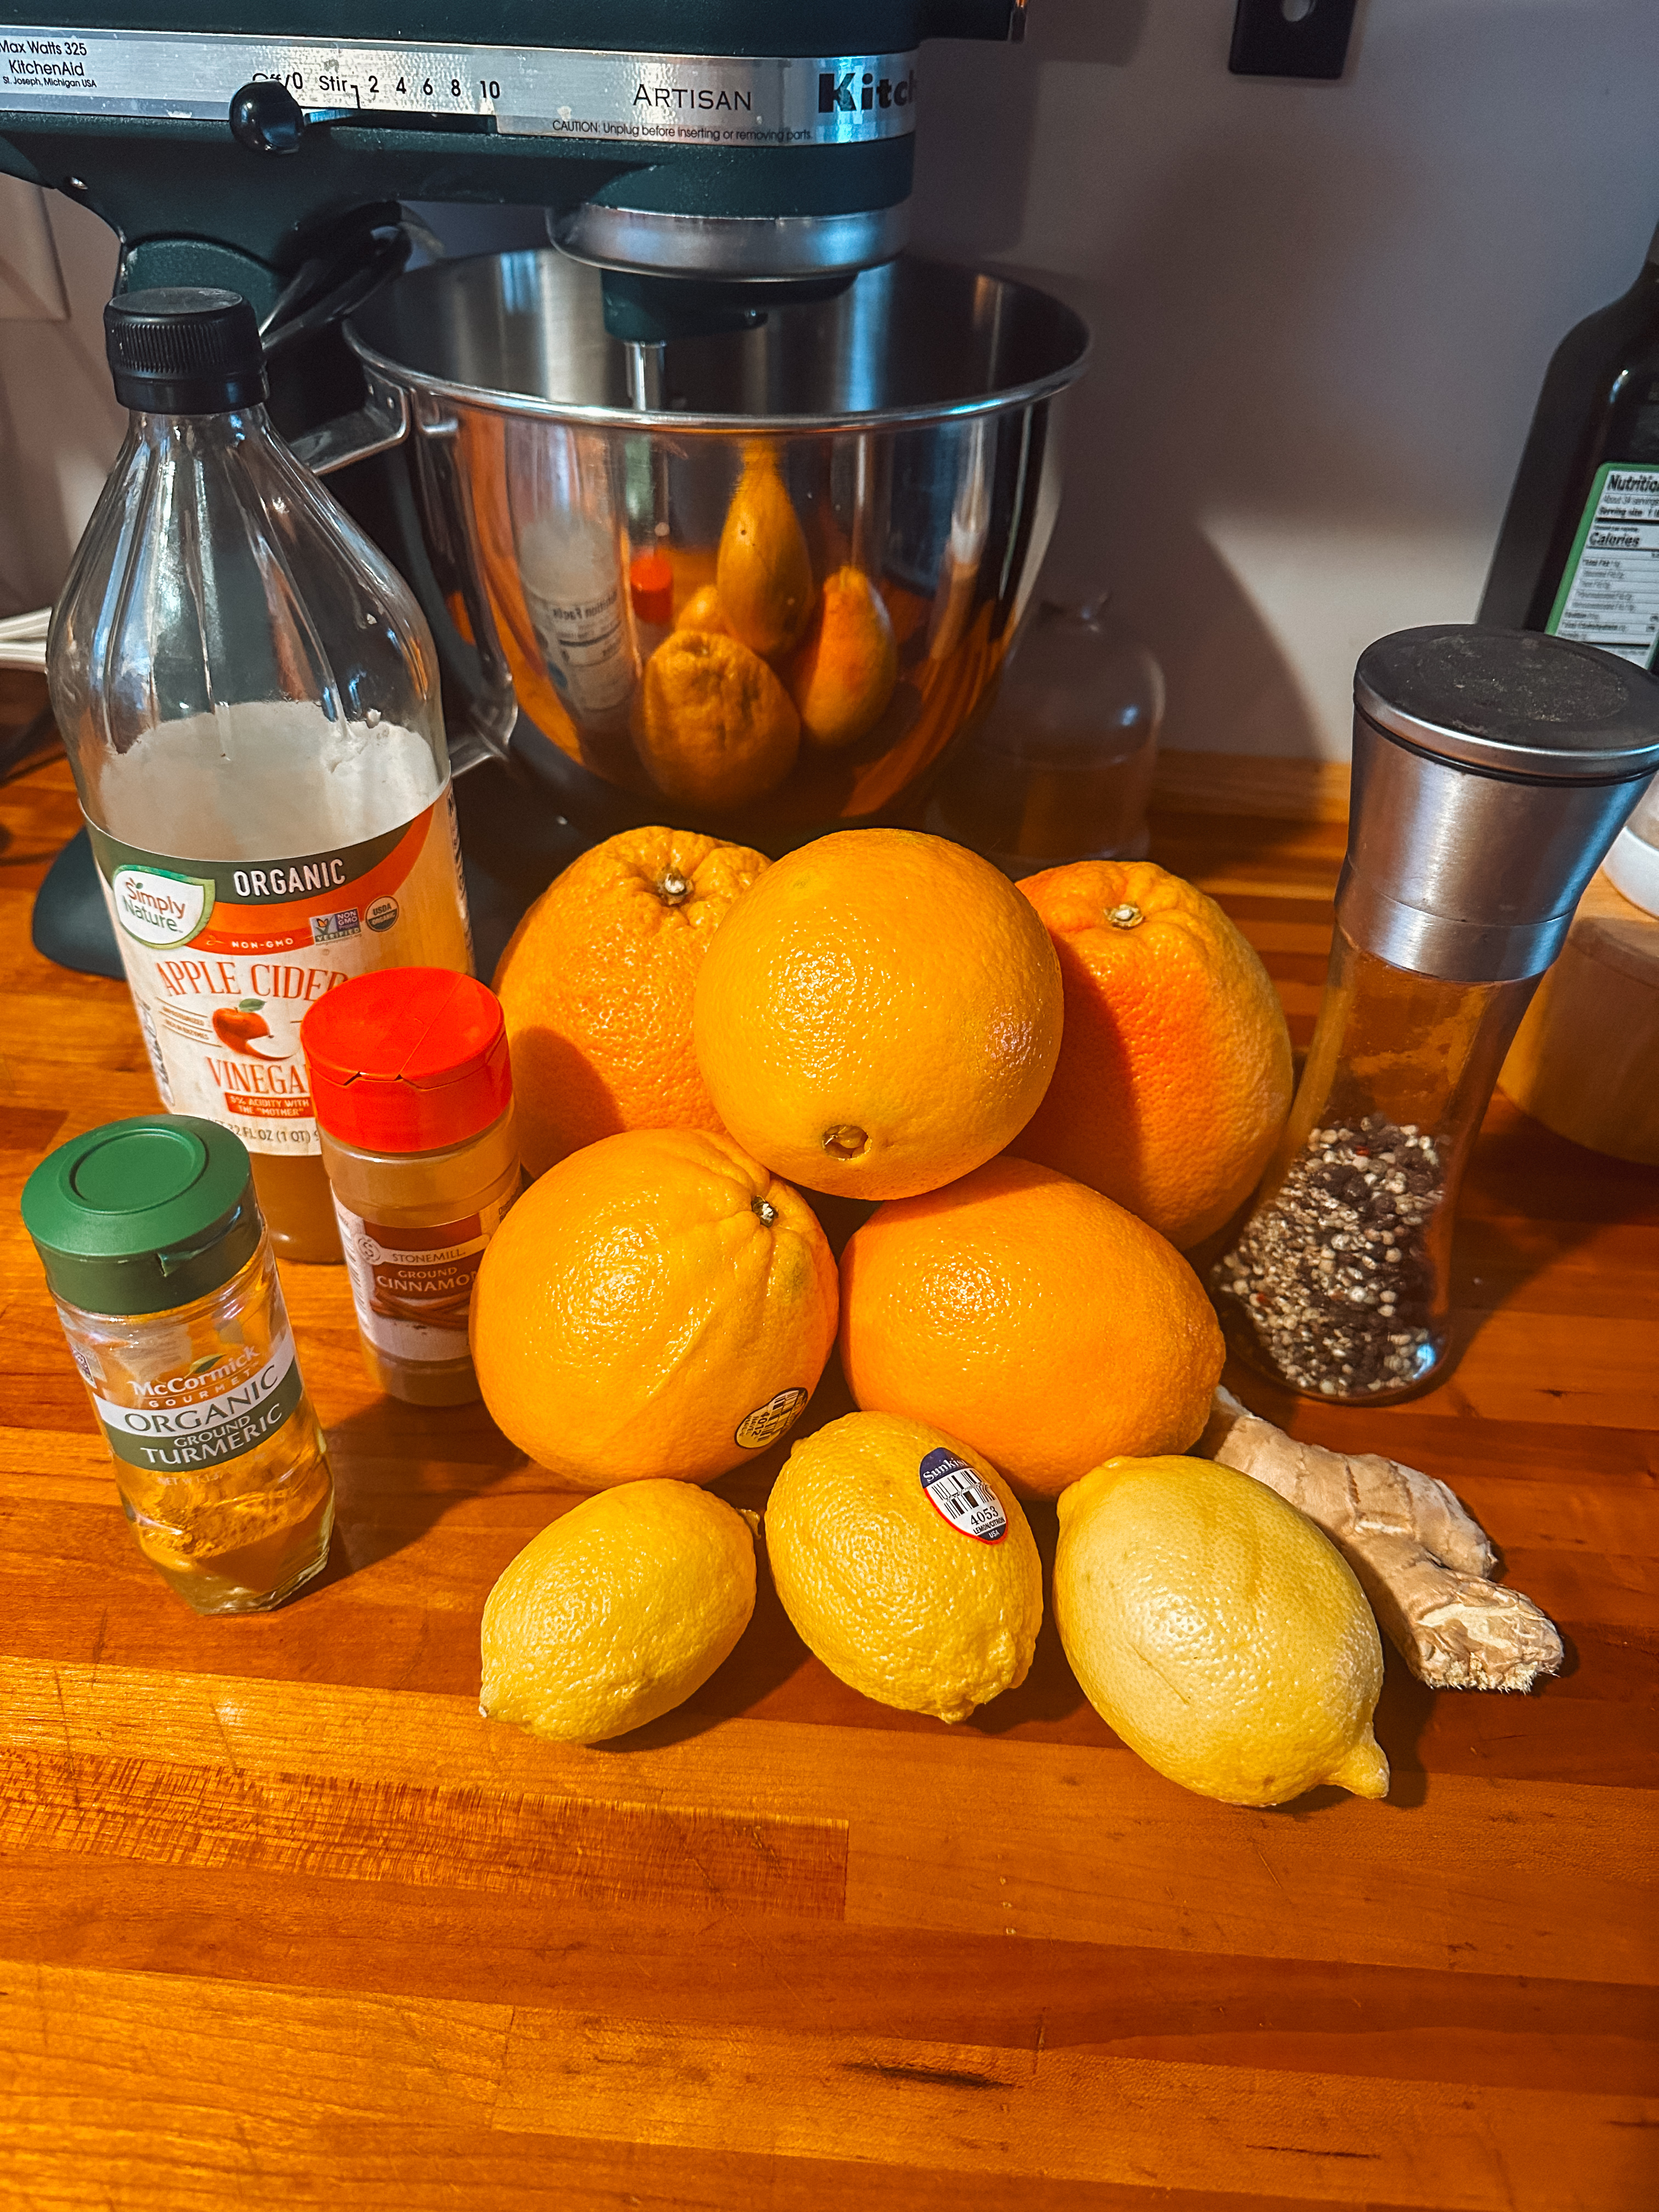
Everyone is getting sick & I just do not have time for that. I know sometimes catching these nasty bugs is completely out of our control; so I like to do what is within my control and that involves making this drink. This juice is packed with oranges, lemons, grapefruits, cinnamon, ginger, turmeric, and black pepper. It provides us with antioxidants, vitamin C, and anti-inflammatory properties that keep us nice and healthy in the upcoming cold months. I like to drink the juice with some lemonade warmed up in the microwave as a nice tea, or you can drink it cold on its own.
Ingredients
1 Grapefruit
2 Oranges
3 Lemons
1 Knob of Fresh Ginger
1 TBSP Apple Cider Vinegar
1 TSP Turmeric
1 TSP Cinnamon
1 TSP Black Pepper
Water
Let’s Get Juicing
Prep all your fruits by removing the rind and cutting them into slices.
Place all the ingredients into a blender and fill the blender 3/4 full of water, leaving the top of the fruits uncovered.
Once completely blended, prepare a pot with a strainer over top. Strain the juice to remove all the pulp.
After straining, jar the juice to store and place it in the fridge for up to a month.