I love the simple pleasure of a warm biscuit. The opportunities are endless; you could make it sweet or savory. The biscuit could be the star of the show or a side. I have recently found a love for warm pimento cheese, and I cannot wait to make these biscuits again. Make these biscuits for yourself and see how amazing life can be. What are some of your favorite biscuit toppings?
Ingredients
300g all-purpose flour
113g Unsalted Butter, cold
125g Sourdough Discard
240g Buttermilk
15g Sugar
Add Before Cutting Out:
5g Salt
1 1/2 TSP Baking Powder
1/2 TSP Baking Soda
Let’s Get Cooking
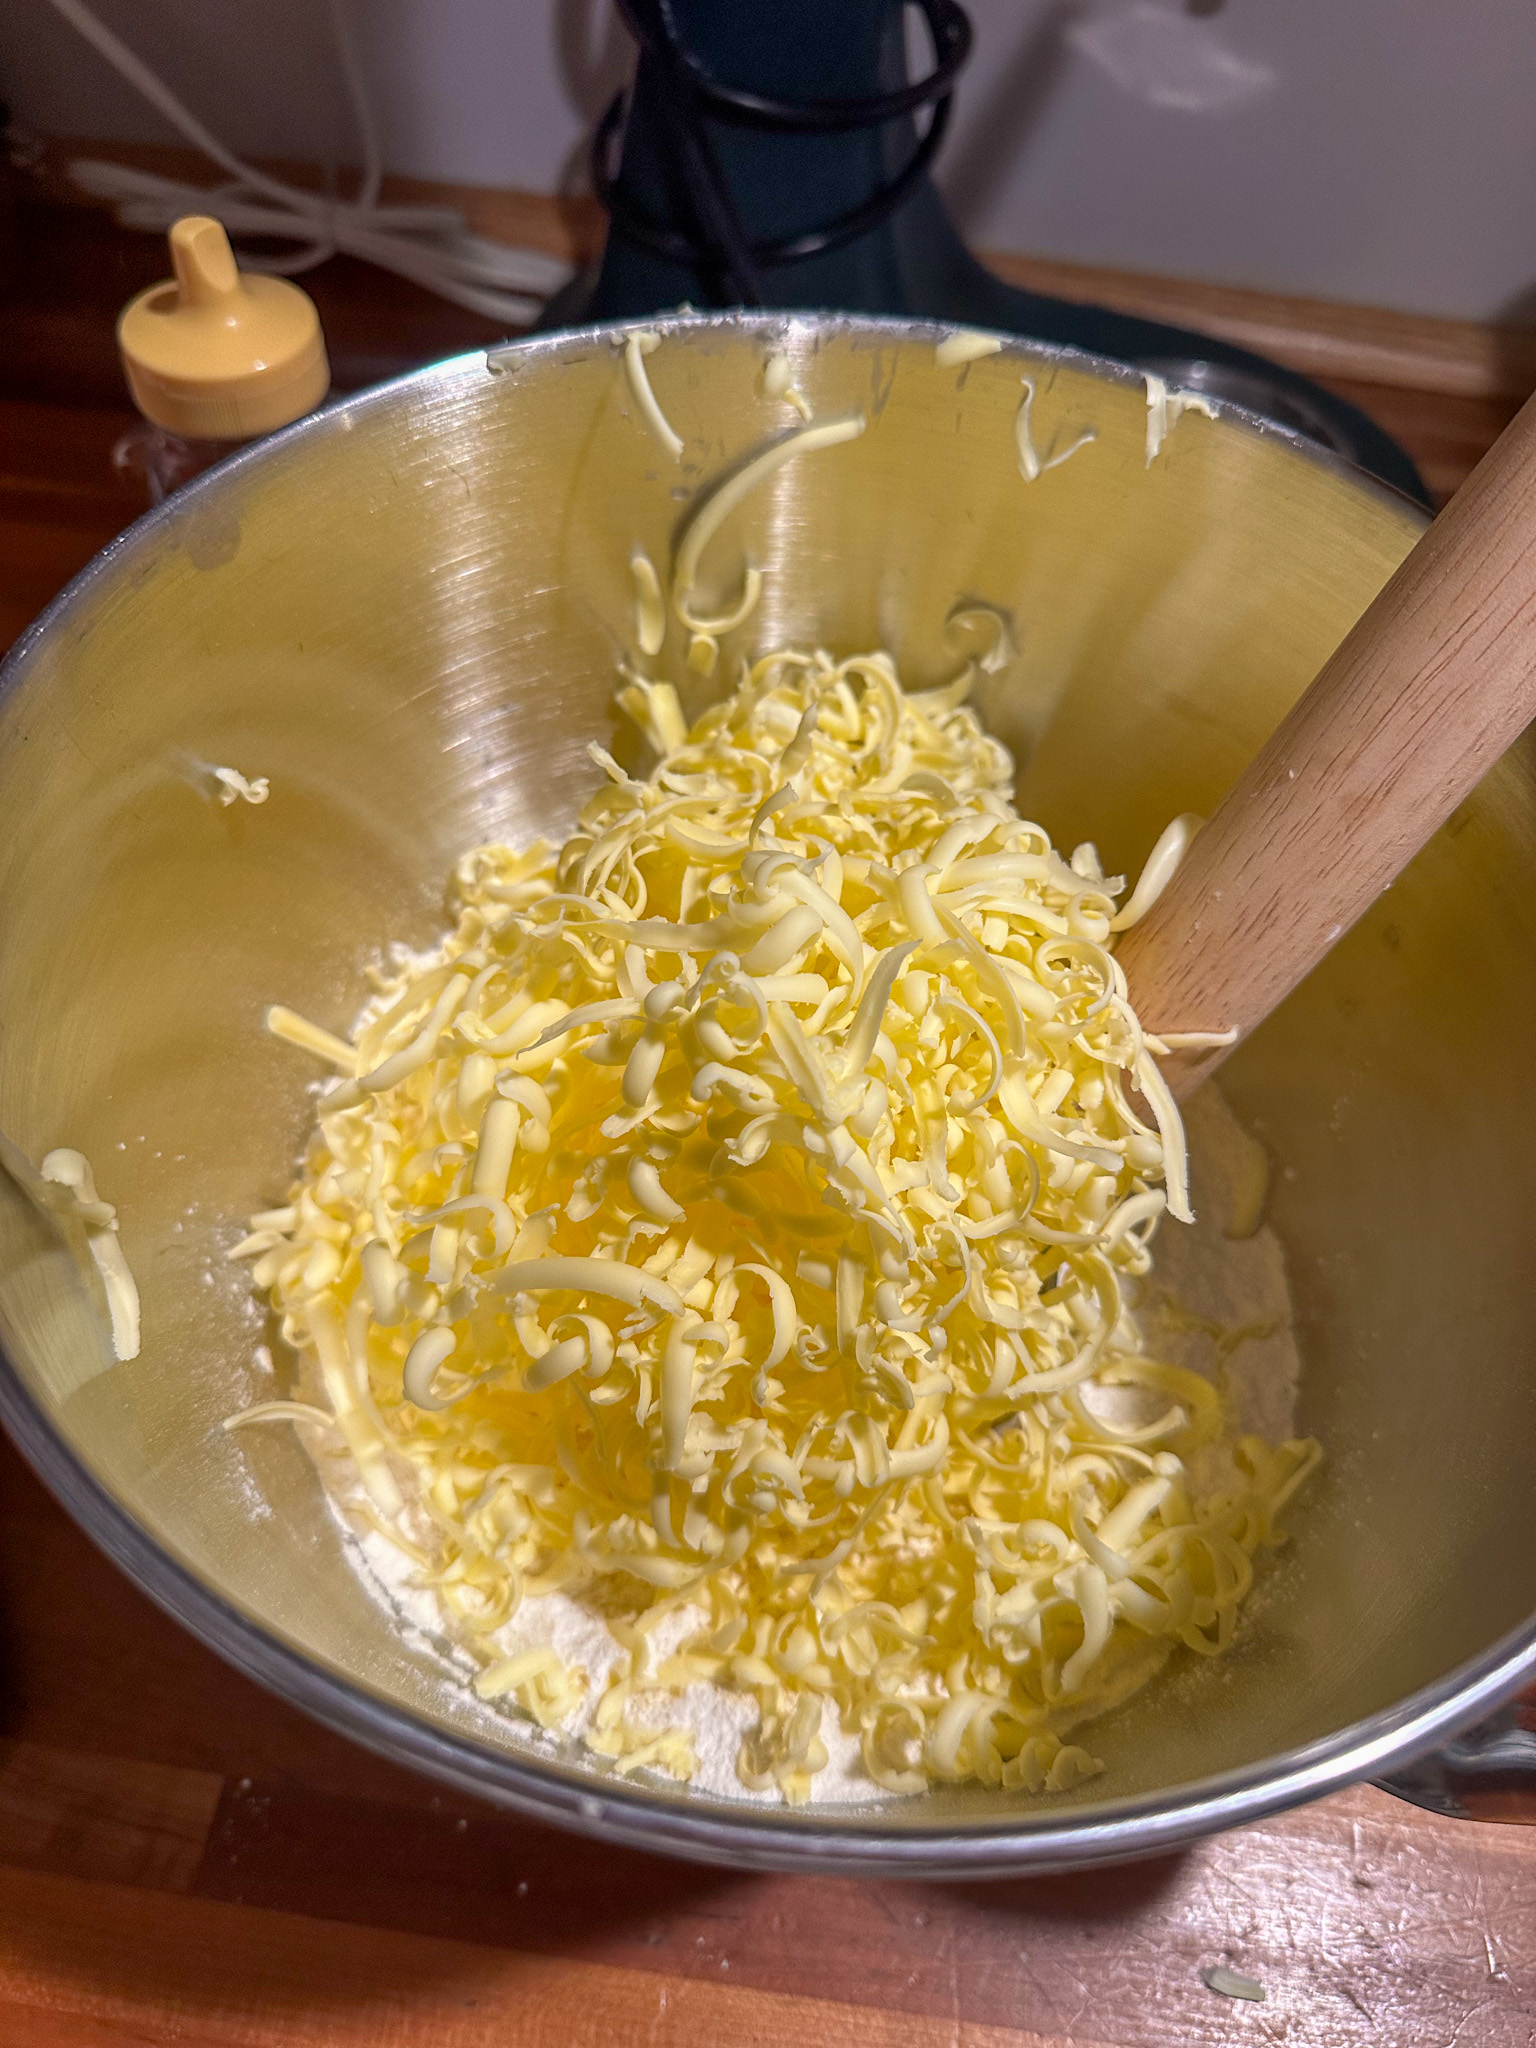
Grate the 113g of cold butter into a large mixing bowl. Add the 300g of flour to the butter. Using a fork mix the flour and butter until they begin to form pea-sized crumbs.
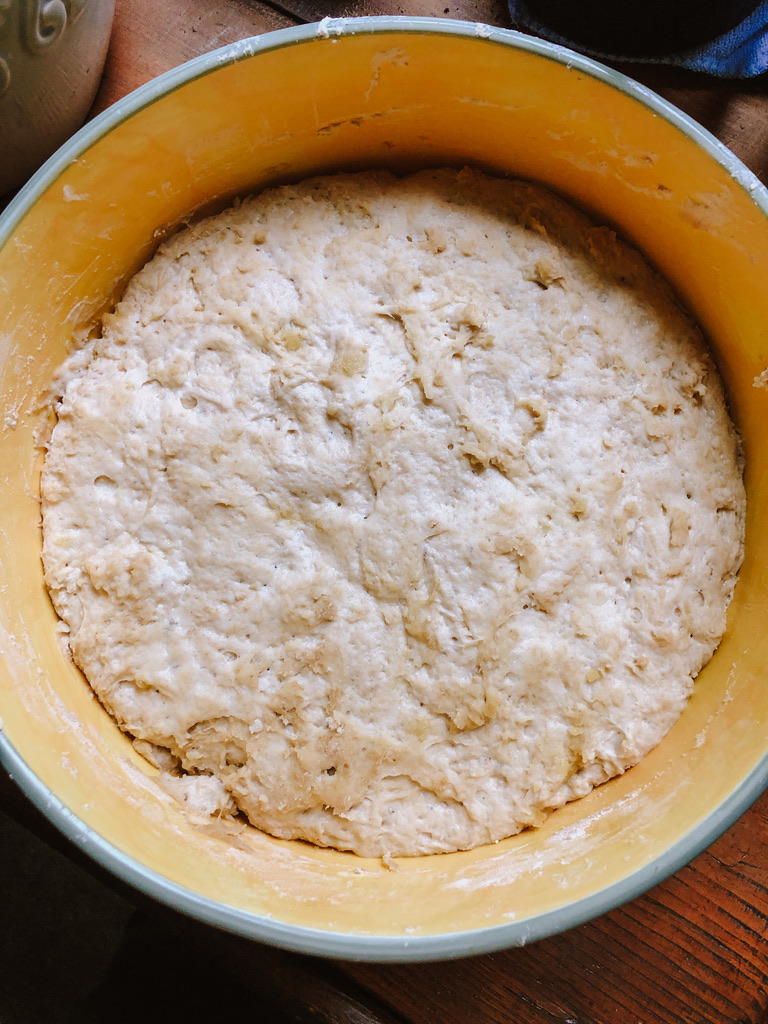
Add in the 125g sourdough discard + 240g buttermilk + 15g sugar. Stir with a stiff spatula until well combined. Cover with a damp towel and let the dough rise on the counter for 10-12 hours.
In the morning/before you cut the dough, mix in 5g salt + 1 1/2 TSP baking powder + 1/2 tsp baking soda. Mix well with your hands.
Preheat the oven to 400F and lightly butter a cast iron skillet.
Flour your counter and turn the dough out onto it. Flour the dough and press it into a 1inch rectangle shape. Cut out the biscuits and arrange in the skillet.
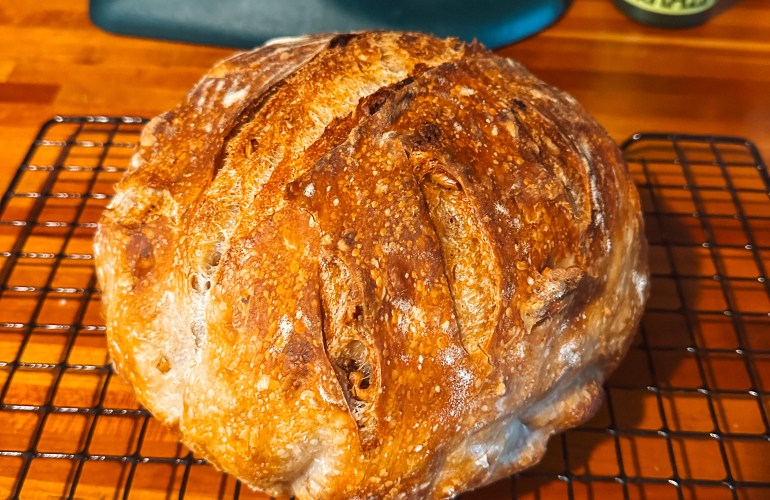
Bake for 25-30 minutes, or until the tops are brown.
I love how customizable sourdough can be! I have been trying out different variations, and this combo may be one of my fall favorites. The walnuts add this wonderful crunch while the blue cheese highlights the tanginess of the sourdough. It makes a wonderful bread for grilled cheese, to dip into soup, and to eat toasted with some butter!
Ingredients
300g Water
175g Active Sourdough Starter
450g Bread Flour
10g Sat
1 Cup of Walnuts, roughly chopped
1 Package of Your fav Blue Cheese, crumbled
Let’s Get Baking
In a large bowl, combine 300g water + 150g active sourdough starter and whisk until fully incorporated.
Then add in 450g of bread flour + 10g of salt. Mix well until there are no dry spots on the dough. The dough should be sticky. Cover with a damp towel and let sit on the counter for an hour.
After the initial hour, uncover the dough and add in most of the chopped walnuts + blue cheese. Be sure to save some of the fillings for the shaping process! Now we begin stretch and folds. Wet your hands and place them underneath the dough, pull the edges of the dough up and fold them on themselves. Repeat on all sides of the dough. Once folded, cover the dough with the towel and repeat the stretches every hour until the loaf has doubled in size – the timing will vary. The dough will feel light, airy, and it will be less sticky when it is ready.
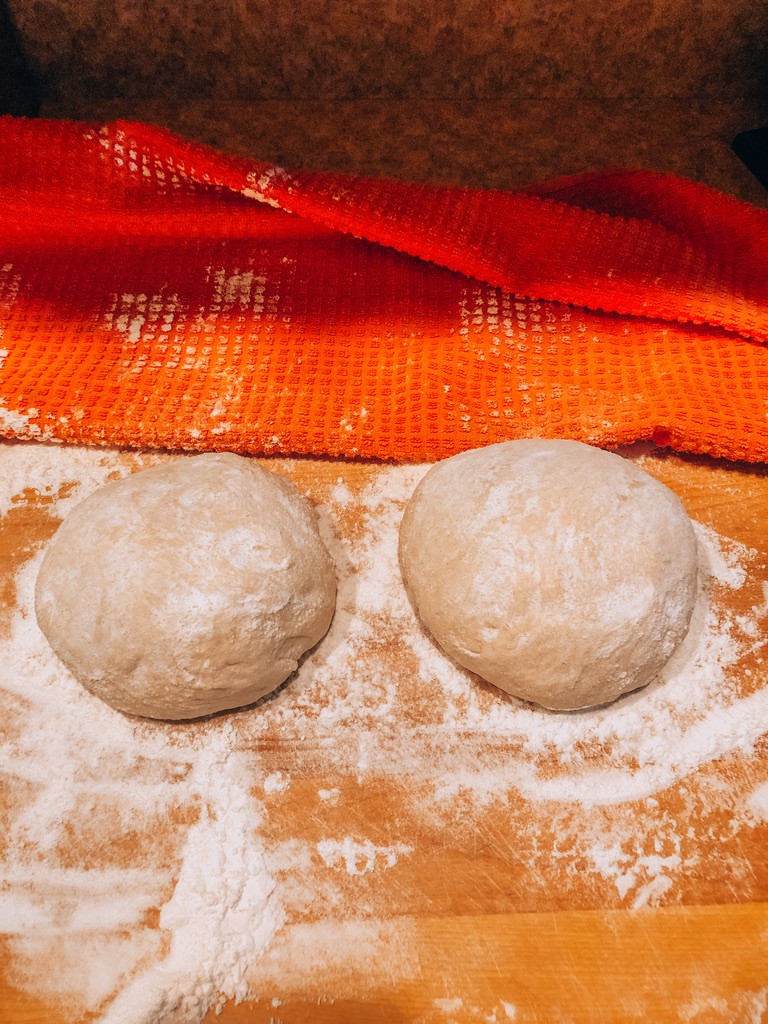
Time to shape! Turn out your dough on a lightly floured surface. Pull out the edges of the dough to create a rectangle. Add in the remaining walnuts + blue cheese. Fold one side halfway into the rectangle and fold the other side over that. Roll the dough away from you, creating a log. Place your hands on the sides of the dough and begin pulling towards yourself to get rid of the seams and create a tighter ball. Prepare a bowl by placing a towel in the bowl and sprinkling flour on the towel. Place the dough ball upside down [or seam side up] into the prepared bowl. Cover with the towel and let it proof for one hour on the counter before moving it into the fridge overnight.
Preheat the oven to 500°F and put your Dutch oven in the oven while it preheats. Place your dough on a piece of parchment paper and score the bread to release the steam. Carefully remove your Dutch oven once the oven has preheated and place your dough inside. Cover with the lid and bake at 500F for 20 minutes. After the initial 20 minutes, reduce the heat to 475°F and bake for another 25 minutes.
Allow to fully cool before cutting into the dough – this is the hardest part! Then enjoy!
I have so much dill in my garden now that I don’t know what to do with it! I usually plant it for my homemade pickles but I wanted to find ways to incorporate it into other dishes. I decided that adding dill to my sourdough loaf would be a perfect start to using up my harvest. All I could think about was making BLTs on homemade bread. I loved how the dill and lemon highlighted the sourness of the bread. This might be my new go-to summer loaf! I used Sourdough by Syd recipe on TikTok – I make the perfect loaf with it every time!
Ingredients
300g Water
175g Active Sourdough Starter
450g Bread Flour [I used bread flour and whole wheat just because I did not have enough bread flour]
10g Sat
1 Bunch of dill, chopped
1 Lemon, zested
Let’s Get Baking
In a large bowl, combine 300g water + 150g active sourdough starter and whisk until fully incorporated.
Then add in 450g of bread flour + 10g of salt. Mix well until there are no dry spots on the dough. The dough should be sticky. Cover with a damp towel and let sit on the counter for an hour.
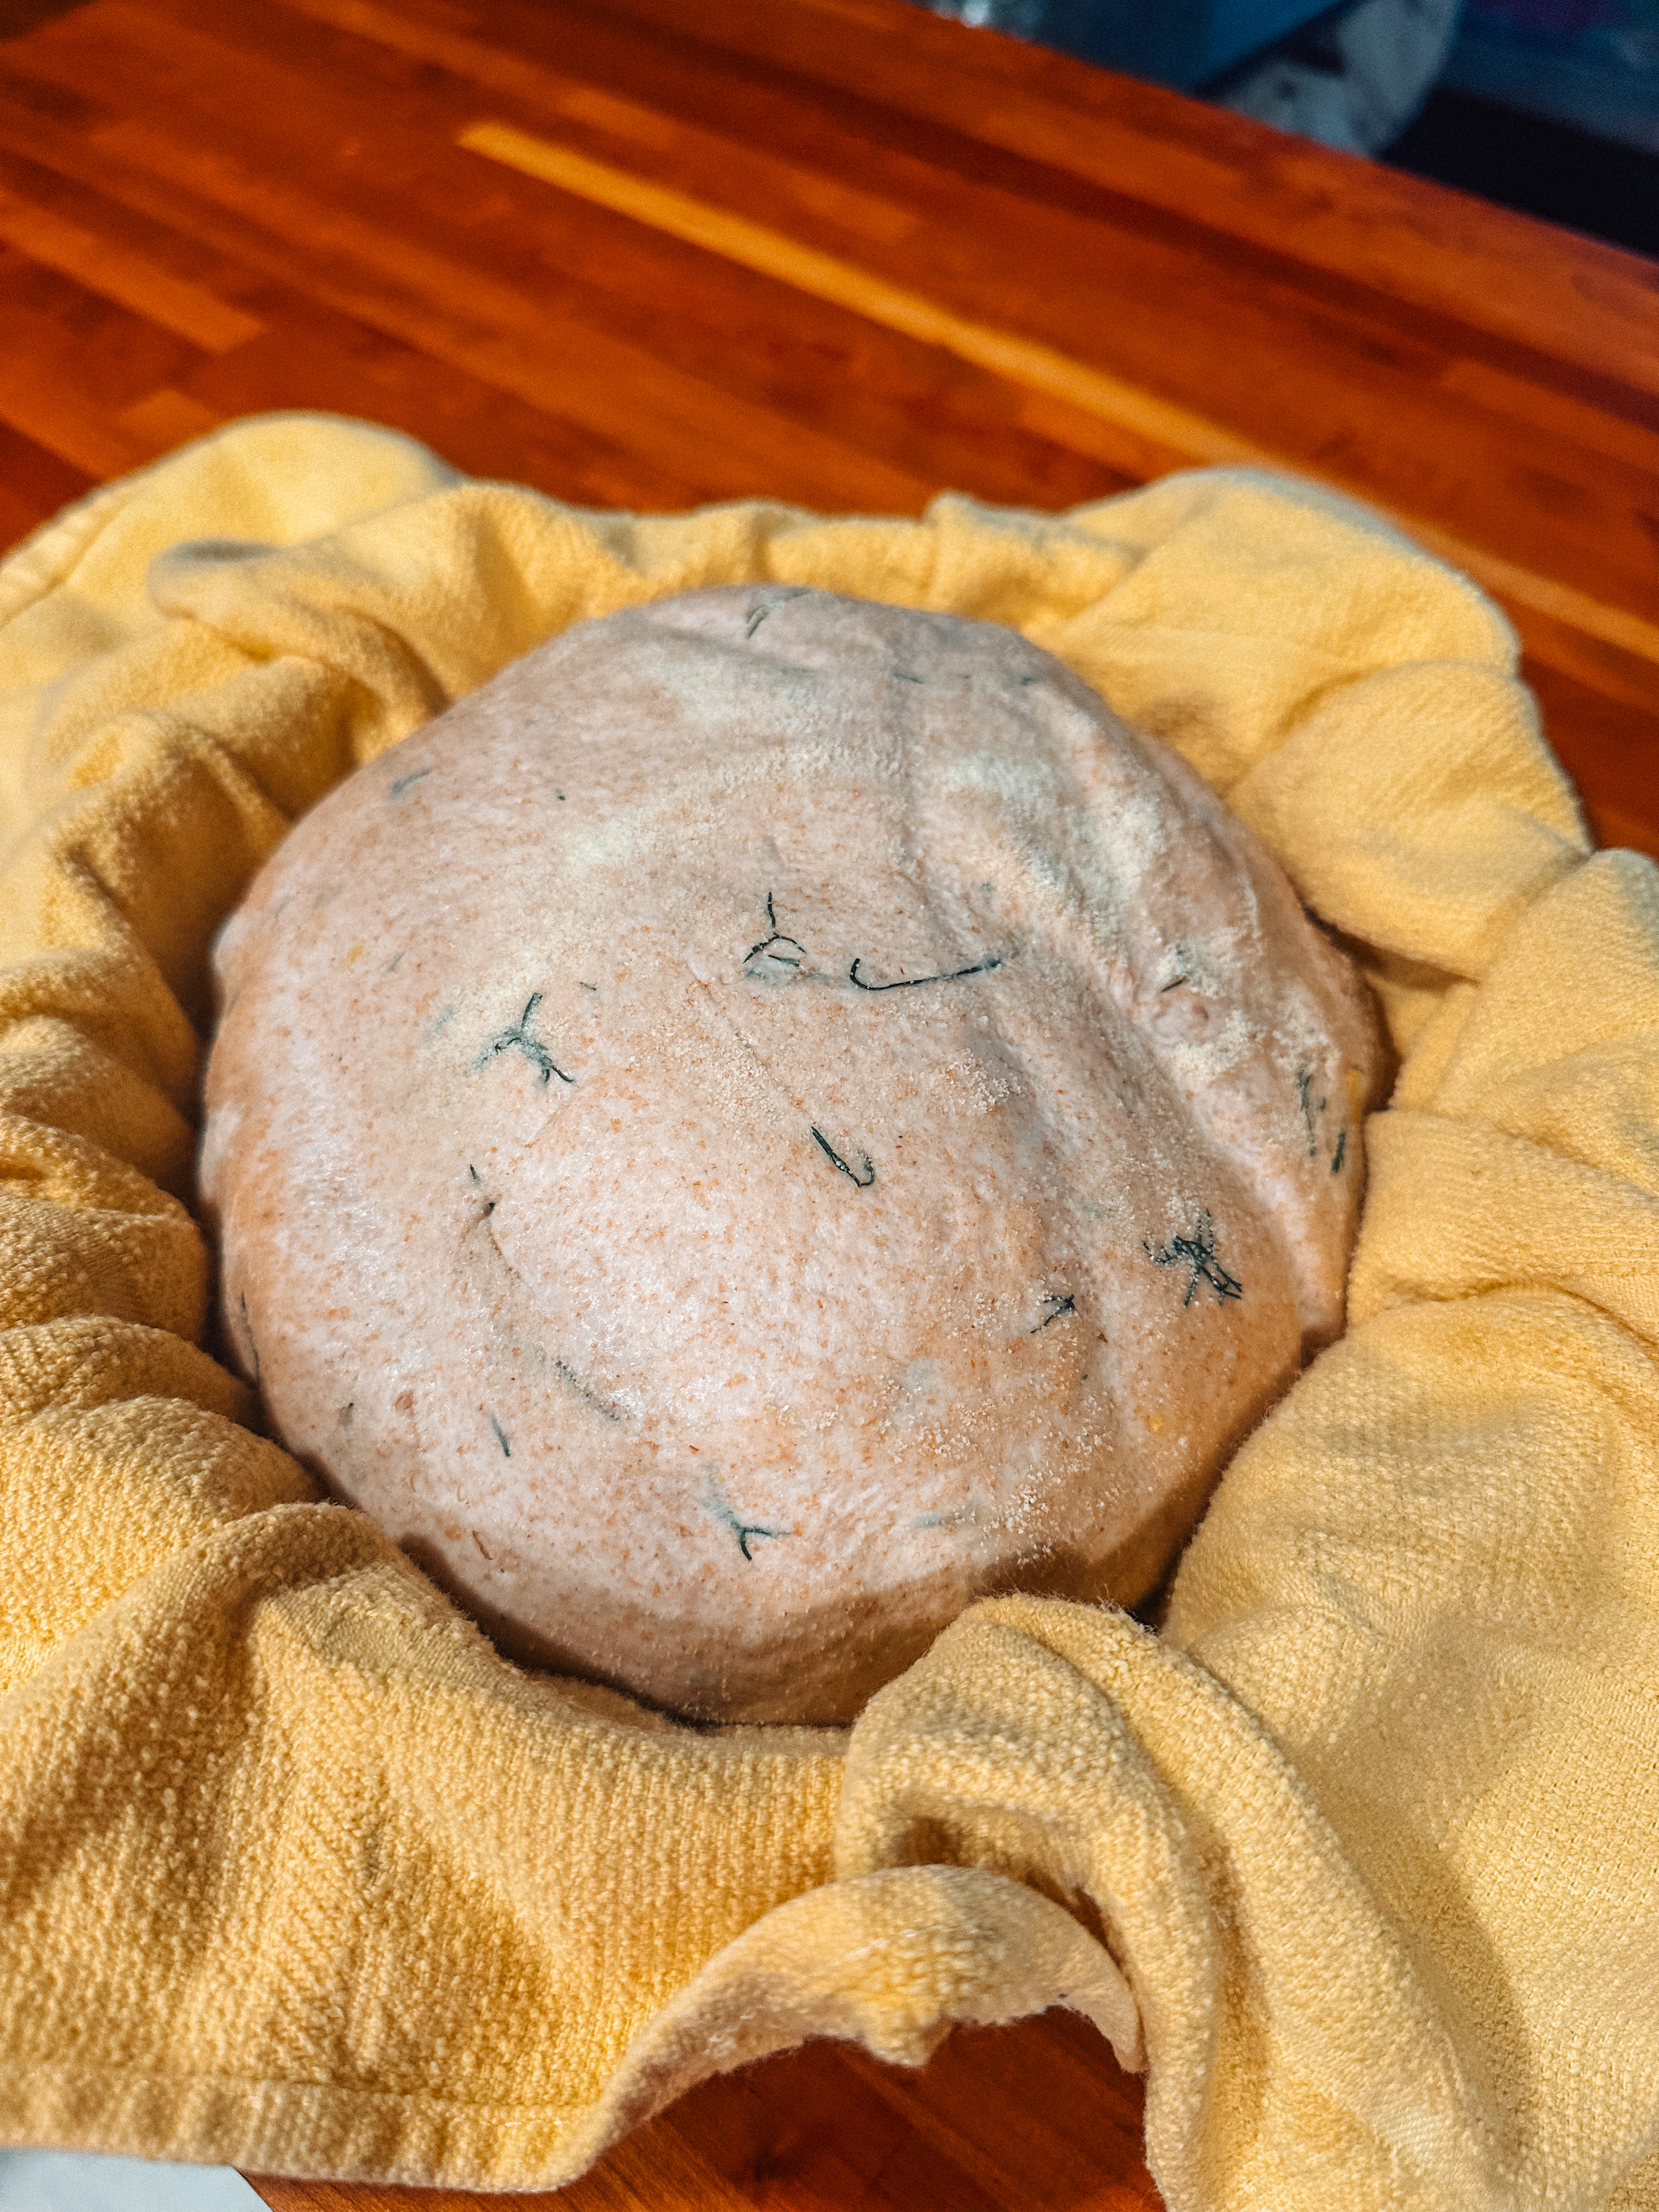
After the initial hour, uncover the dough and add in the dill + lemon. Now we begin stretch and folds. Wet your hands and place them underneath the dough, pull the edges of the dough up and fold them on themselves. Repeat on all sides of the dough. Once folded, cover the dough with the towel and repeat the stretches every hour until the loaf has doubled in size – the timing will vary. The dough will feel light, airy, and it will be less sticky when it is ready.
Time to shape! On a place your dough on a floured surface. Pull out the edges of the dough to create a rectangle. Fold one side halfway into the rectangle and fold the other side over that. Roll the dough away from you, creating a log. Place your hands on the sides of the dough and begin pulling towards yourself to get rid of the seams and create a tighter ball. Prepare a bowl by placing a towel in the bowl and sprinkling flour on the towel. Place the dough ball upside down [or seam side up] into the prepared bowl. Cover with the towel and let it proof for one hour on the counter before moving it into the fridge overnight.
Preheat the oven to 500°F and put your Dutch oven in the oven while it preheats. Place your dough on a piece of parchment paper and score the bread to release the steam. Carefully remove your Dutch oven once the oven has preheated and place your dough inside. Cover with the lid and bake at 500F for 20 minutes. After the initial 20 minutes, reduce the heat to 475°F and bake for another 25 minutes.
Allow to fully cool before cutting into the dough – this is the hardest part! Then enjoy!
I would love to hear about all the creations you make with this bread! What are your favorite dill recipes?
I have been on a sourdough kick recently, I love how versatile it is! You can make pastries, savory snacks, and the best bread ever. I love making the big loaves, but I wanted to try something easier to cut and use for my morning avocado toast. I found this recipe from Stay at Home Sarah and she truly is right on with how easy this sandwich bread is! This recipe makes two loaves which you can easily wrap up and freeze until you’re ready to use!
Ingredients
1/2 Cup Softened Butter
2 1/2 Cups Warm Water
1 1/2 Cups Active Sourdough Starter
2 TBSP Honey
1 TBSP Salt
8 Cups Bread Flour
Let’s Get Baking
Using your stand mixer bowl, add in softened butter + warm water + active sourdough starter + honey + salt + half of the flour. Mix with paddle attachment until all the ingredients are combined. Switch to the dough hook and slowly add in the rest of the flour. Knead on low for about 7-8 minutes or until the dough is smooth and glossy.
Place the dough into a buttered bowl and cover with plastic wrap or a damp towel. Leave at room temp to proof for 10-12 hours. The dough will be ready when it’s doubled in size.
After your first proof, lightly coat your loaf pans with oil or butter. Divide the dough in half. Working one at a time, roll the dough into a large rectangle. Stretch the sides and press gently on the dough to release any bubbles. using the short sides, fold the dough into thirds. Starting at the short end, roll the dough up into a log, tuck the ends in underneath. Repeat with the other piece of dough. Place into the prepared pans seam side down. Cover with a damp towel and let proof again. This can take up to about 3-6 hours, or until the dough is about 1in from the pan rim. I completed this second proof in the fridge, but you can also leave it out.
To bake, preheat the oven to 375F and bake for about 40 min. Allow to cool on a wire wrack and let rest 1 hour before slicing.
This makes the best bread that can be used with any toppings imaginable! I have been loving it with avocado + chili oil + a runny egg for my breakfast
We all know that I love Brad Leone, my sourdough starter is named after him. I got his new cookbook for Christmas and was excited to see that he shared his sourdough recipe. Brad’s recipe is completely different from Claire Saffitz recipe that I had been using from the New York Times. Brad’s recipe incorporates olive oil which brings out a fatty flavor that I love in the bread. Brad also doesn’t require you to knead the dough for 20 minutes, which my arms appreciate. If you’re making bread at all it’s increcibly important to have a kitchen scale.
Ingredients
You need a total of 1000g of flour, it can be of different types, but Brad notes it also can be 1000g of all the same
700 g Bread Flour
150g Rye Flour [I used whole wheat]
150 Fine Italian Flour/type “00” [ I just used the bread flour again]
750g Filtered, Room Temp Water
15g Fine Salt
30g Extra-Virgin Olive Oil [I had a little fun here and used my herbs de provence oil]
150g Active Starter, fed the night before
Lets Get Cooking
Sift the flours together into a large bowl and mix in the water. You want the flours to autolyze which will help build up the gluten development. Make sure there is no dry flour left in the bowl. Cover and let sit for at least 30 minutes, you can let it sit for longer.
Once you’re done letting the flours autolyze, add salt + oil + starter to the flour mixture. Using your hands, knead the mixture into a smooth uniform ball. You can knead by gently pulling the dough and folding it over itself, or whatever kneading method works for you. Once you get the dough how you like it, place it back in the bowl and cover with plastic wrap. This will begin the fermenting process. Be sure to leave the dough at room temperature.
Here’s the part where you need to watch.
Every 60 minutes during the fermenting process you’re going to have to ‘turn’ the dough. This is done by wetting your hands and pulling up a side of the dough and folding it over itself. Turn 90 degrees and complete these ‘turns’ on all 4 sides. After each turn, cover again and let the dough rest. Depending on how your dough is fermenting you may do 3 turns, you may do 6. Once you’ve noticed that the dough has about doubled in size in the bowl and has a light and airy texture.
Once your fermentation is done it’s time to shape and bake! Flour a surface and let the dough fall out. Cut the dough in half if you are making bread, if you are making pizza dough, cut it into 4 equal pieces. With a bench scraper, slide it under the dough and turn, making it into a ball almost. Have floured bowls ready to place the shaped dough back into it and cover. Flip the dough into the floured bowl so that the bottom of the loaf is facing up. You can refrigerate for a day, which I recommend. Or you can bake that day.
Preheat the oven to 500F and place the dutch oven with the lid on into the oven. Gently flip out the dough onto a floured piece of parchment paper. Cut the top of the dough so it can release steam while baking. Place the dough/parchment into the dutch oven, cover, lower the temp to 460F and bake for about 20-25 minutes. Remove the lid and then let bake for another 45 minutes.
Let sit for about an hour before cutting into it!
If you’re making pizza with the dough, follow along with my sourdough pizza recipe after making the dough!
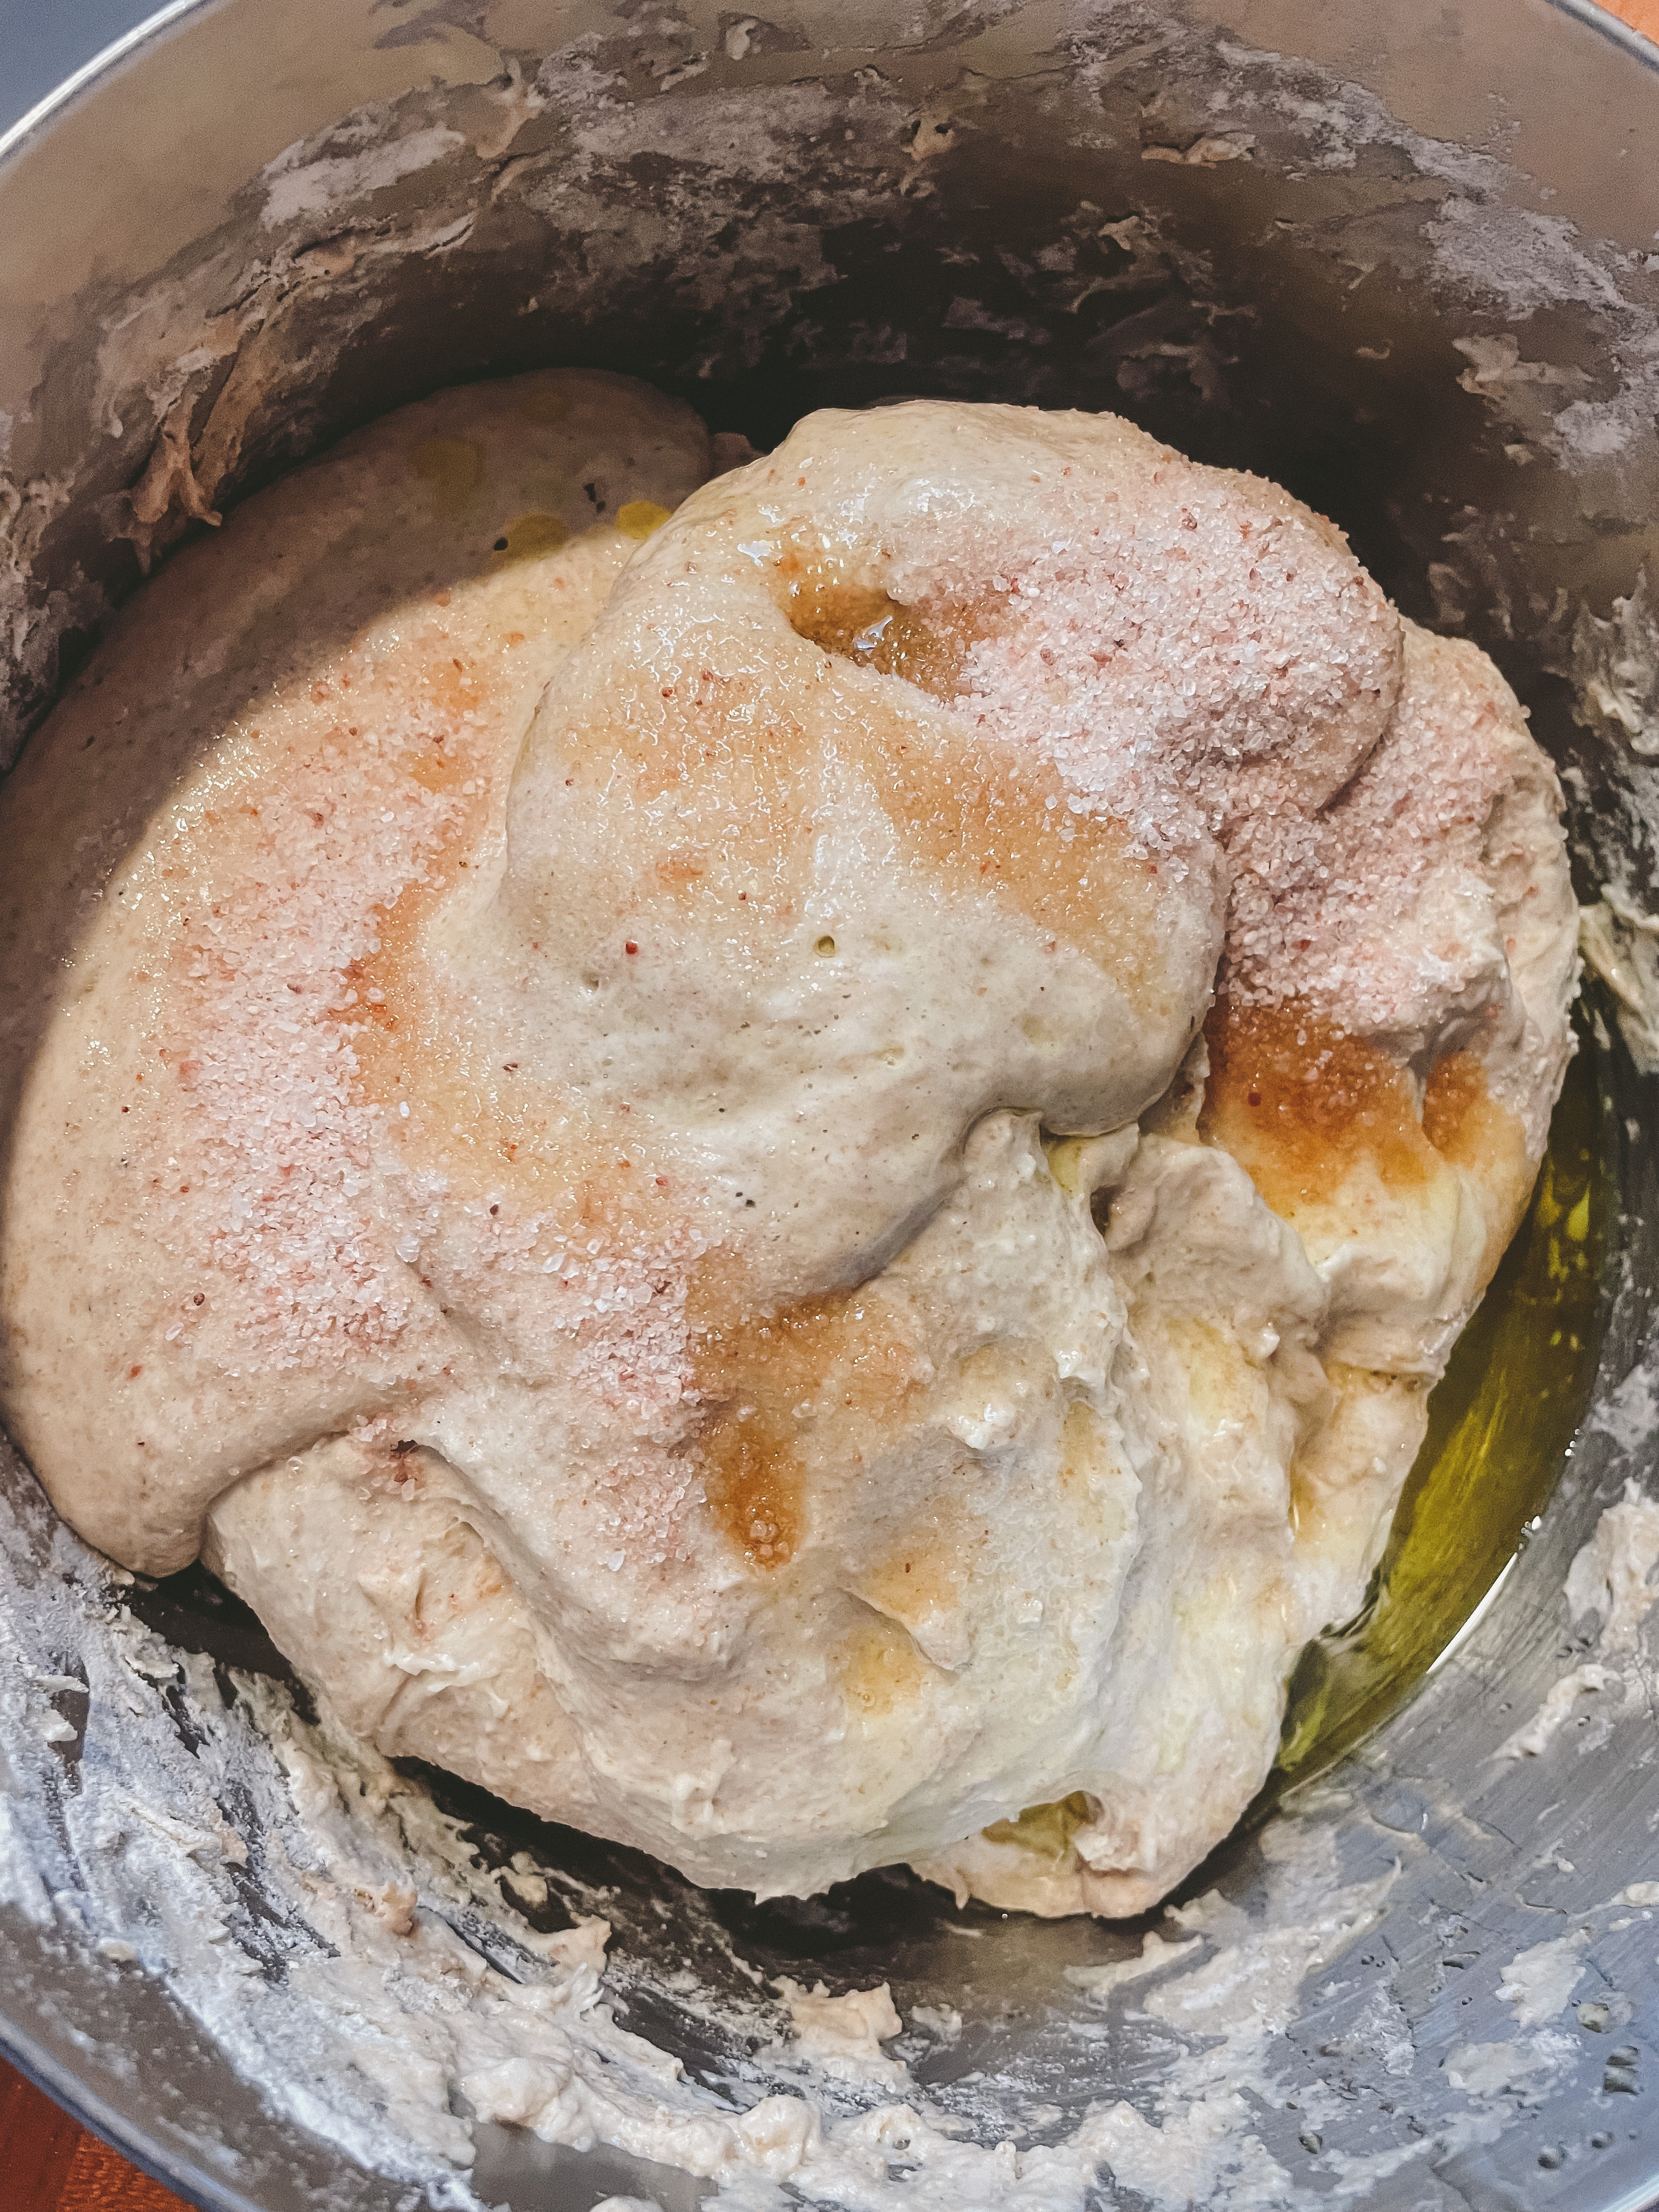
I love to find any sort of recipe that I can utilize my sourdough starter (it’s name is Brad). I found this recipe from Eat the Lovefor sourdough soft pretzels and I just had to try it out for myself. This recipe does take about 2 days, because you need to make sure your starter is fed and active & you need the dough to rise for about 4 hours. These are easy and delicious, perfect with mustard or some cheese.
Ingredients
1 Cup Warm Water
1 TBSP Honey
1 Cup Active Sourdough Starter, check out here how to begin your own starter/how to feed
4 Cups Bread Flower, you can use All Purpose Flour
1/4 Cup Unsalted Butter, melted
2 TSP Salt
1 Egg Yolk
Coarse Salt
Baking Soda Bath:
2/3 Cup Baking Soda
10 Cups Water
Let’s Get Cooking
I did all of this by hand, you can use a mixer with a dough hook. Combine the cup of warm water and honey in large bowl & stir until dissolved. Add in the active sourdough starter until it has loosened and combined with the water.
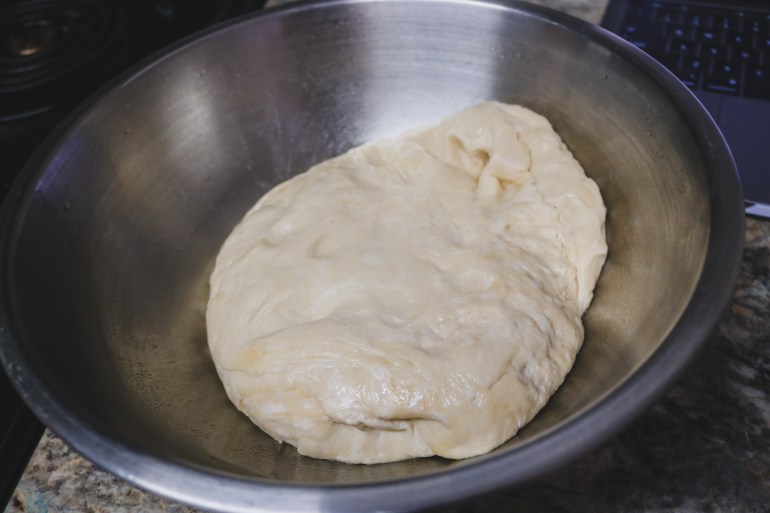
Add in the flour + butter + salt into the bowl. Mix well until it begins to form a shaggy dough. Remove from bowl and place the dough onto a lightly floured counter, knead until the dough becomes smooth and more elastic.
Once the dough is smooth, coat a clean bowl with cooking spray. Cover the bowl with plastic wrap or a damp towel and let rise, until the dough has doubled, about 3 to 4 hours.
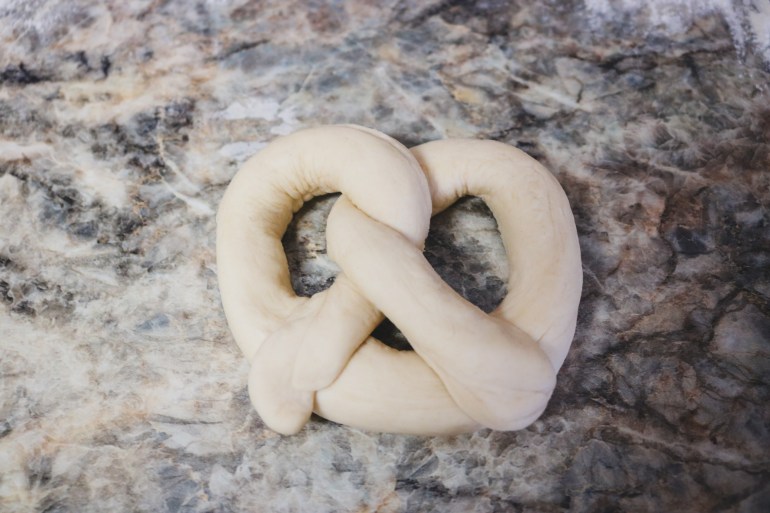
Preheat the oven to 450F once the dough is done proving. Line two baking sheets with baking mats or parchment paper and divide the dough into about 10 even pieces/110g each. Cover with a damp towel once rolled out.
Take one piece of dough and roll into a long rope. Form a ‘U’ shape then take the two ends, cross over each other, then bring back down to the bottom of the ‘U’.
Bring the water & baking soda in a large pot up to a boil. Make sure that the baking soda has fully dissolved. Add in about 2-3 pretzels per time, letting them boil for about 50 seconds. Place on the baking sheet following.
Combine the egg yolk + water and brush on top of each pretzel, sprinkle with coarse salt.
Bake for 15-18 minutes or until the pretzels have browned. Let cook on the baking sheet for a few before moving to a wire rack.
If you’re like me & every other food lover, you made some sour dough starter during this quarantine. You can make so many delicious things with sourdough starter. I personally love the sour taste so I have been trying to find new ways to use the starter. Recently, I made pizza dough from my starter & omg it’s everything I could have wanted. I got the recipe from Little Spoon Farm, check them out! Enough talking, let’s get cooking.
Ingredients
1/2 Cup/100 g Sourdough Starter (If you don’t have starter, check out the recipe here to make your own!)
2 TSP/10 g Sea Salt
1/3 Cup + 2 TSP/ 50 g Whole Wheat Flower
3.5 Cup + 1 TBSP/ 450 g All Purpose Flour
1.5 Cup/ 375 g Water
You’ll also need whatever pizza toppings your heart desires, I’m a cheese and sausage kinda gal but it’s your pizza so you run the show
Let’s Get Cooking
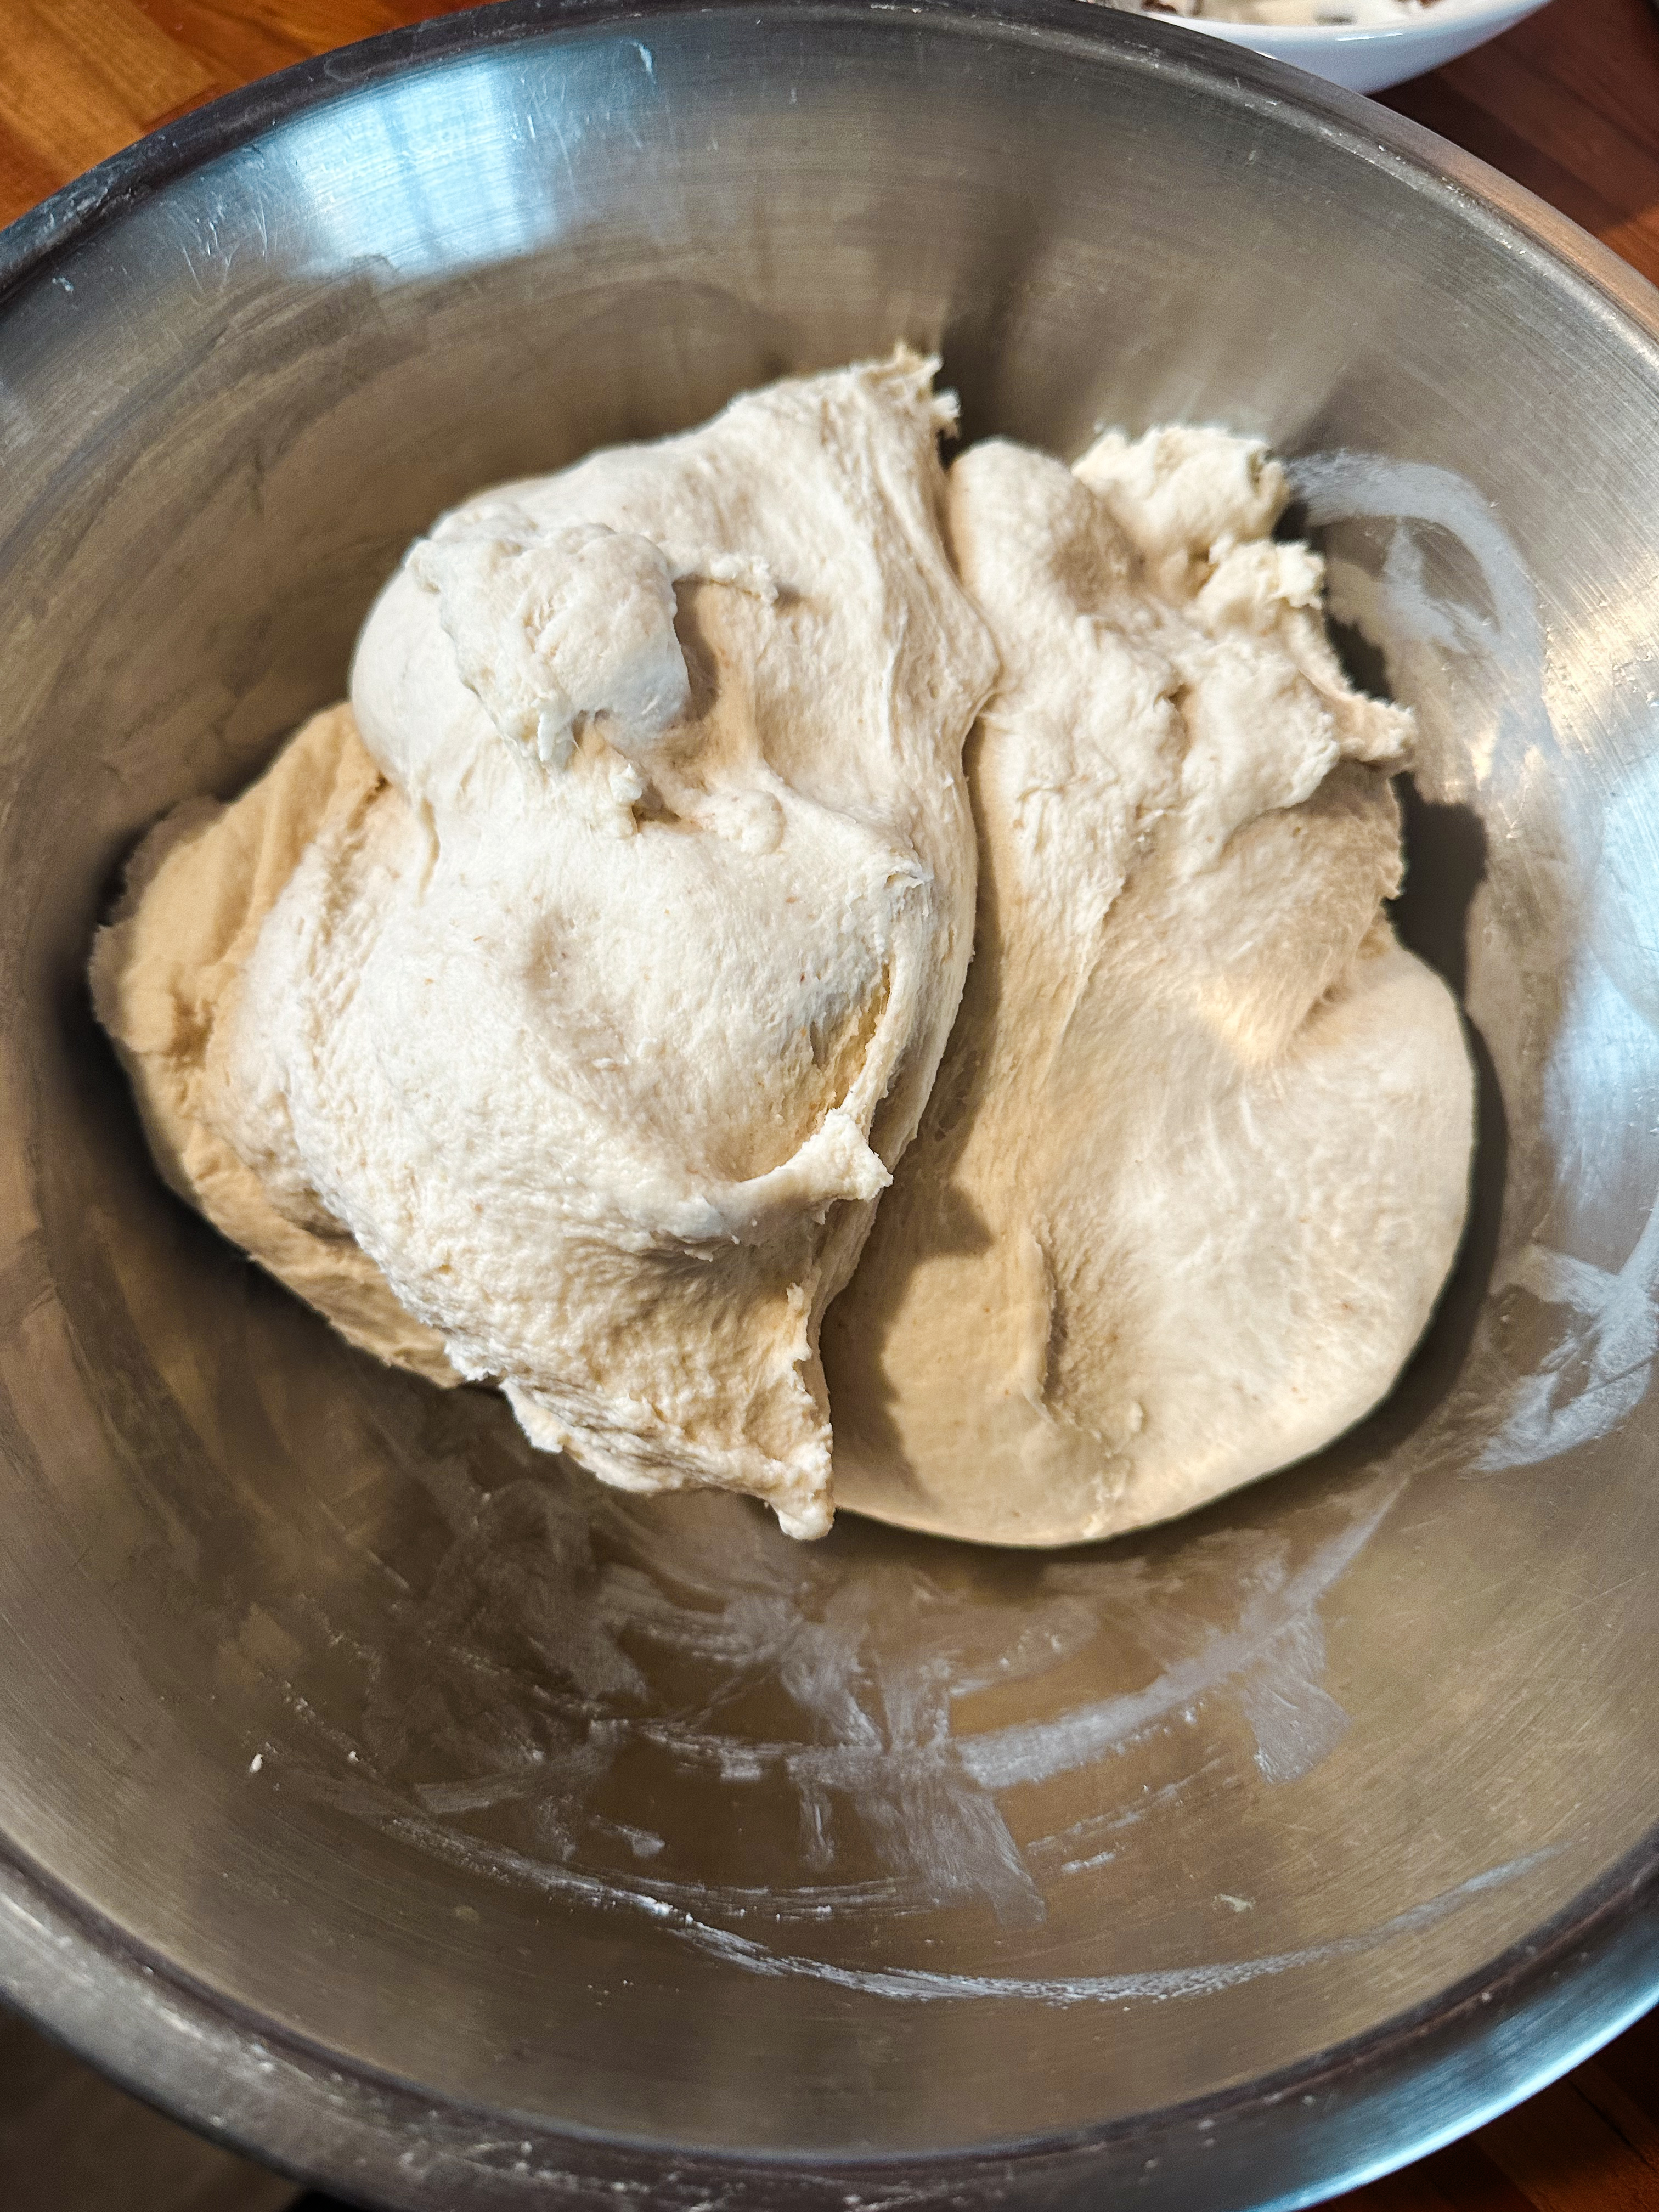
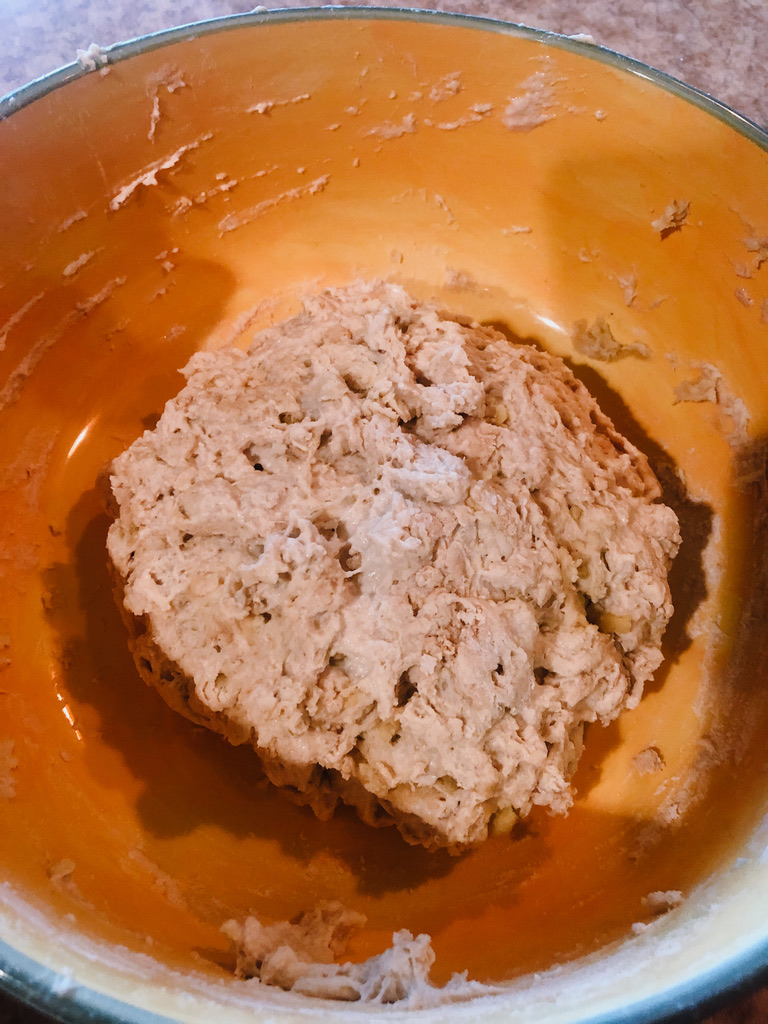
The night before: Add the pizza crust ingredients into a large mixing bowl. Using your hands, mix until all the ingredients are incorporated. Cover the bowl and let it ferment over night at room temp.
Fully Mixed Dough
Fermented dough the next morning
In the Morning: wet your hand with water and gently pull one side of the dough up & over its self. Turn the bowl and complete this on all sides.
Cover the bowl and place in the fridge up until about 36 hours until you are ready to bake. You can skip this step if you’d like and get right to cooking!
When you’re ready to eat: remove the bowl from the fridge and let sit for about 30 min.
Divide the dough into 4 pieces on a floured surface, shape the dough into a ball form and let rest for about 30 min. Cover with a towel
Turn the broiler on high and heat up a cast iron skillet. While the skillet is heating up, press the dough into about an 8″ circle (use as much flour as you need)
Remove the skillet once it is hot and place the dough into the skillet. Put on whatever toppings you desire and then place back into the oven for about 5-6 minutes, or until the crust on the bottom begins to char.
Remove from heat, slice it up, & enjoy with friends, family, or just yourself.
We all have so much time on our hands that it’s the perfect time to try new things. Sourdough bread has been something that is on my mind, but it always seemed out of reach, the starter, the fermentation process. I did not understand anything about it. I figured now was the perfect time to figure out this whole process. King Arthur Flour has the BEST guide for making your own starter, so that is what I am going to share with you. I think the best possible thing you can have in your kitchen when making a starter is a kitchen scale, this thing saved me! Now you can always get some starter from a friend, or beg a bakery for a bit of theirs, but truly what fun is that. Here is the guide that I used to make my starter and eventually, my own bread. My best advice is be patient, this is going to take some time!
Ingredients
To Begin the starter:
1 Cup/113g whole rye or whole wheat flour
1/2 Cup/113g cool water
To Feed starter
1 Cup/113g unbleached All-purpose flour
1/2 Cup/113g cool water (if the house is warm) or lukewarm water (if house is cold)
Let’s Get Fermenting
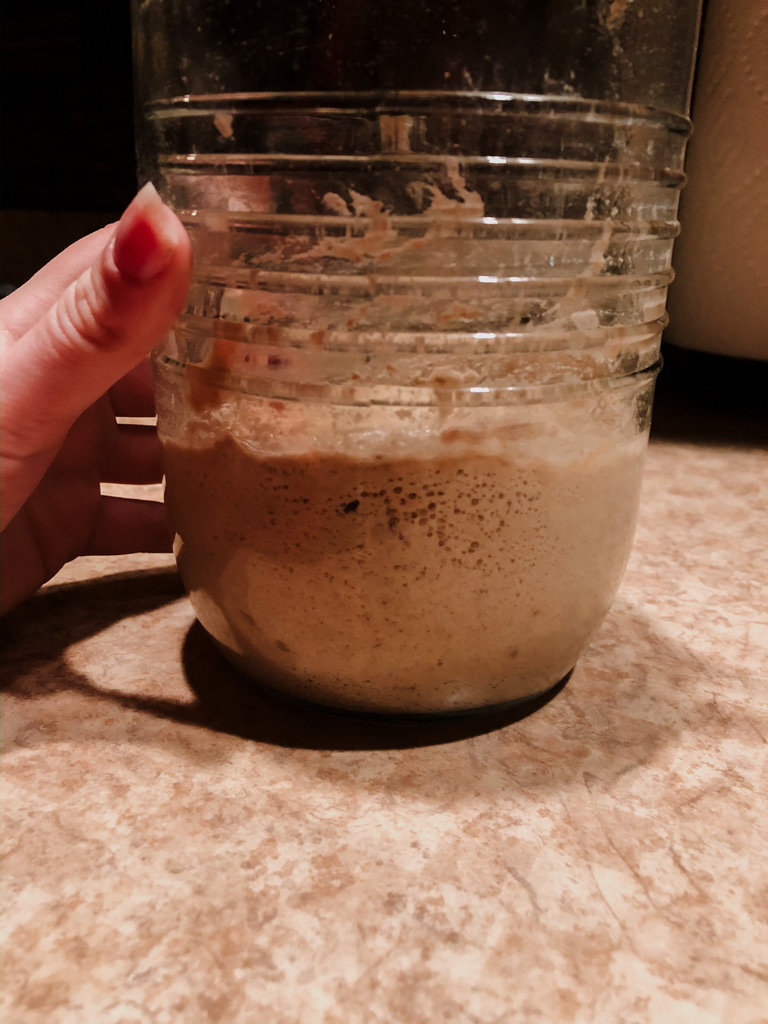
Day 1: start the process by combining the whole wheat flour with cool water in a non-reactive container. Glass is recommended & what I used as well. Be sure that whatever you store it in the starter has room to grow. Stir all the ingredients together and cover. Let the container sit at room temperature/70 degrees for 24 hours.
Day 2: Some bubbling my start appearing on the sides of the container. Now discard about 1/2 cup/4oz of the starter. Add what is left of the starter to 1 cup/113g of unbleached all-purpose and 1/2 cup/113g cool or lukewarm water depending on your house temperature. Mix well & let the mixture rest again for 24 hours.
Day 3: MORE ACTIVITY, there should be some bubbling and it may even start to smell a little bit differently now, THIS IS GOOD! This is soon going to get repetitive, but you are now going to move to 2 feedings in a day. This starter is now your new pet!
Discard all but 1/2 cup/4oz and combine with the 113g unbleached and 113g water. Mix & cover like usual. This time however, you are going to repeat the step in 12 hours.
Day 4: Discard all but 4oz/1/2 cup and combine with 113g of unbleached flour and water. Feed again in 12 hours
Day 5: At this point your starter should have doubled in volume, there will be lots of bubbles, and a very different smell than when you started. Repeat the same steps you completed in Day 4 until the starter has risen enough.
If your starter has risen enough feed it one more time before using what you need to make the bread. One thing I have to say is do not worry about this being perfect. There were times that I forgot to feed the starter twice, or I didn’t do it at the same time. Trust me it all works out, it will just make the process a little longer! Store the starter in its permanent container and place in the fridge. Feed once a week with the 113g flour and water.
I hope this guide is helpful, please check out King Arthur’s guide as well for any extra tips! This process is very rewarding once you realize that you were able to make your own sourdough at home! It’s no easy task & you should be proud!