Lemon & Raspberry Pound Cake

I was home a few weekends ago, and my mom kept talking about how she wanted a pound cake. I love a good loaf cake, especially in the summer when bright flavors can be added. I decided to switch it up and go with a lemon and raspberry combo. I wanted something extra tart with this heat wave we have been having. Shout out to YEY Food for the recipe.

Ingredients

Pound Cake:

  • 1 1/2 cups (3 sticks) unsalted butter, softened
  • 1 3/4 cups granulated sugar
  • 4 large eggs
  • 3 cups all-purpose flour
  • 1 teaspoon baking powder
  • 1/2 teaspoon salt
  • 1 cup milk
  • 1 tablespoon grated lemon zest (from about 2 lemons)
  • 1/2 teaspoon vanilla extract
  • 1 cup fresh raspberries

Lemon Glaze:

  • 1 cup powdered sugar
  • 2-3 tablespoons fresh lemon juice

Let’s Get Baking

Full transparency: when making this cake, I missed ingredients and had to remake it. Do not be like me and make sure to read the instructions!

Preheat oven to 350°F. Grease a 9×5-inch loaf pan and set aside. Zest your lemons and rinse the raspberries.

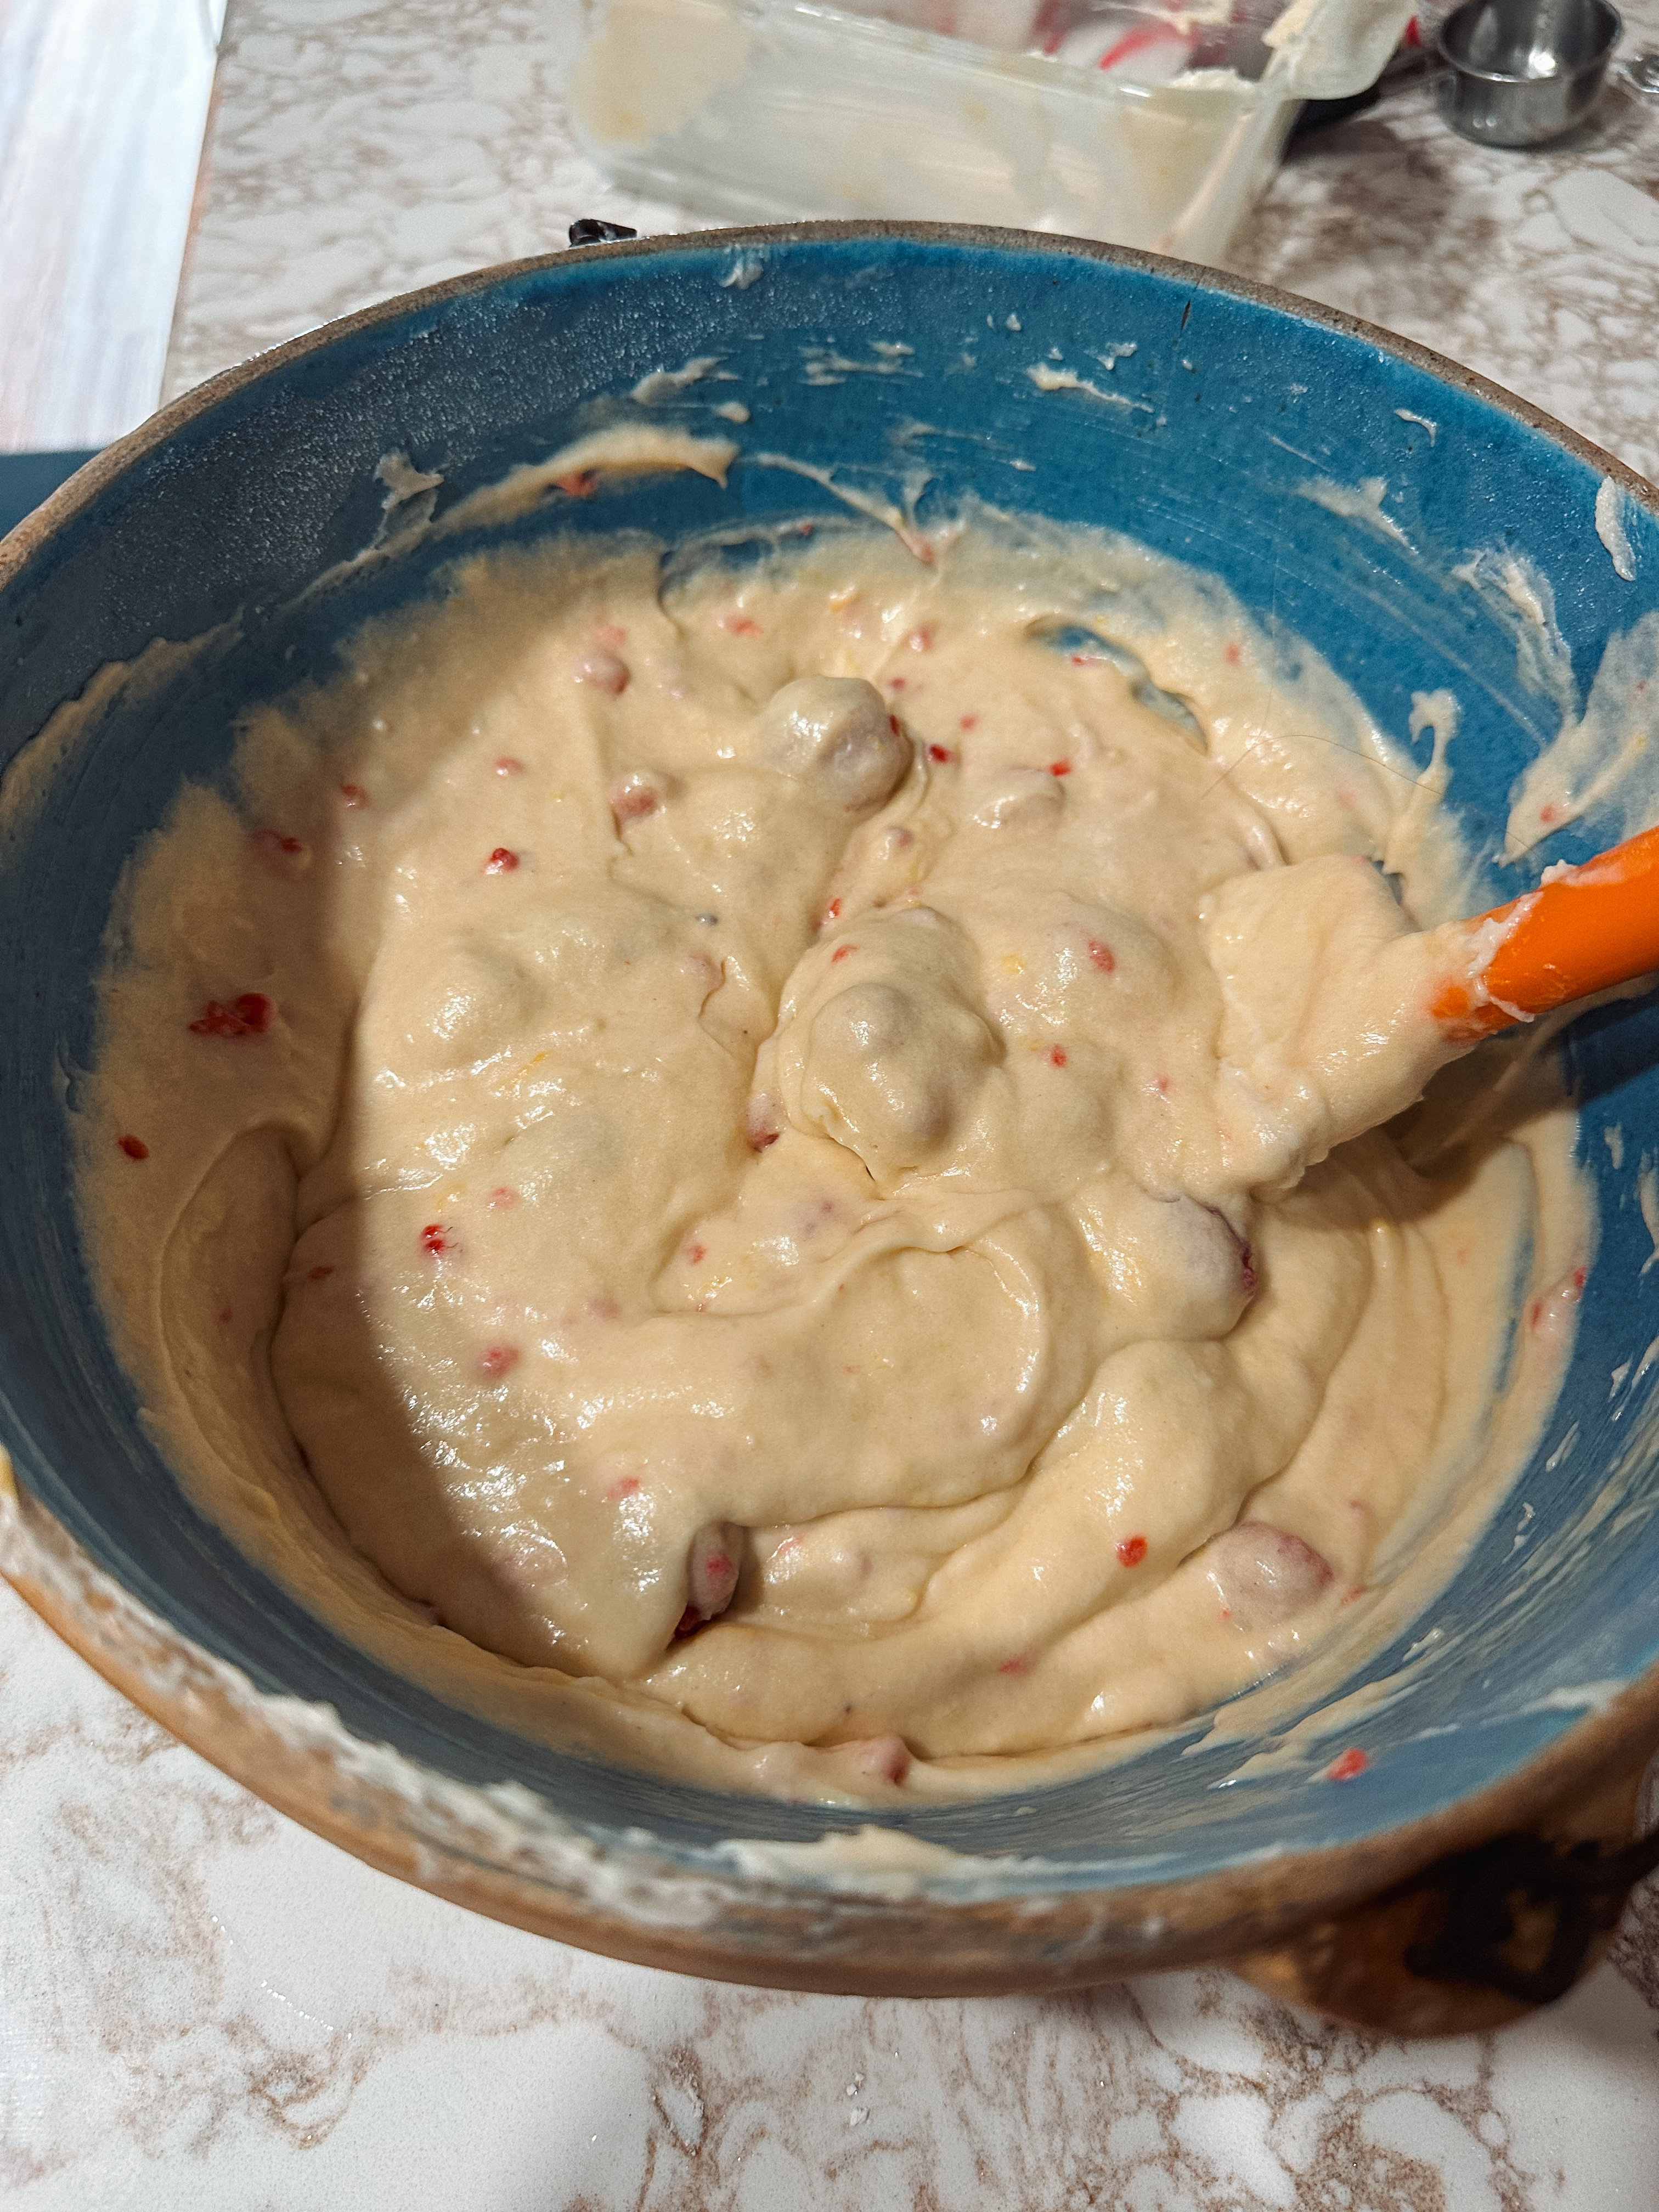
In a large bowl, using an electric mixer, cream together butter + sugar until light yellow and fluffy. Beat in eggs one at a time, then stir in vanilla extract.

In a separate bowl, whisk together flour + baking powder + salt. Add dry ingredients to wet ingredients and alternate with milk, starting and ending with the dry ingredients. Mix until just combined.

Gently fold in lemon zest and fresh raspberries. Do not overmix, or the raspberries will break down.

Pour batter into prepared loaf pan. Bake for 55-60 minutes, or until a toothpick inserted into the center comes out clean. Let the cake cool for 5-10 minutes, then remove from pan and place on a wire rack.
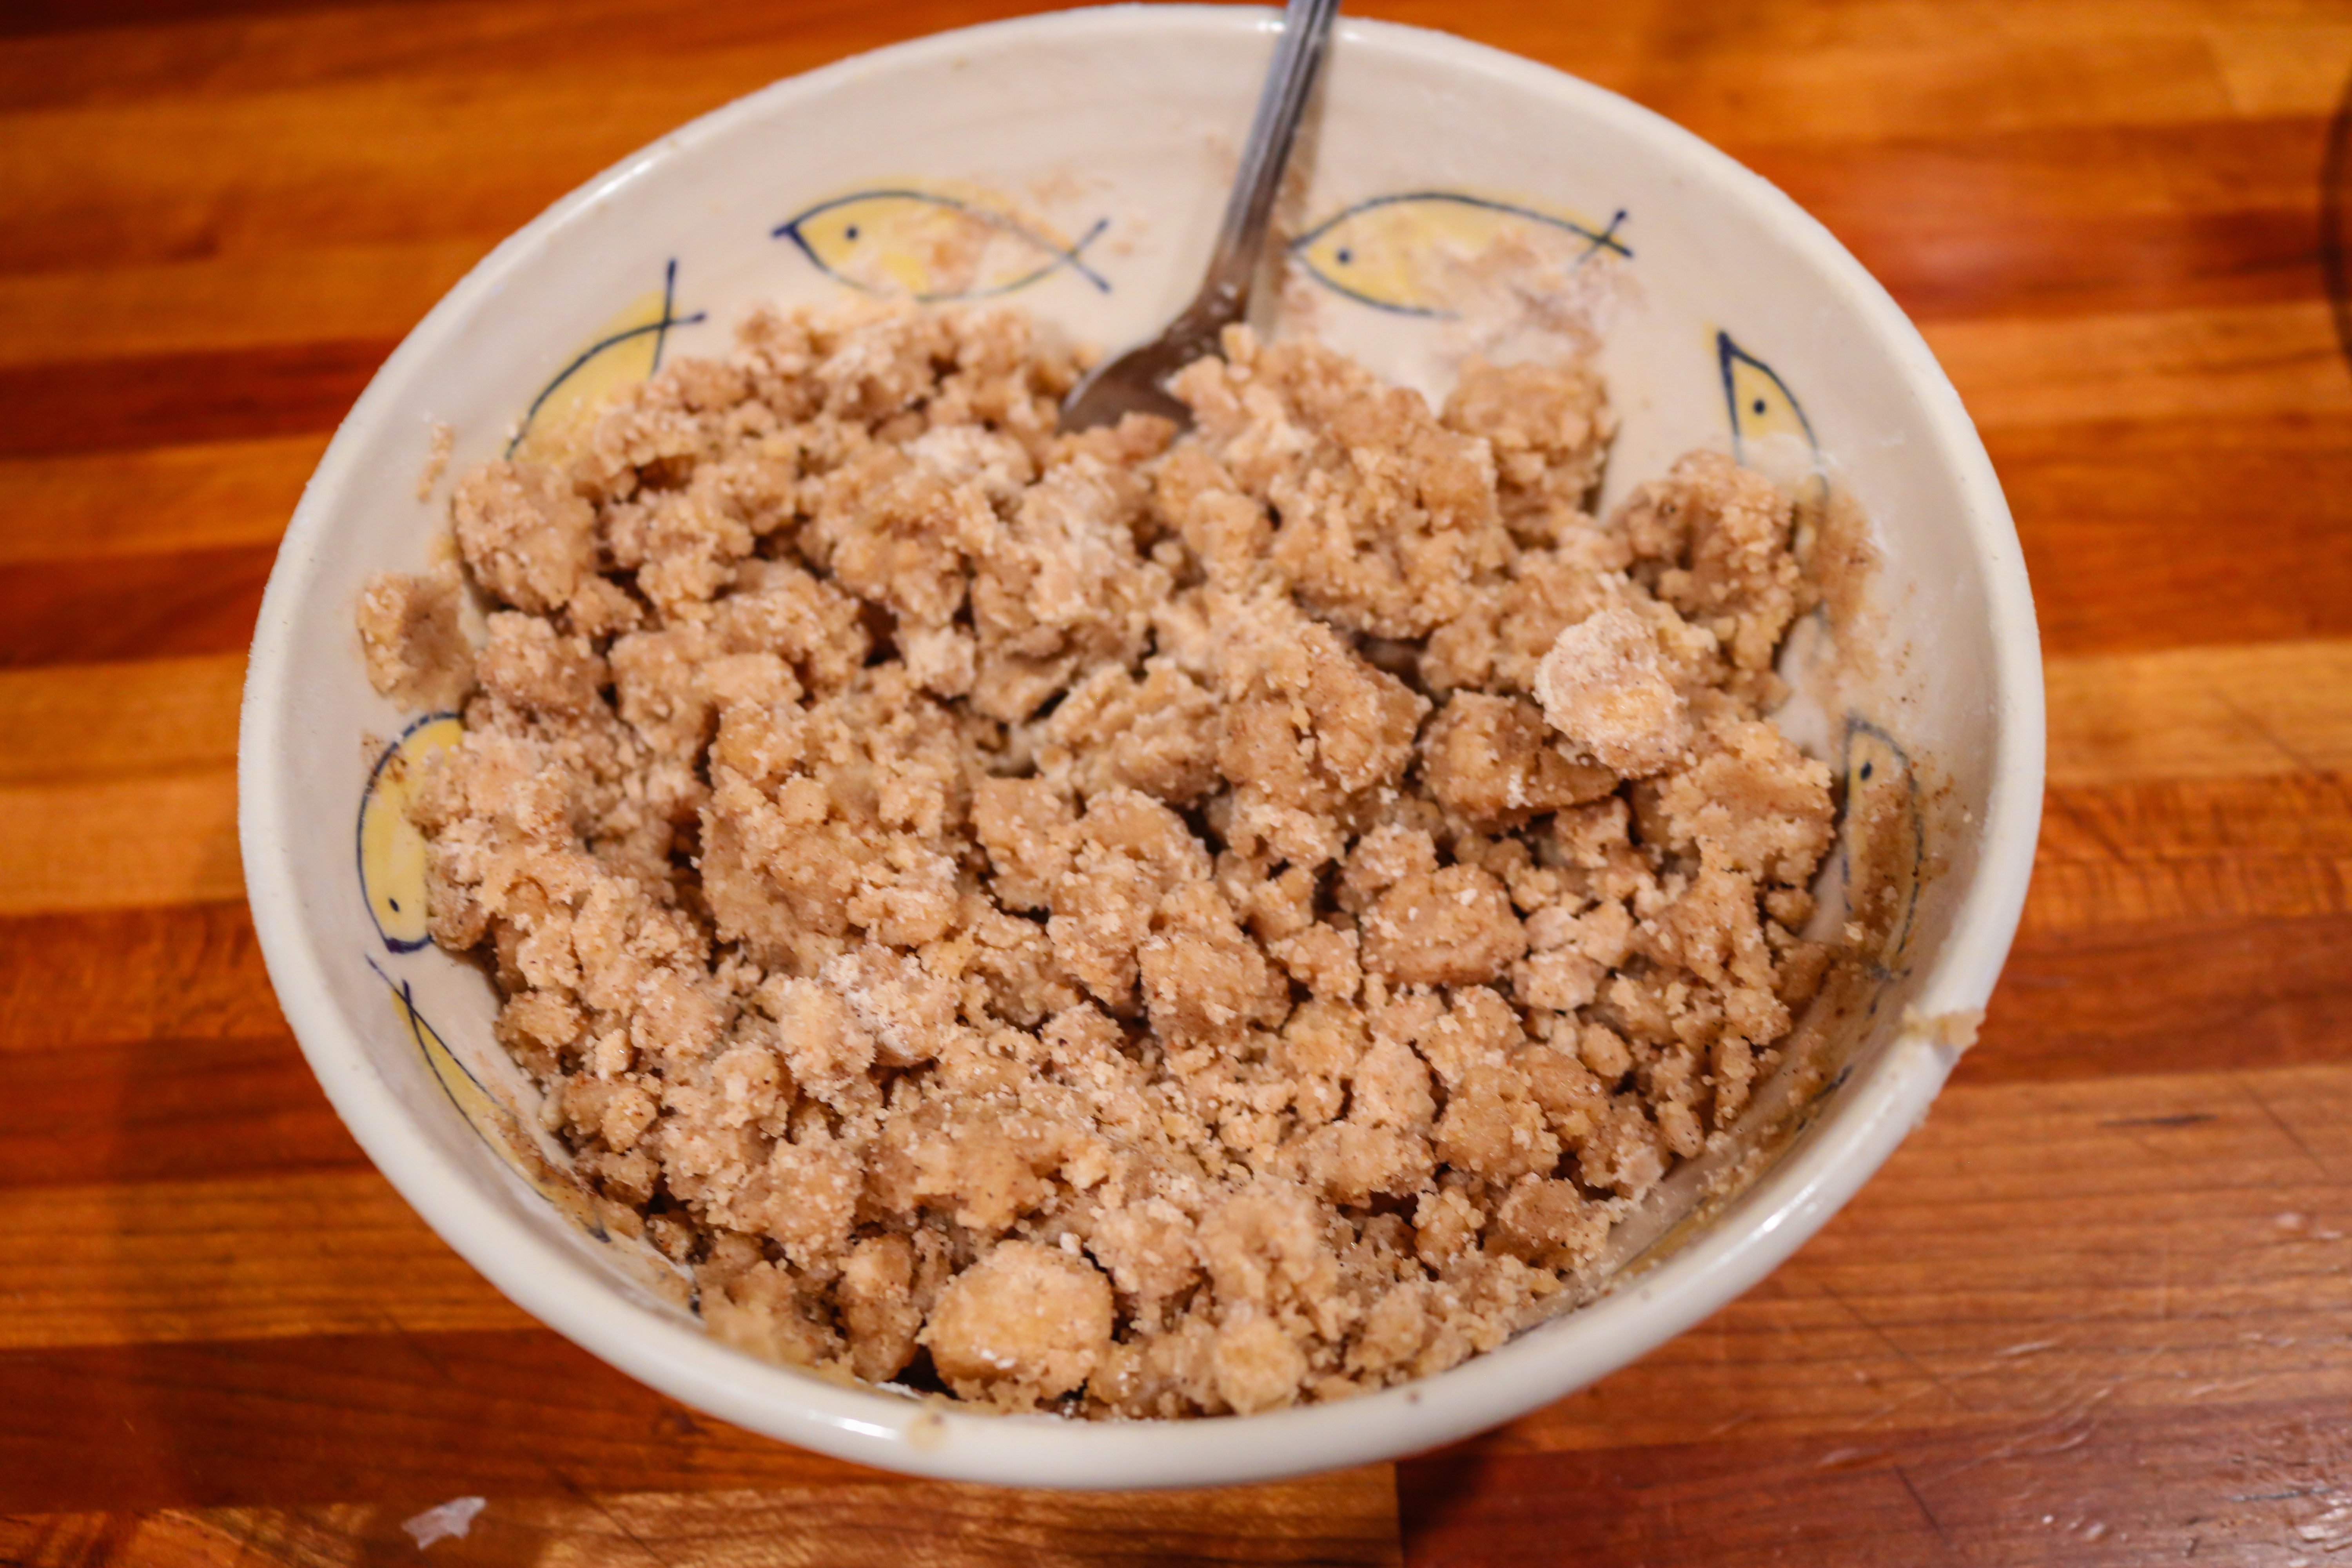
Lemon Glaze

In a small bowl, whisk together powdered sugar + lemon juice to make a thin glaze.

Once the cake is completely cool, drizzle the lemon glaze over the top.

Eat immediately or wrap tightly in foil/plastic wrap and keep in the fridge.

Made with Love,

Hannah

    Grilled Scampi

    I love a fish market because I come across things that I do not normally cook with, like these scampis, also called langoustines. I found these with their shells on and with it being August I thought why not throw them on the grill! I love the simplicity of this dish; you can serve these on their own, on top of pasta, or with some crusty bread!

    Ingredients

    • 1/4 Cup Olive Oil
    • 1 Large Lemon, juiced
    • Fresh Parsley
    • 1 Garlic Clove, minced
    • Salt + Pepper
    • 1 LB Scampi

    Let’s Get Cooking

    In a large bowl combine scampi + olive oil + lemon juice + parsley + garlic + salt + pepper. Cover with plastic wrap and marinade in the fridge for 30 minutes.

    Lightly oil the grill and place the scampi directly on the grates. Grill 2-3 minutes on each side or until opaque.

    Enjoy immediately.

    Made with Love,

    Hannah

    Crispy Lemon Potatoes w/ Whipped Dill Ricotta

    When you first read this recipe title it seems like it’s going to be complicated, I promise you it’s not. This recipe is so damn delicious it is on my MUST-MAKE list. It is the perfect side dish, thanks to The Feed Feed, as the potatoes are crispy on the outside and fluffy on the inside and have this amazing lemony flavor. THEN paired with this cooling and herby ricotta sauce to dip them in, truly I cannot say enough, I almost said fuck it and ate them as my main dish instead. The recipe calls for baby potatoes, but I used leftover russets I had and cut them into 1-inch slices and they turned out perfect.

    Ingredients

    • 1 1/2 LB Baby Potatoes, halved/ or russets cut into 1-inch thick slices and halved
    • 1 TSP Kosher Salt
    • 2 TBSP Olive Oil
    • 1/4 Cup Grated Parmesan Cheese
    • 1/2 Lemon, Juice + Zest
    • 2 TSP Dijon Mustard
    • 1 TSP Smoked Paprika
    • Kosher Salt + Black Pepper to taste

    Whipped Dill Ricotta Dip

    • 1 Cup Ricotta Cheese
    • 1 TBSP Greek Yogurt
    • Handful Fresh Dill / I used 1 TBSP Dried Dill
    • 1 TBSP Fresh Lemon Juice
    • 1 Garlic Clove, finely diced
    • Kosher salt + pepper to taste

    Let’s Get Cooking

    Add the prepared potatoes into a large pot and cover with cold water. Add in salt and bring to a boil, cook until they are fork tender, about 8 minutes. Drain the potatoes and place them back into the pot, allowing them to steam for a few minutes.

    Preheat the oven to 425F.

    Add olive oil + lemon zest + lemon juice + Dijon mustard + smoked paprika + grated parmesan cheese + black pepper to the potatoes. Stir well to coat. Place the lid onto the pot and shake the pot back and forth, creating some texture to the potatoes

    Spread the potatoes evenly on a lined baking sheet with parchment paper, cut side down, for 32 minutes, or until crispy.

    While the potatoes are cooking, combine the ingredients for the whipped ricotta in a food processor or blender. Blend for one minute and adjust the seasonings to your taste.

    Once the potatoes are finished cooking, let cool slightly before enjoying with a side of the dip.

    Made with love,

    Hannah

    Sour Cherry Crumb Cake

    Young Hannah would be questioning me right now as I never was one to like fruits in my desserts. But then you turn 27 and all of a sudden you don’t mind it! This recipe comes from Bon Appetit and I made it a while back solely because the picture in the magazine looked so delicious and I had to see if it tasted just as good. Though this is a bit more of a summer recipe, in using fresh cherries, I used frozen cherries and it came out AMAZING. If you’re not normally a ‘fruit in dessert’ person, trust me on this one.

    A note from Bon Appetit: If you can’t find sour cherries, you can use sweet ones! Just reduce the sugar in the cherry swirl to 1/4 Cup and mix in the zest + juice of 1 lemon after it’s cooled.

    Ingredients

    Cherry Swirl

    • 1 1/2 lb Fresh Sour Cherries, pitted or frozen
    • 1/2 Cup Granulated Sugar
    • 1/2 TSP Diamond Crystal or 1/4 TSP Morton Kosher Salt

    Streusel

    • 1 1/4 Cups All Purpose Flour
    • 1 Cup Light Brown Sugar
    • 1/4 TSP Salt
    • 1 TSP Ground Cardamom [ I couldn’t find in my grocery store so I replaced with Nutmeg]
    • 1 TSP Cinnamon
    • 1/2 Cup Unsalted Butter, melted, slightly cooled

    Cake

    • 2 Cups All Purpose Flour
    • 1 TSP Baking Powder
    • 1 TSP Baking Soda
    • 1/2 TSP Salt
    • 1 Cup Granulated Sugar
    • 1/2 Cup Unsalted Butter, room temp
    • 2 Large Eggs
    • 1 Cup Sour Cream [ I used low-fat Greek yogurt]
    • 1/3 Cup Buttermilk
    • 2 TSP Vanilla Extract

    Let’s Get Baking

    Make the cherry swirl: in a medium saucepan bring the cherries + granulated sugar + salt to a boil. Cook, stirring often and smashing cherries with a wooden spoon, until they are softened and just coasted in Syria, about 15-20 min for fresh, 25-30 min for frozen. Let cool.

    Make the streusel: whisk flour + brown sugar + salt + cardamom + cinnamon in a medium bowl. Pour butter over and gently mix with a fork until just crumbs begin to form. Be careful not to overmix, set aside.

    Make the cake: preheat the oven to 350 F and line a 13×9″ baking pan with parchment paper, leaving an overhang on the sides.

    Whisk flour + baking powder + baking powder + baking soda + salt in a medium bowl to combine.

    Beat granulated sugar + butter in a bowl of a stand mixer with the paddle attachment. Beat on medium speed until light and fluffy, about 2 minutes. Add in eggs one at a time.

    Mix in sour cream + buttermilk + vanilla. Reduce speed to low and add in the dry ingredients, mix until just combined. Using a rubber spatula, scrape down the sides of the bowl to incorporate everything.

    Scrape 2/3 of the batter into the prepared pan and spread into an even layer. Spread the cherry swirl over then top with the remaining batter. Top with the reserved streusel.

    Bake for about 35-40 minutes or until a tester comes out clean. Let cool in the pan for at least 30 minutes before cutting.

    Enjoy!

    Made with Love,

    Hannah

    Crab Cakes

    Being in mostly land-locked Ohio, I don’t always get access to seafood, which I love very dearly. I was craving crab cakes the other day and rather than trust a restaurant, I figured I’d make them myself, thanks to a recipe from Instagram by GetFitwithNeil. Check out your local fish monger to get some fresh lump crab!

    Ingredients

    • 1 LB Jumbo Lump Crab Meat,
    • 2 Large Eggs
    • 2 1/2 TBSP Mayo
    • 1 1/2 TSP Dijon Mustard, I’ve used whole grain as well and it’s good
    • 1 TSP Worcestershire Sauce
    • 1 TSP Old Bay Seasoning
    • 1/4 TSP Salt
    • 2 TBSP Fresh Parsley, I do 1 TBSP Dry
    • 1/2 Cup Panko
    • 1/4 Cup Celery, finely chopped

    Aioli:

    • 1/2 CUP Mayo
    • 1/4 CUP Sour cream
    • 1 TSP Lemon Juice
    • 2 TSP Hot Sauce
    • 1/4 TSP Paprika
    • 1 TSP Dijon/Whole Grain Mustard
    • Salt to taste

    Let’s Get Cooking

    Mix together the eggs + mayo + mustard + Worcestershire + old bay + salt + parsley + celery in a large bowl.

    Add in the crab meat, gently breaking some of it up and the panko. Gently mix until it all comes loosely together.

    Prepare a baking sheet with parchment paper. Shape the crab cakes and place on the baking sheet.

    Place in the fridge for at least an hour so they came come together.

    Heat a non-stick pan and lightly coat the bottom with oil, when the pan is hot add in the crab cakes and cook for about 3-5 min each side, until the bottoms are golden brown.

    To make the aioli: mix all the ingredients in a small bowl together, salt to taste.

    Serve warm with aioli.

    Enjoy!

    Made with Love,

    Hannah

    Homemade Dill Pickles

    I think there is something special about making something yourself that you could easily buy at the store, like pickles! This is my second year with making my own pickles and canning them, it makes me feel so sustainable, especially when using my own produce. Canning to me is a lost skill, mostly something my grandparents and those before them did, so I am excited to start learning this for myself and fill up my shelves! Foodie with Family helped me with the canning basics. I was going for a super garlicky-dill pickle here and I revamped the recipe a little from last year, as it takes 6-weeks before I can try them out I will comeback with a flavor-update. I made 2 quarts worth, so edit this recipe as you need.

    Ingredients

    You’ll need pint-sized Mason jars and a large pot with a lid and rack in order to seal the jars, it is helpful to have the rack but not necessary.

    • 8 Garlic Cloves, smashed, 2 per jar
    • 16 Black Peppercorns, 4 per jar
    • 1/8 TSP Allspice, per jar
    • Bunch of Dill, about 4 small stalks per jar
    • 1/4 TSP Mustard Seeds. per jar
    • 1/8 TSP Red Pepper Flakes, per jar
    • 1 1/2 Cup Apple Cider Vinegar
    • 1/2 White Vinegar
    • 4 Cups Water
    • 2 TBSP Pickling Salt
    • 4 Bay Leaves, 1 per jar
    • 1 LBS Pickling Cucumbers, washed, ends cut off, halved then quartered

    Let’s Get Canning

    First things first you need to sanitize your jars & lids. I submerge my jars & lids in boiling water for 5 minutes, then safely remove and let cool.

    Prep all your ingredients, cut your cucumbers, peel and smash your garlic.

    Prep the jars: to each jar add, 2 smashed garlic cloves + 1 bay leaf + 4 stalks of dill [ go crazy with it ] + 4 peppercorns + 1/8 TSP Allspice + 1/4 TSP Mustard Seeds + 1/8 TSP Red Pepper flakes. Add in the cucumbers on top, I went about 10 cucumbers per jar, they can be a little packed, but don’t force them in.

    To make the brine, scale it according to the amount you’re making. In a saucepan, combine Apple Cider Vinegar + White Vinegar + Pickling Salt + Water and bring to a boil. Once boiling, pour into your prepared jars, making sure you leave 1/2″ headspace at the top.

    Place the lids on the jars and gently tighten the ring around the jar, just enough that it has some resistance. This is when your huge canning pot comes in handy.

    Bring the water to a rolling boil in your canning pot. Once boiling, add in your sealed jars, since I used pints, Foodie with Family noted I needed to boil for 15 minutes before removing and letting cool. The popping sound you may hear while cooling is completely normal! Allow to cool overnight before checking the seal. If the lid bounces back after pushing in the middle then be sure to move to the fridge, if there is no give they are good to sit on the shelves! Be sure to date the lids with the date the pickles were made. The pickles are ready in 6 weeks, so see you then for the taste test!

    Made with Love,

    Hannah

    Zucchini Fritters

    With it being the middle of July we can finally begin to reap benefits from our harvest! Though I did not grow these zucchini’s myself, my mom gave me TONS from the farmers market. After making 2 loafs if zucchini bread [I recommend trying out my chocolate zucchini bread], I was not sure what else to make. I came across this zucchini fritter recipe from Bon Appetit and I figured it was the perfect side dish. It was a fantastic use of the zucchini that is great on it’s own or topped with your own creation.

    Ingredients

    • 1 1/2 LBS Zucchini, grated
    • 1/2 TSP Salt
    • 1 Large Egg
    • 1/4 Cup All Purpose Flour
    • 3 TBSP Chives, finely chopped
    • 1 TBSP Cornstarch
    • Fresh Cracked Pepper
    • 1/3 Vegetable Oil

    Let’s Get Cooking

    Place the zucchini in a strainer and toss with 1/2 tsp salt. Let sit for 10 minutes then wring the zucchini dry with a cheese cloth or kitchen towel.

    Place the zucchini in a large bowl, add in the egg + flour + chives + cornstarch + salt + pepper.

    Heat the oil in a large skillet over MED heat. Working in batches, drop 1/4 cupfuls into the skillet, flattening slightly. Cook until golden, about 3 sides each. Transfer to a paper-towel lined plate & season with salt.

    Serve warm.

    Made with Love,

    Hannah

    BLT Salad with Homemade Blue Cheese Dressing

    When you have all of the ingredients of a BLT just hanging out in your fridge you are obligated to make one; even more so when we will have delicious fresh tomatoes right off the vine! To tie this all together I thought a homemade blue cheese dressing would work perfectly and add a little funkiness.

    Ingredients:

    Blue Cheese Dressing:

    • 1 Cup Mayo
    • 1/2 Cup Plain Greek Yogurt
    • 1 TBSP Apple Cider Vinegar
    • 1 TBSP Dried Parsley
    • Juice of 1/2 Lemon
    • 1/2 Cup Blue Cheese Crumbles
    • 2 Cloves Garlic, finely minced
    • 2 TBSP White Onion, finely minced
    • Salt + Pepper, to taste

    BLT Salad

    • 2 Heads Romaine, washed & chopped
    • 1 Container of Cherry Tomatoes, halved
    • 1 Avocado, diced
    • 1 Cucumber, sliced then halved
    • 3-4 Radishes, sliced
    • 3-4 Bacon slices, cooked & chopped

    Let’s Get Cooking

    In a medium-sized container with a lid, combine all of the blue cheese dressing ingredients. Stir well and taste, add more of whatever you feel it needs! Place it in the fridge and let it all come together for about an hour.

    In a large bowl, add in your salad ingredients and mix well! I plated my salad, making sure I had a little bit of everything before topping it with dollops of the blue cheese dressing and extra cracked black pepper.

    It’s creamy, it’s crunchy, it’s fresh, & delicious!

    Made with Love,

    Hannah

    Barefoot Contessa’s Summer Garden Pasta

    I live & die for any recipe that shows off the fresh ingredients. This Barefoot Contessa Summer Garden Pasta is the ONE. I mean the one and only pasta you need to be making this summer. Not only is it so freaking easy to make, but it also shows off the most beautiful produce that you may just be growing in your backyard right now!!! Since this is a no-cook sauce, you heard me, no cook; be sure to allow the tomatoes to sit the full 4 hours to really infuse that oil and soften up. I made mine with some Ohio City Pasta, which is always a favorite to grab at the Hudson Farmer’s Market, but feel free to use whatever pasta you desire. Barefoot Contessa made this dish for 6, I did enough for just 1 person.

    Ingredients

    • 5 Cherry Tomatoes, halved
    • Good Olive Oil
    • 3 Garlic Cloves, minced
    • 5 Large Basil Leaves, julienned + more for serving
    • 1/2 TSP Crushed Red Pepper Flakes
    • Salt + Pepper
    • Single Serving of Pasta
    • Parmesan Cheese

    Let’s Get Cooking

    In a medium bowl, combine tomatoes + 1/4 Cup Olive Oil + basil leaves + red pepper flakes + salt + pepper. Cover with plastic wrap and set aside at room femp for about 4 hours.

    When ready to serve, bring a pot of water with a drizzle of olive oil + salt to a boil. Cook the pasta to al dente according to the package directions. Dain the pasta and add to the bowl with the tomatoes. Top with cheese & extra basil leaves.

    I hope after your take your first bite you put your fork down and lean back in your chair in awe of how delicious this dish is.

    Made with Love,

    Hannah

    Mediterranean Pasta Salad

    It’s June, so it’s pretty much summer. Here in Ohio, it’s been in the high 80s for the last week so all of us have been avoiding those hearty-heavy meals. So now I am turning to pasta salad, it’s light, and you can pack it with all your favorite colorful veggies. This pasta salad takes a Mediterranean approach, focusing on our veggies & healthy fats!

    Ingredients

    • 1 Package of a Pasta of your choosing, I used Chickpea Protein Pasta
    • 1/2 Cucumber, sliced & quartered
    • 1/4 Cup Kalamata Olives
    • 1/4 Cup Green Olives
    • 1/2 Red Onion, sliced
    • 1/2 Cup Cherry Tomatoes, sliced
    • 1/3 Cup Artichokes, chopped
    • 1/4 Cup Olive Oil + more if needed
    • 2 TBSP Red Wine Vinegar
    • 1 TSP Parsley
    • 1 TSP Oregano
    • Salt & Pepper

    Let’s Get Cooking

    Cook your pasta according to package directions and rinse.

    Prep all the ingredients

    In a large bowl, add in the pasta + cucumber + olives + red onion + tomatoes + artichokes and mix well.

    Pour over the olive oil + red wine vinegar + oregano + parsley + salt + pepper and mix well.

    If you’re making this for meal prep, separate your salad into individual containers. Or share with a group of family and friends.

    Made with Love,

    Hannah