If you are feeling in a spooky mood this Halloween season this simple burger is a great way to celebrate! I am not a mushroom gal so no mushrooms for me on my burger, but my mom and brother loved them! This is another recipe from Bob’s burger recipe book and he still hasn’t failed me yet; and don’t forget the fries!
Ingredients
1 10oz Package White Button Mushrooms, sliced
2 TBSP Butter
1 LB Ground Beef
8 Thick Slices Muenster Cheese
4 Buns
Green Leaf or Boston Lettuce
Ketchup
Let’s Get Cooking
Saute the mushrooms in the butter over MED-HIGH heat until they are limp and light brown
Form 4 patties and season both sides with salt and pepper. Cook the burgers to your preferred doneness, I always go for a Medium Rare, so about 6 min per side.
While the burgers are over the heat, put one slice of Muenster on each burger. Then pile on a scoop of mushrooms and then a second slice of Muenster to hold the mushrooms together. [If you’re like me and want no mushrooms, I still went for 2 slices of cheese, the more cheese the better!]
To build the burger: Bottom bun, lettuce, cheesy mushroom burger, a dash of ketchup, and top bun.
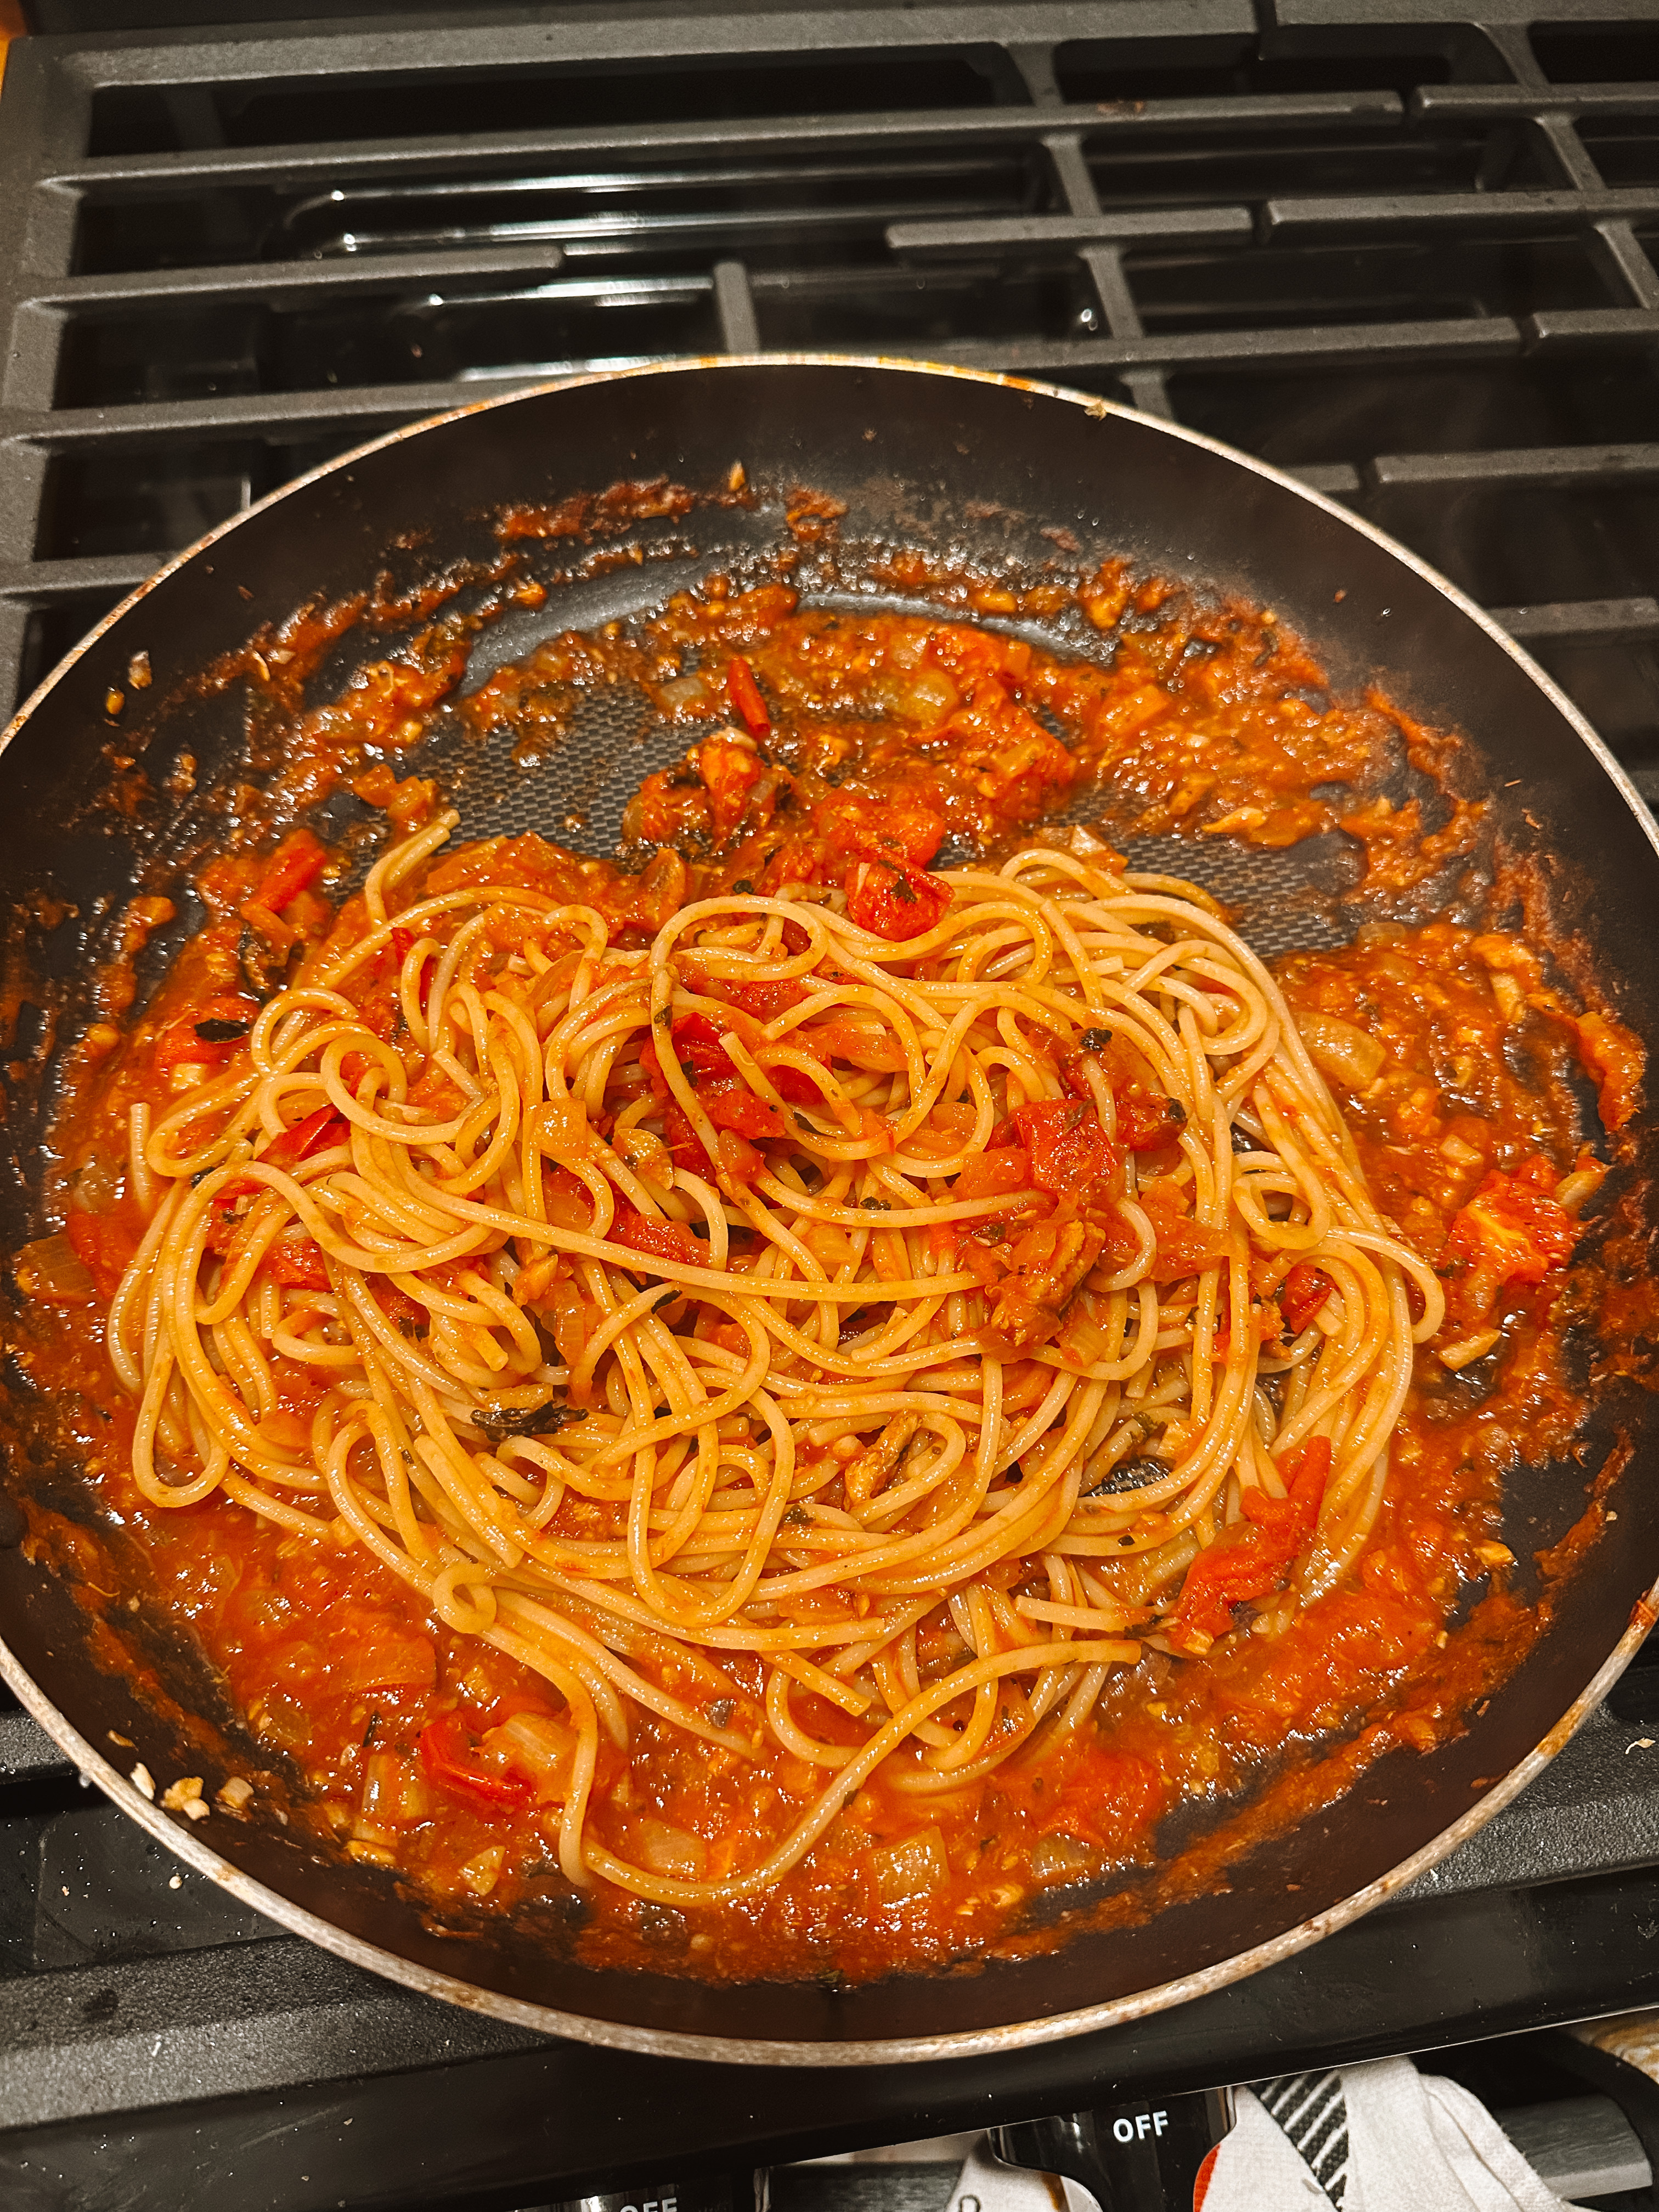
I am mad at myself for being so late on the tinned fish game. I had these spicy sardines from the Tinned Fish Market and pasta sounded like the perfect thing to add them to. This recipe comes from Crafty Cooking Mama and it turned out great! With it just being me the sauce made enough for left overs for the next night! Feel free to use whatever kind of sardines you like, I used spicy ones to add an extra kick.
Ingredients
1/2 Onion, minced
3 TBSP Olive Oil
4 Garlic Cloves, minced
1/4 Cup White Wine
3 Cups Crushed Tomates
1 TSP Red Pepper Flakes
1 TSP Dried Basil
1/2 TSP Salt
1/2 TSP Dried Oregano
1/2 TSP Dried Parsley
3 Sardines + a little oil from the tin
Spaghetti of your choice
Salt + Pepper
Let’s Get Cooking
Heat olive oil in a large skillet.
Saute the onions until translucent, about 10 minutes. Add in the garlic and saute for a minute. Add in the white wine and scrape the pan to deglaze.
Add in the crushed tomatoes + red pepper + basil + salt + oregano + parsley and simmer covered for about 15-20 min.
Cook the pasta according to package instructions. Reserve 1/4 Cup of the pasta water and add to the sauce.
After simmering, add in the sardines + a little of the oil and simmer on low for about 10 min, use your spatula to break up some of the sardines. Add more red pepper if needed.
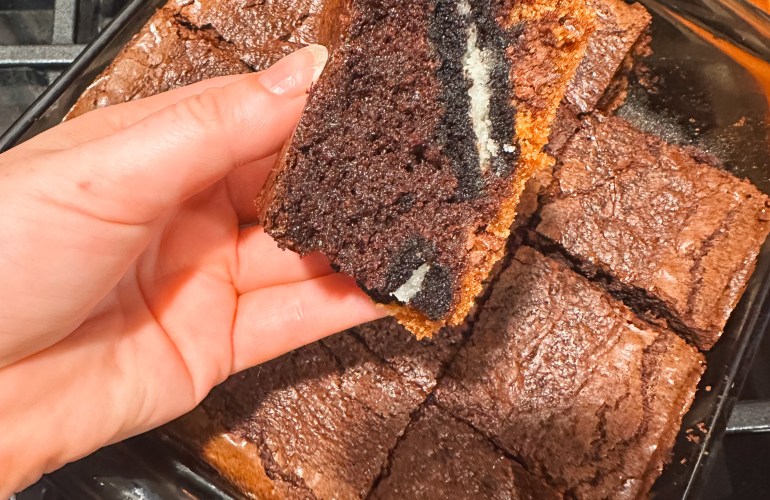
Not sure why exactly these brownies are called ‘slutty’, I don’t think they should be chastised for being absolutely delicious. After deciding to leave my job in community mental health and move into private practice I wanted to leave my co-workers with one final treat for them to remember me by. I figured these brownies would be the way to do it! You can get all fancy with this if you want and make your own chocolate chip cookie dough but if you want to save some work for yourself, you can buy the premade stuff! I ask you to make these brownies & take the power back!!!
Ingredients
1 package Pillsbury Chocolate Chip cookie dough [ or make your own]
1 package of Oreo Cookies, I went for double stuffed but do what you want.
1 box Brownie Mix, of your choosing + the necessary ingredients [eggs + oil]
Let’s Get Baking
Lightly grease a 9×9 pan with butter.
Prehear your oven to 350F
Make your brownie batter according to the package instructions.
Place your cooking dough into the pan and press until it covers the bottom. Then place a singler layer of oreos on top of the cookie dough.
Pour over the brownie batter over the oreo + cookie layers. Spread with a spatula to make an even layer.
Bake for 45-60 minutes. Test with a knife to see if it’s done.
Allow it to cool before cutting into it, it’s hard to resist I know!
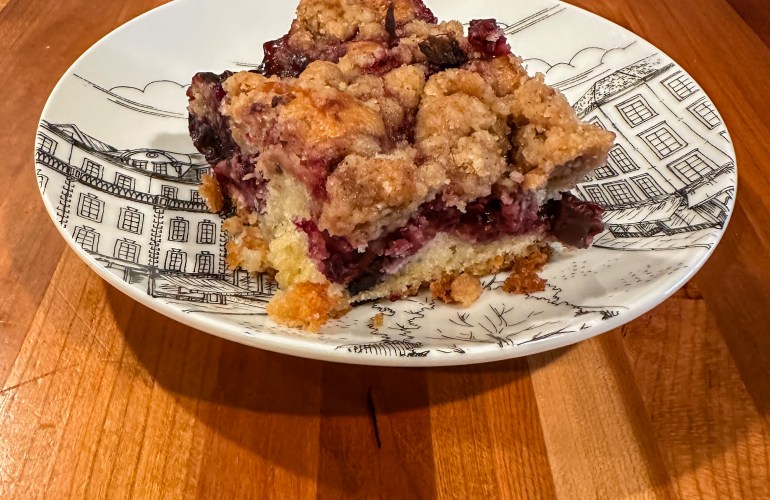
Young Hannah would be questioning me right now as I never was one to like fruits in my desserts. But then you turn 27 and all of a sudden you don’t mind it! This recipe comes from Bon Appetit and I made it a while back solely because the picture in the magazine looked so delicious and I had to see if it tasted just as good. Though this is a bit more of a summer recipe, in using fresh cherries, I used frozen cherries and it came out AMAZING. If you’re not normally a ‘fruit in dessert’ person, trust me on this one.
A note from Bon Appetit: If you can’t find sour cherries, you can use sweet ones! Just reduce the sugar in the cherry swirl to 1/4 Cup and mix in the zest + juice of 1 lemon after it’s cooled.
Ingredients
Cherry Swirl
1 1/2 lb Fresh Sour Cherries, pitted or frozen
1/2 Cup Granulated Sugar
1/2 TSP Diamond Crystal or 1/4 TSP Morton Kosher Salt
Streusel
1 1/4 Cups All Purpose Flour
1 Cup Light Brown Sugar
1/4 TSP Salt
1 TSP Ground Cardamom [ I couldn’t find in my grocery store so I replaced with Nutmeg]
1 TSP Cinnamon
1/2 Cup Unsalted Butter, melted, slightly cooled
Cake
2 Cups All Purpose Flour
1 TSP Baking Powder
1 TSP Baking Soda
1/2 TSP Salt
1 Cup Granulated Sugar
1/2 Cup Unsalted Butter, room temp
2 Large Eggs
1 Cup Sour Cream [ I used low-fat Greek yogurt]
1/3 Cup Buttermilk
2 TSP Vanilla Extract
Let’s Get Baking
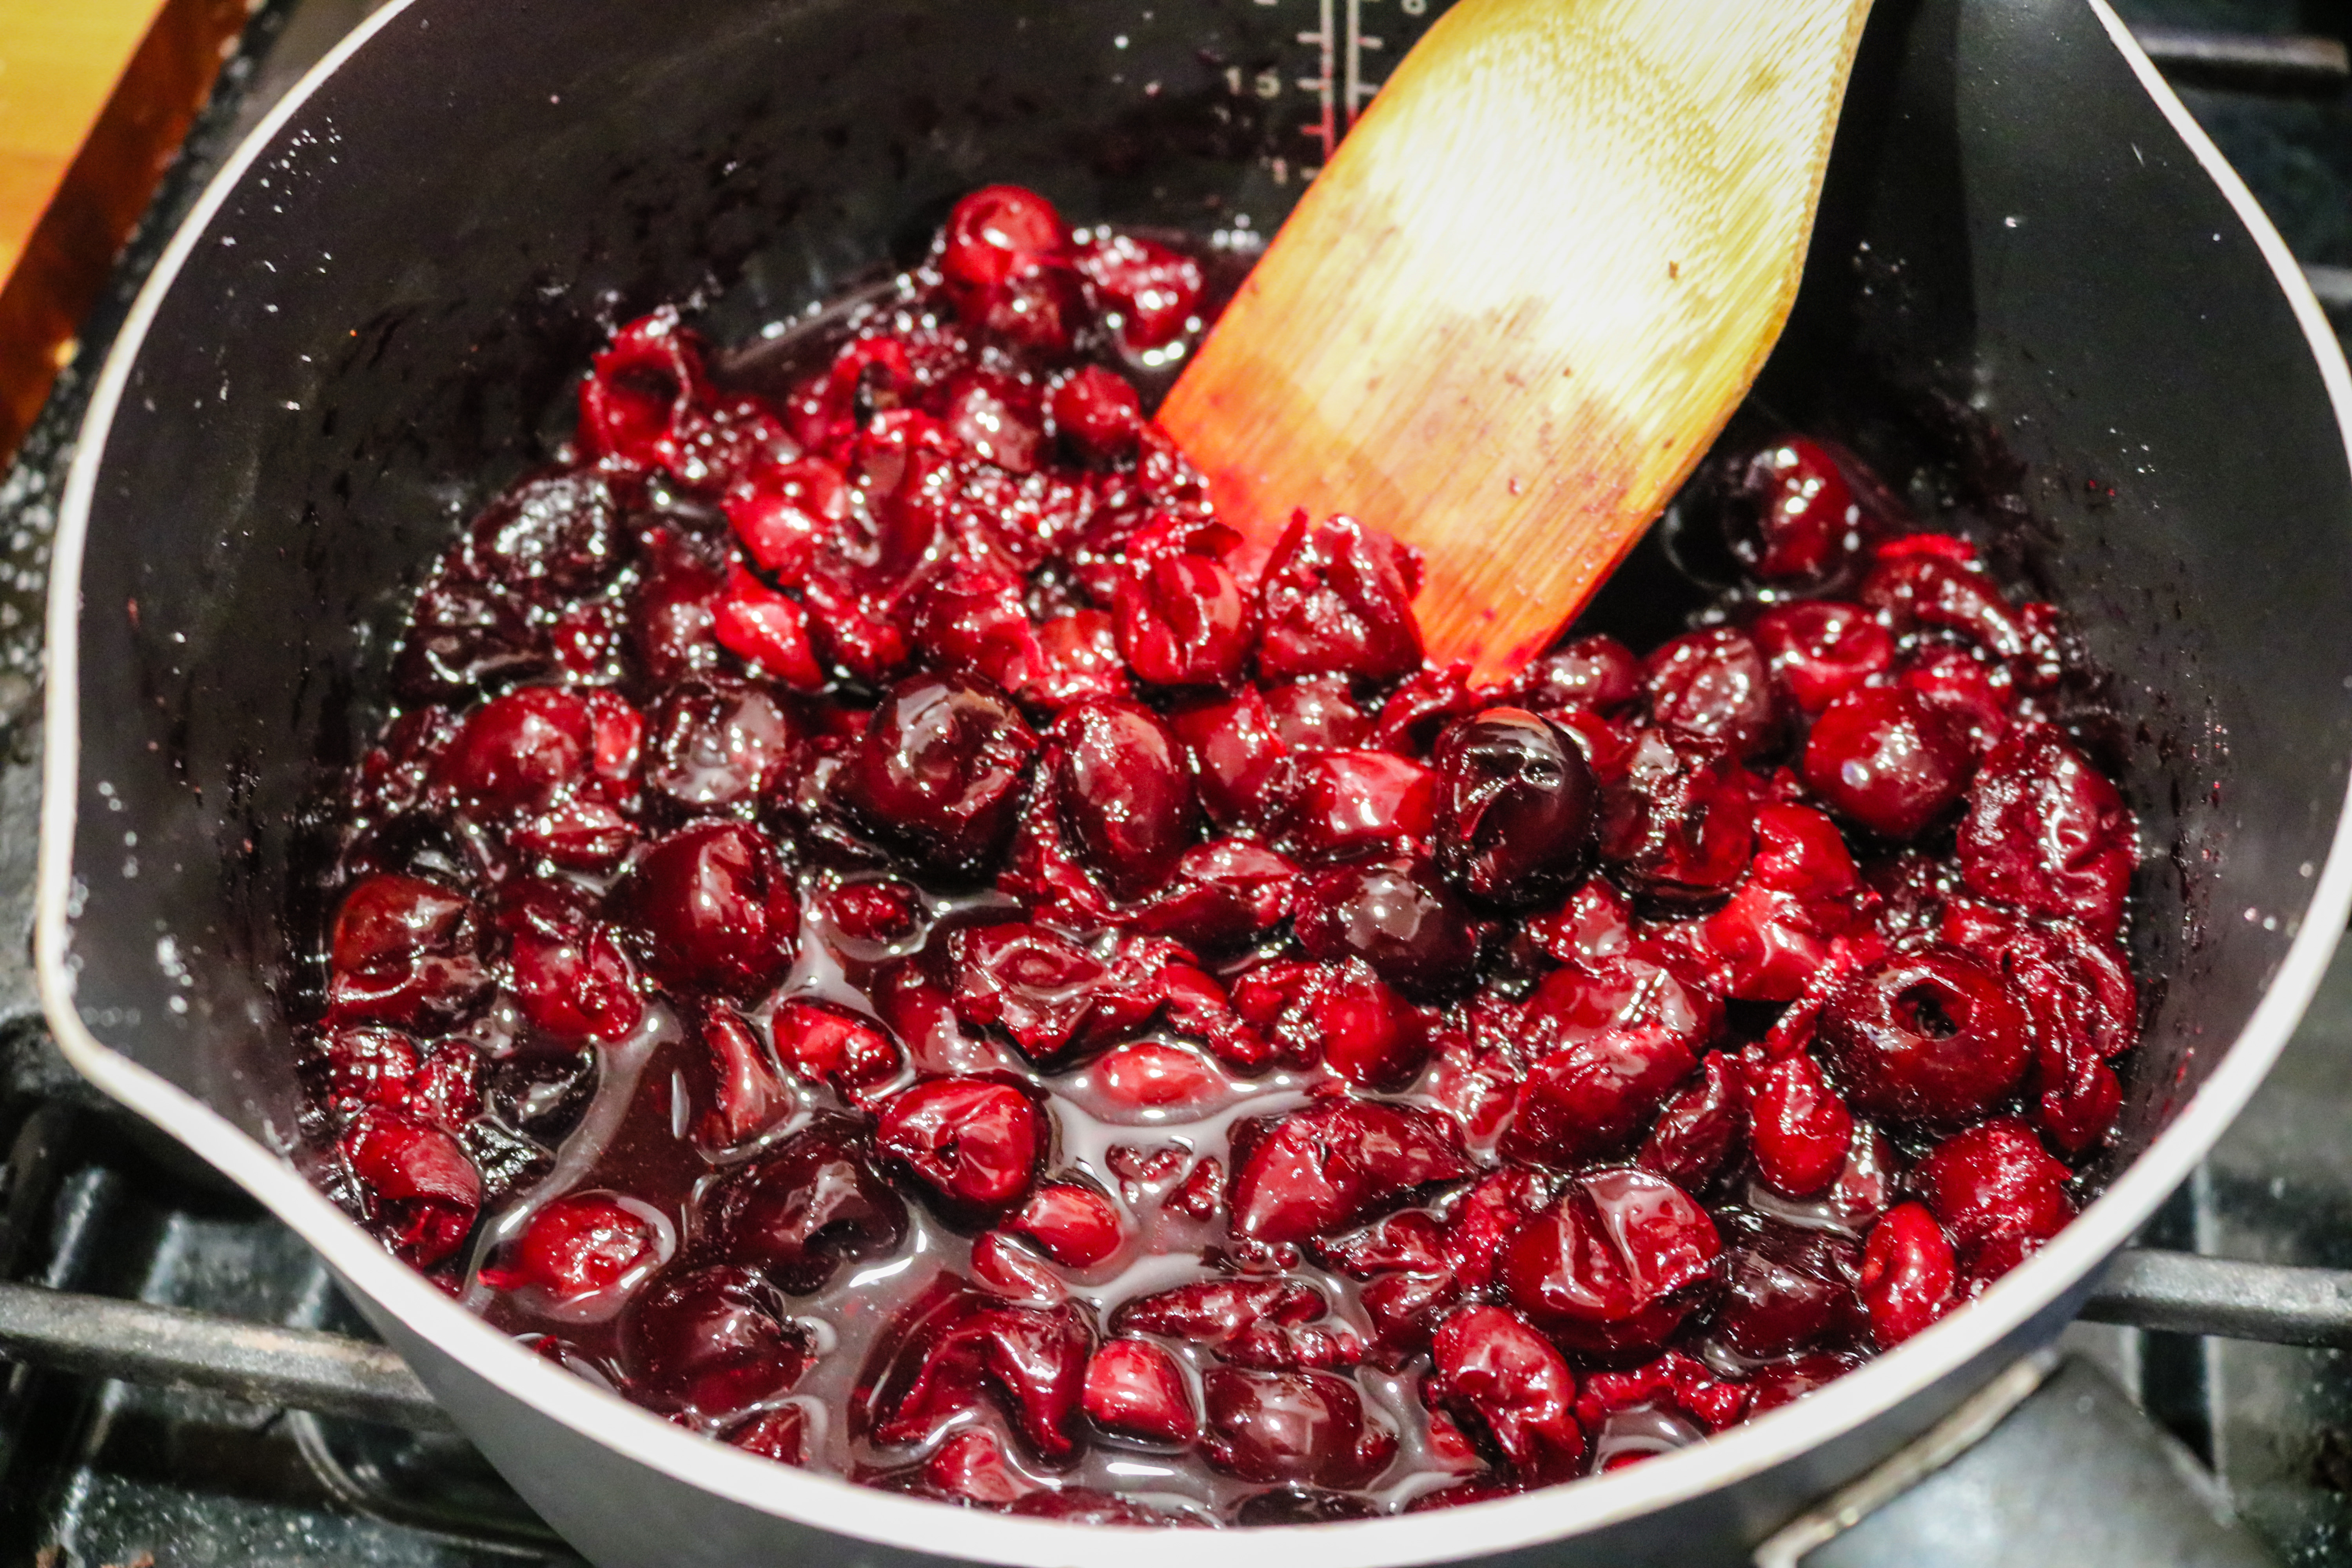
Make the cherry swirl: in a medium saucepan bring the cherries + granulated sugar + salt to a boil. Cook, stirring often and smashing cherries with a wooden spoon, until they are softened and just coasted in Syria, about 15-20 min for fresh, 25-30 min for frozen. Let cool.
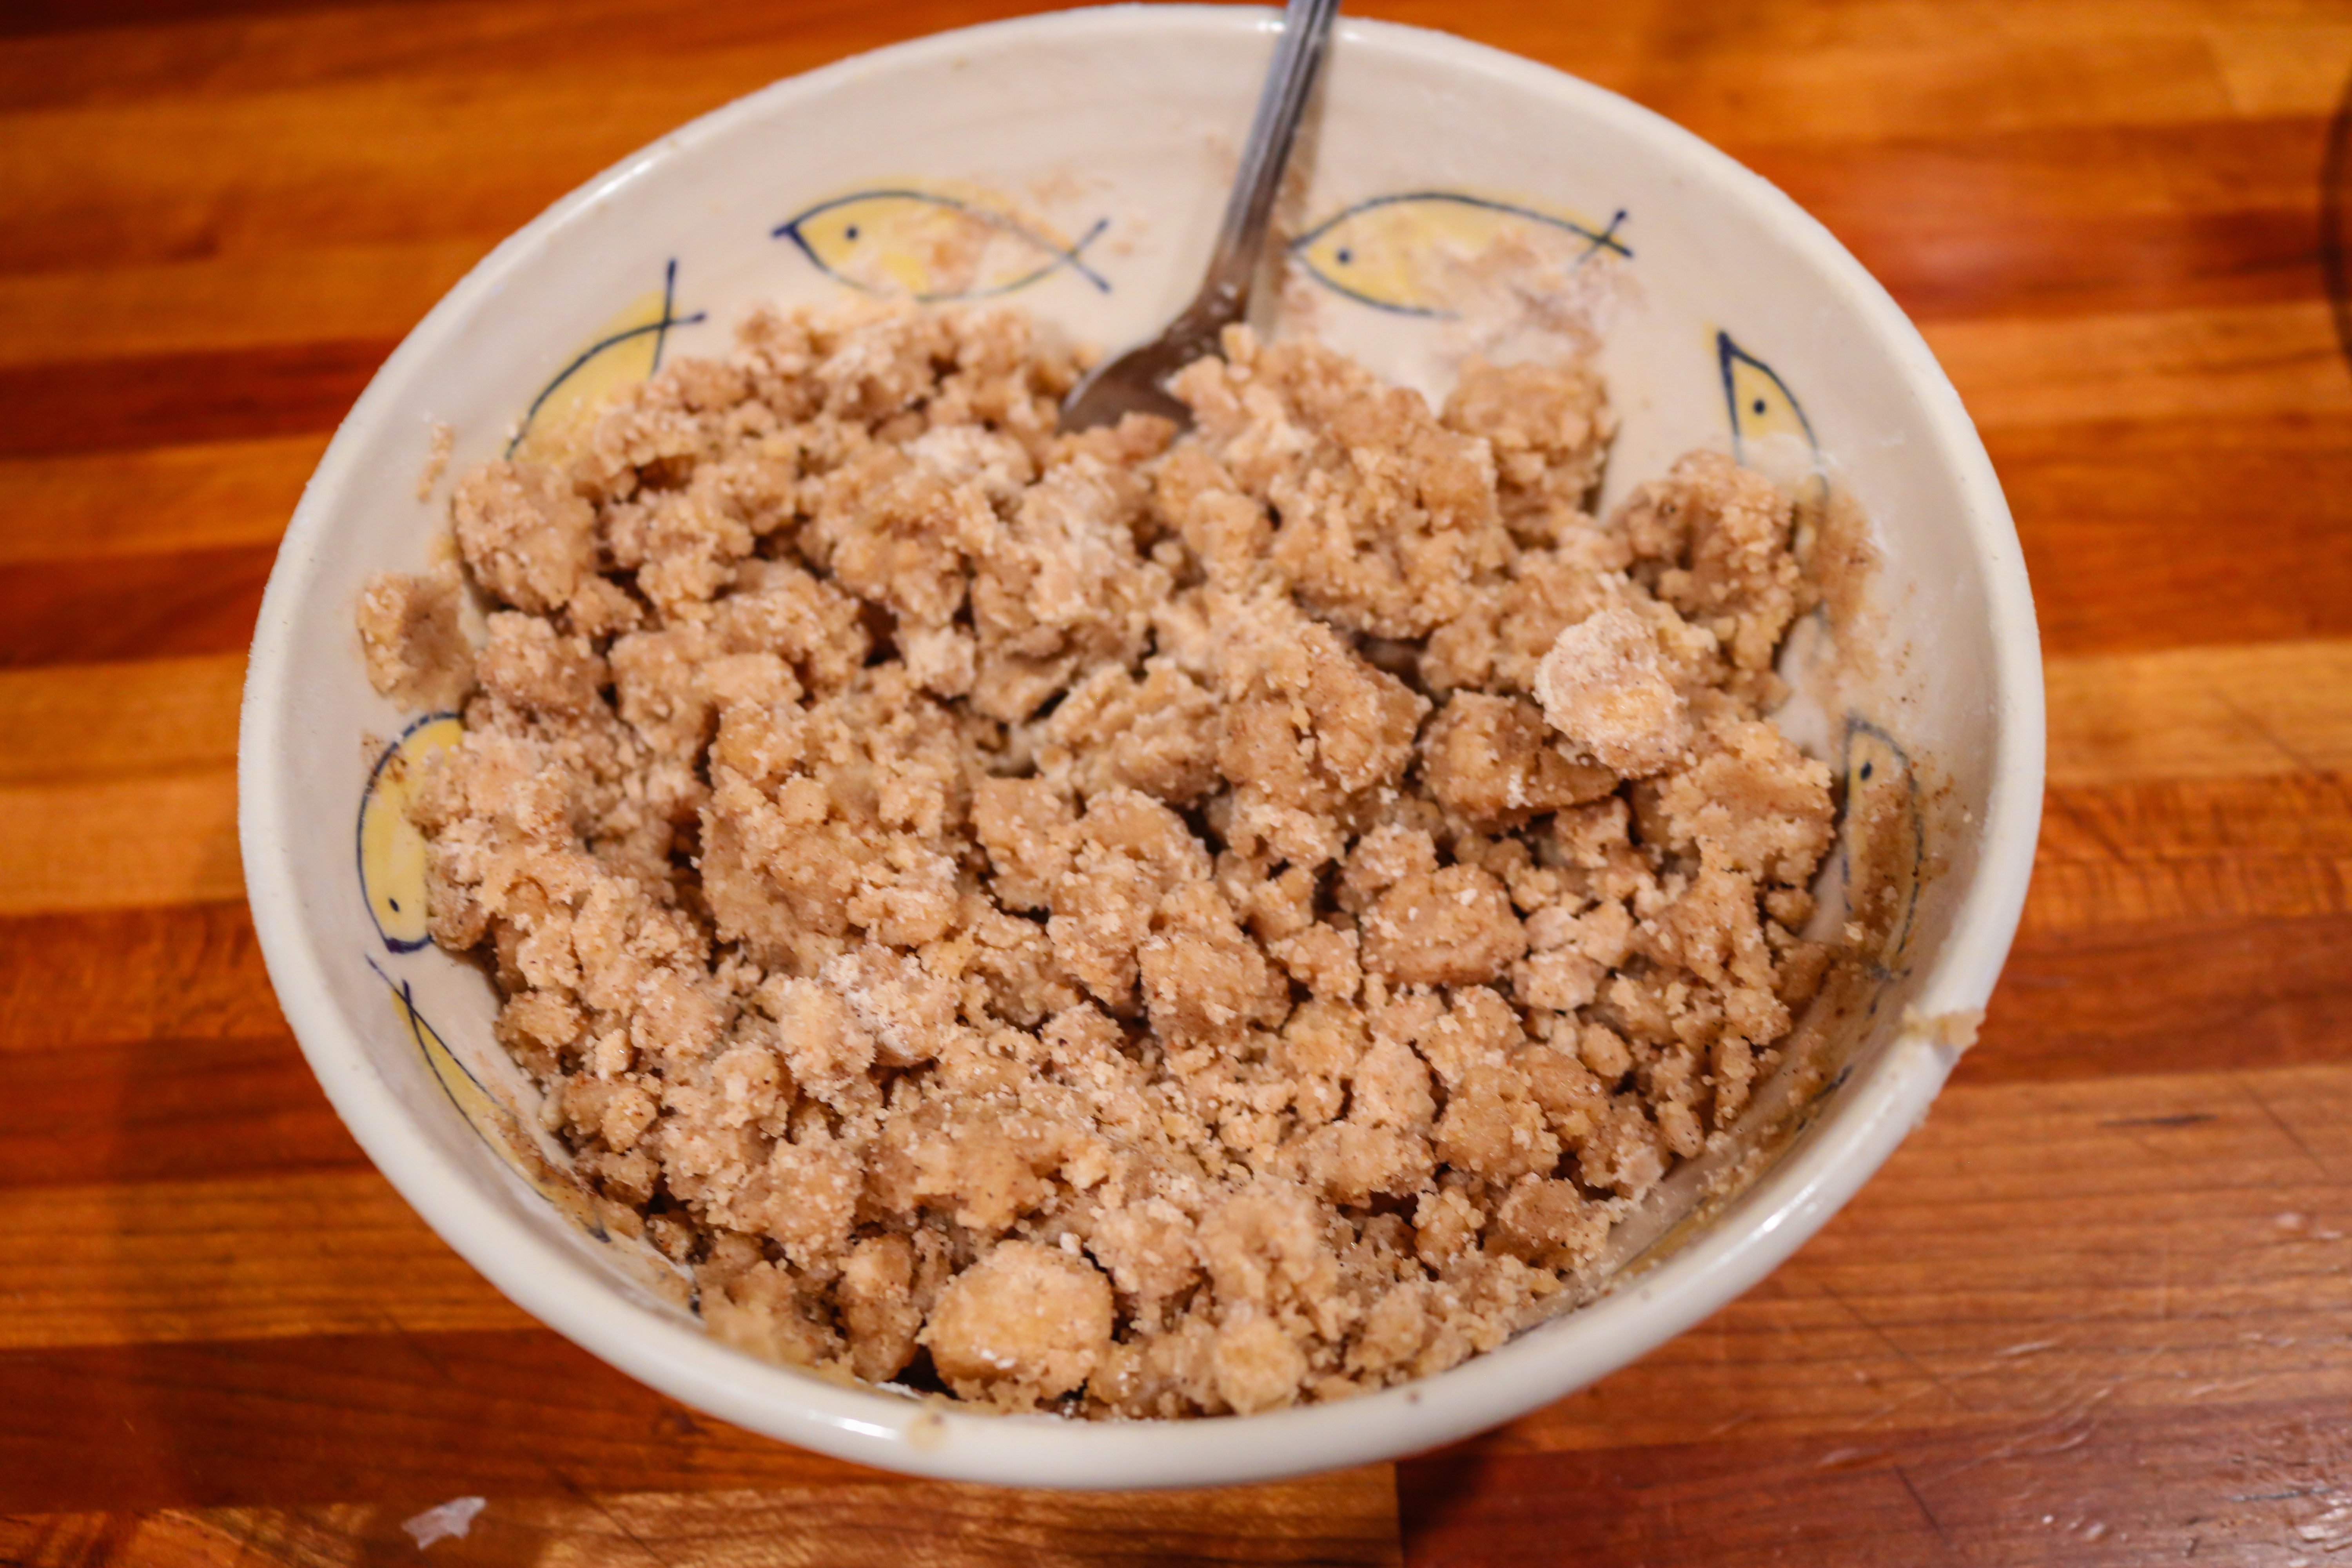
Make the streusel: whisk flour + brown sugar + salt + cardamom + cinnamon in a medium bowl. Pour butter over and gently mix with a fork until just crumbs begin to form. Be careful not to overmix, set aside.
Make the cake: preheat the oven to 350 F and line a 13×9″ baking pan with parchment paper, leaving an overhang on the sides.
Whisk flour + baking powder + baking powder + baking soda + salt in a medium bowl to combine.
Beat granulated sugar + butter in a bowl of a stand mixer with the paddle attachment. Beat on medium speed until light and fluffy, about 2 minutes. Add in eggs one at a time.
Mix in sour cream + buttermilk + vanilla. Reduce speed to low and add in the dry ingredients, mix until just combined. Using a rubber spatula, scrape down the sides of the bowl to incorporate everything.
Scrape 2/3 of the batter into the prepared pan and spread into an even layer. Spread the cherry swirl over then top with the remaining batter. Top with the reserved streusel.
Bake for about 35-40 minutes or until a tester comes out clean. Let cool in the pan for at least 30 minutes before cutting.
Hello, it’s been a while. Life has been happening; I traveled abroad, I left my job of 4 years and went into private practice and in the meantime, I kind of got into a cooking funk. I was making the same couple meals, eating just because I had to, not because of my usual enjoyment. So this past week I decided I needed to do something about it! I had bought some tinned fish while at Borough Market in London [one of my fav places] and figured I should make pasta with it! I found this recipe from NYT Cooking and it is absolutely going to be a staple. It is so quick and easy, relatively little prep is required and it’s easy to modify with how many people you are cooking for. It’s time to step out of your comfort zone & cook with some tinned fish!
Ingredients
1/2 LB Spaghetti
3 TBSP Extra Virgin Olive Oil + 1 TSP Oil from Anchovies
Salt
4 Garlic Cloves, peeled and chopped
4 Anchovy Filets, rinsed and roughly chopped
1 TBSP Capers, rinsed
1/2 TSP Red Pepper Flakes
2 TBSP Chopped Parsley
Parmesan
Let’s Get Cooking
In a large pot, fill with water & salt well. Bring to a boil and cook the spaghetti to just under al dente, about 1 minute less than required cooking time. Drain when done but don’t forget to reserve the pasta water.
While the pasta is cooking, warm the olive oil in a small skillet over MED heat. Add in the garlic and cook for about 1 min, don’t let it brown. Stir in the anchovies, capers, and red pepper, cook for about 30 sec and turn heat to low.
Add in the reserved pasta water, and turn heat back up to MED-LOW. Add in the cooked pasta + parsley and toss well to coat. Add in the parmesan and once the sauce thickens, plate & enjoy.
Being in mostly land-locked Ohio, I don’t always get access to seafood, which I love very dearly. I was craving crab cakes the other day and rather than trust a restaurant, I figured I’d make them myself, thanks to a recipe from Instagram by GetFitwithNeil. Check out your local fish monger to get some fresh lump crab!
Ingredients
1 LB Jumbo Lump Crab Meat,
2 Large Eggs
2 1/2 TBSP Mayo
1 1/2 TSP Dijon Mustard, I’ve used whole grain as well and it’s good
1 TSP Worcestershire Sauce
1 TSP Old Bay Seasoning
1/4 TSP Salt
2 TBSP Fresh Parsley, I do 1 TBSP Dry
1/2 Cup Panko
1/4 Cup Celery, finely chopped
Aioli:
1/2 CUP Mayo
1/4 CUP Sour cream
1 TSP Lemon Juice
2 TSP Hot Sauce
1/4 TSP Paprika
1 TSP Dijon/Whole Grain Mustard
Salt to taste
Let’s Get Cooking
Mix together the eggs + mayo + mustard + Worcestershire + old bay + salt + parsley + celery in a large bowl.
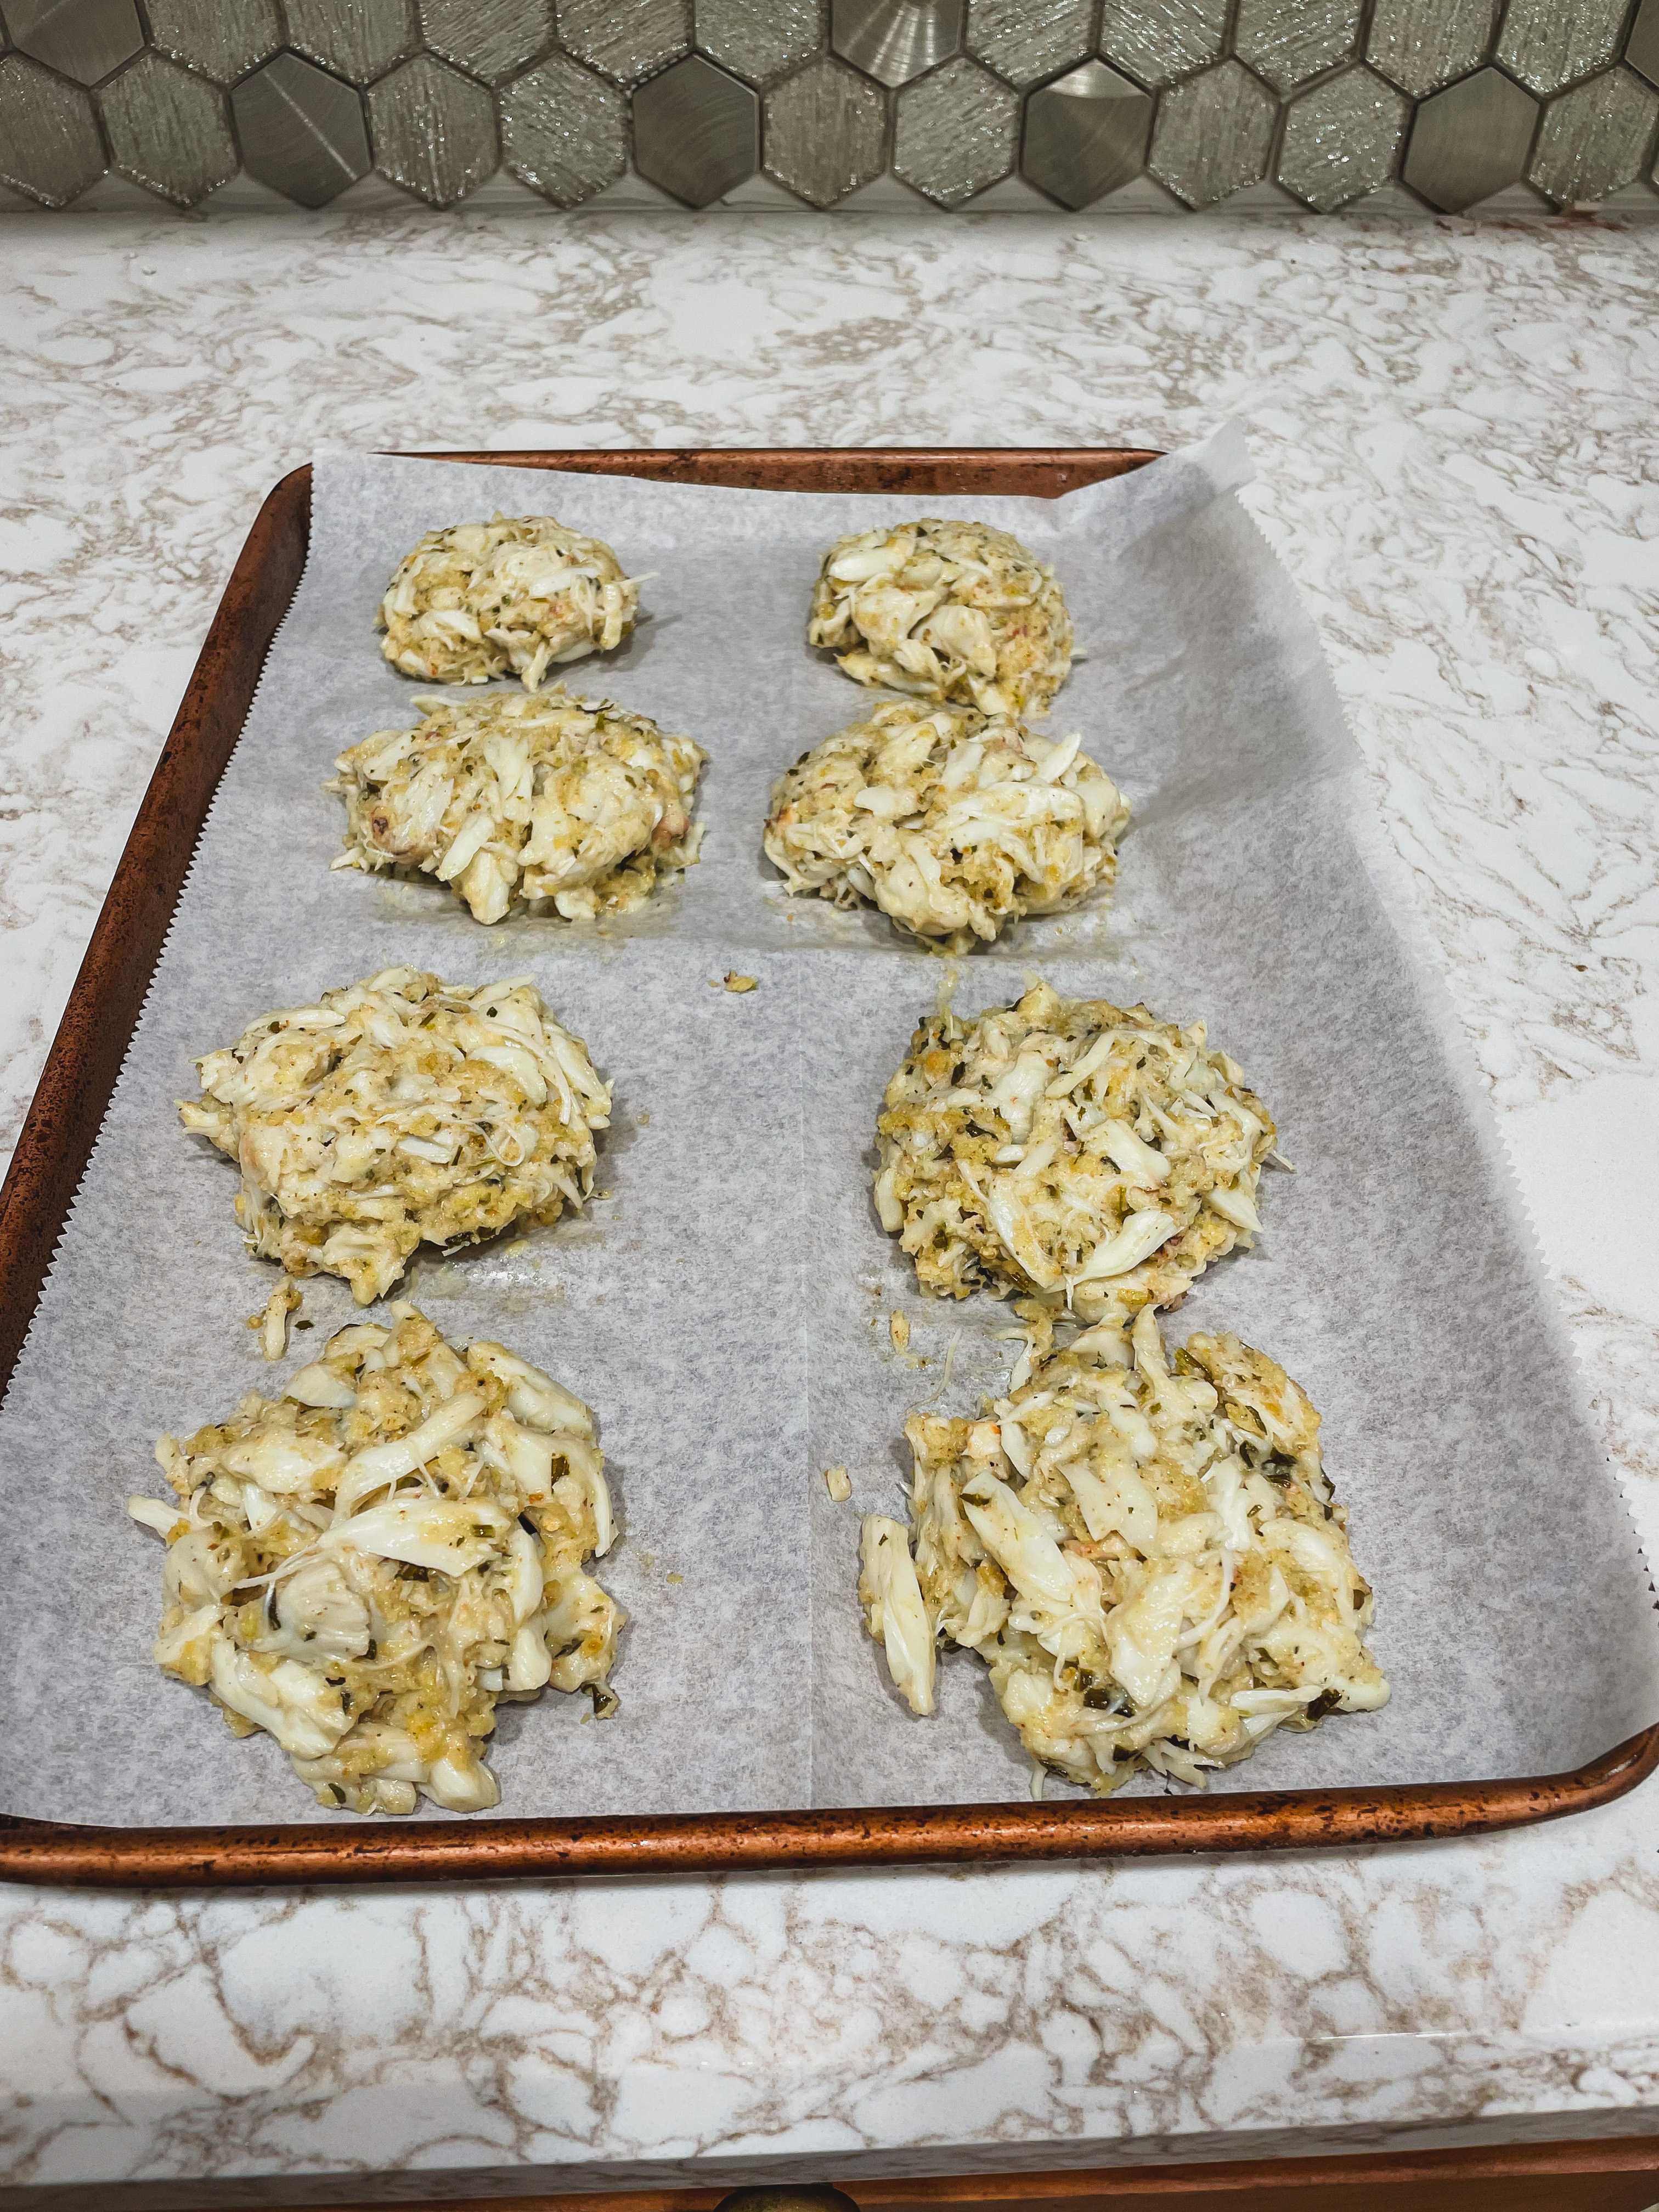
Add in the crab meat, gently breaking some of it up and the panko. Gently mix until it all comes loosely together.
Prepare a baking sheet with parchment paper. Shape the crab cakes and place on the baking sheet.
Place in the fridge for at least an hour so they came come together.
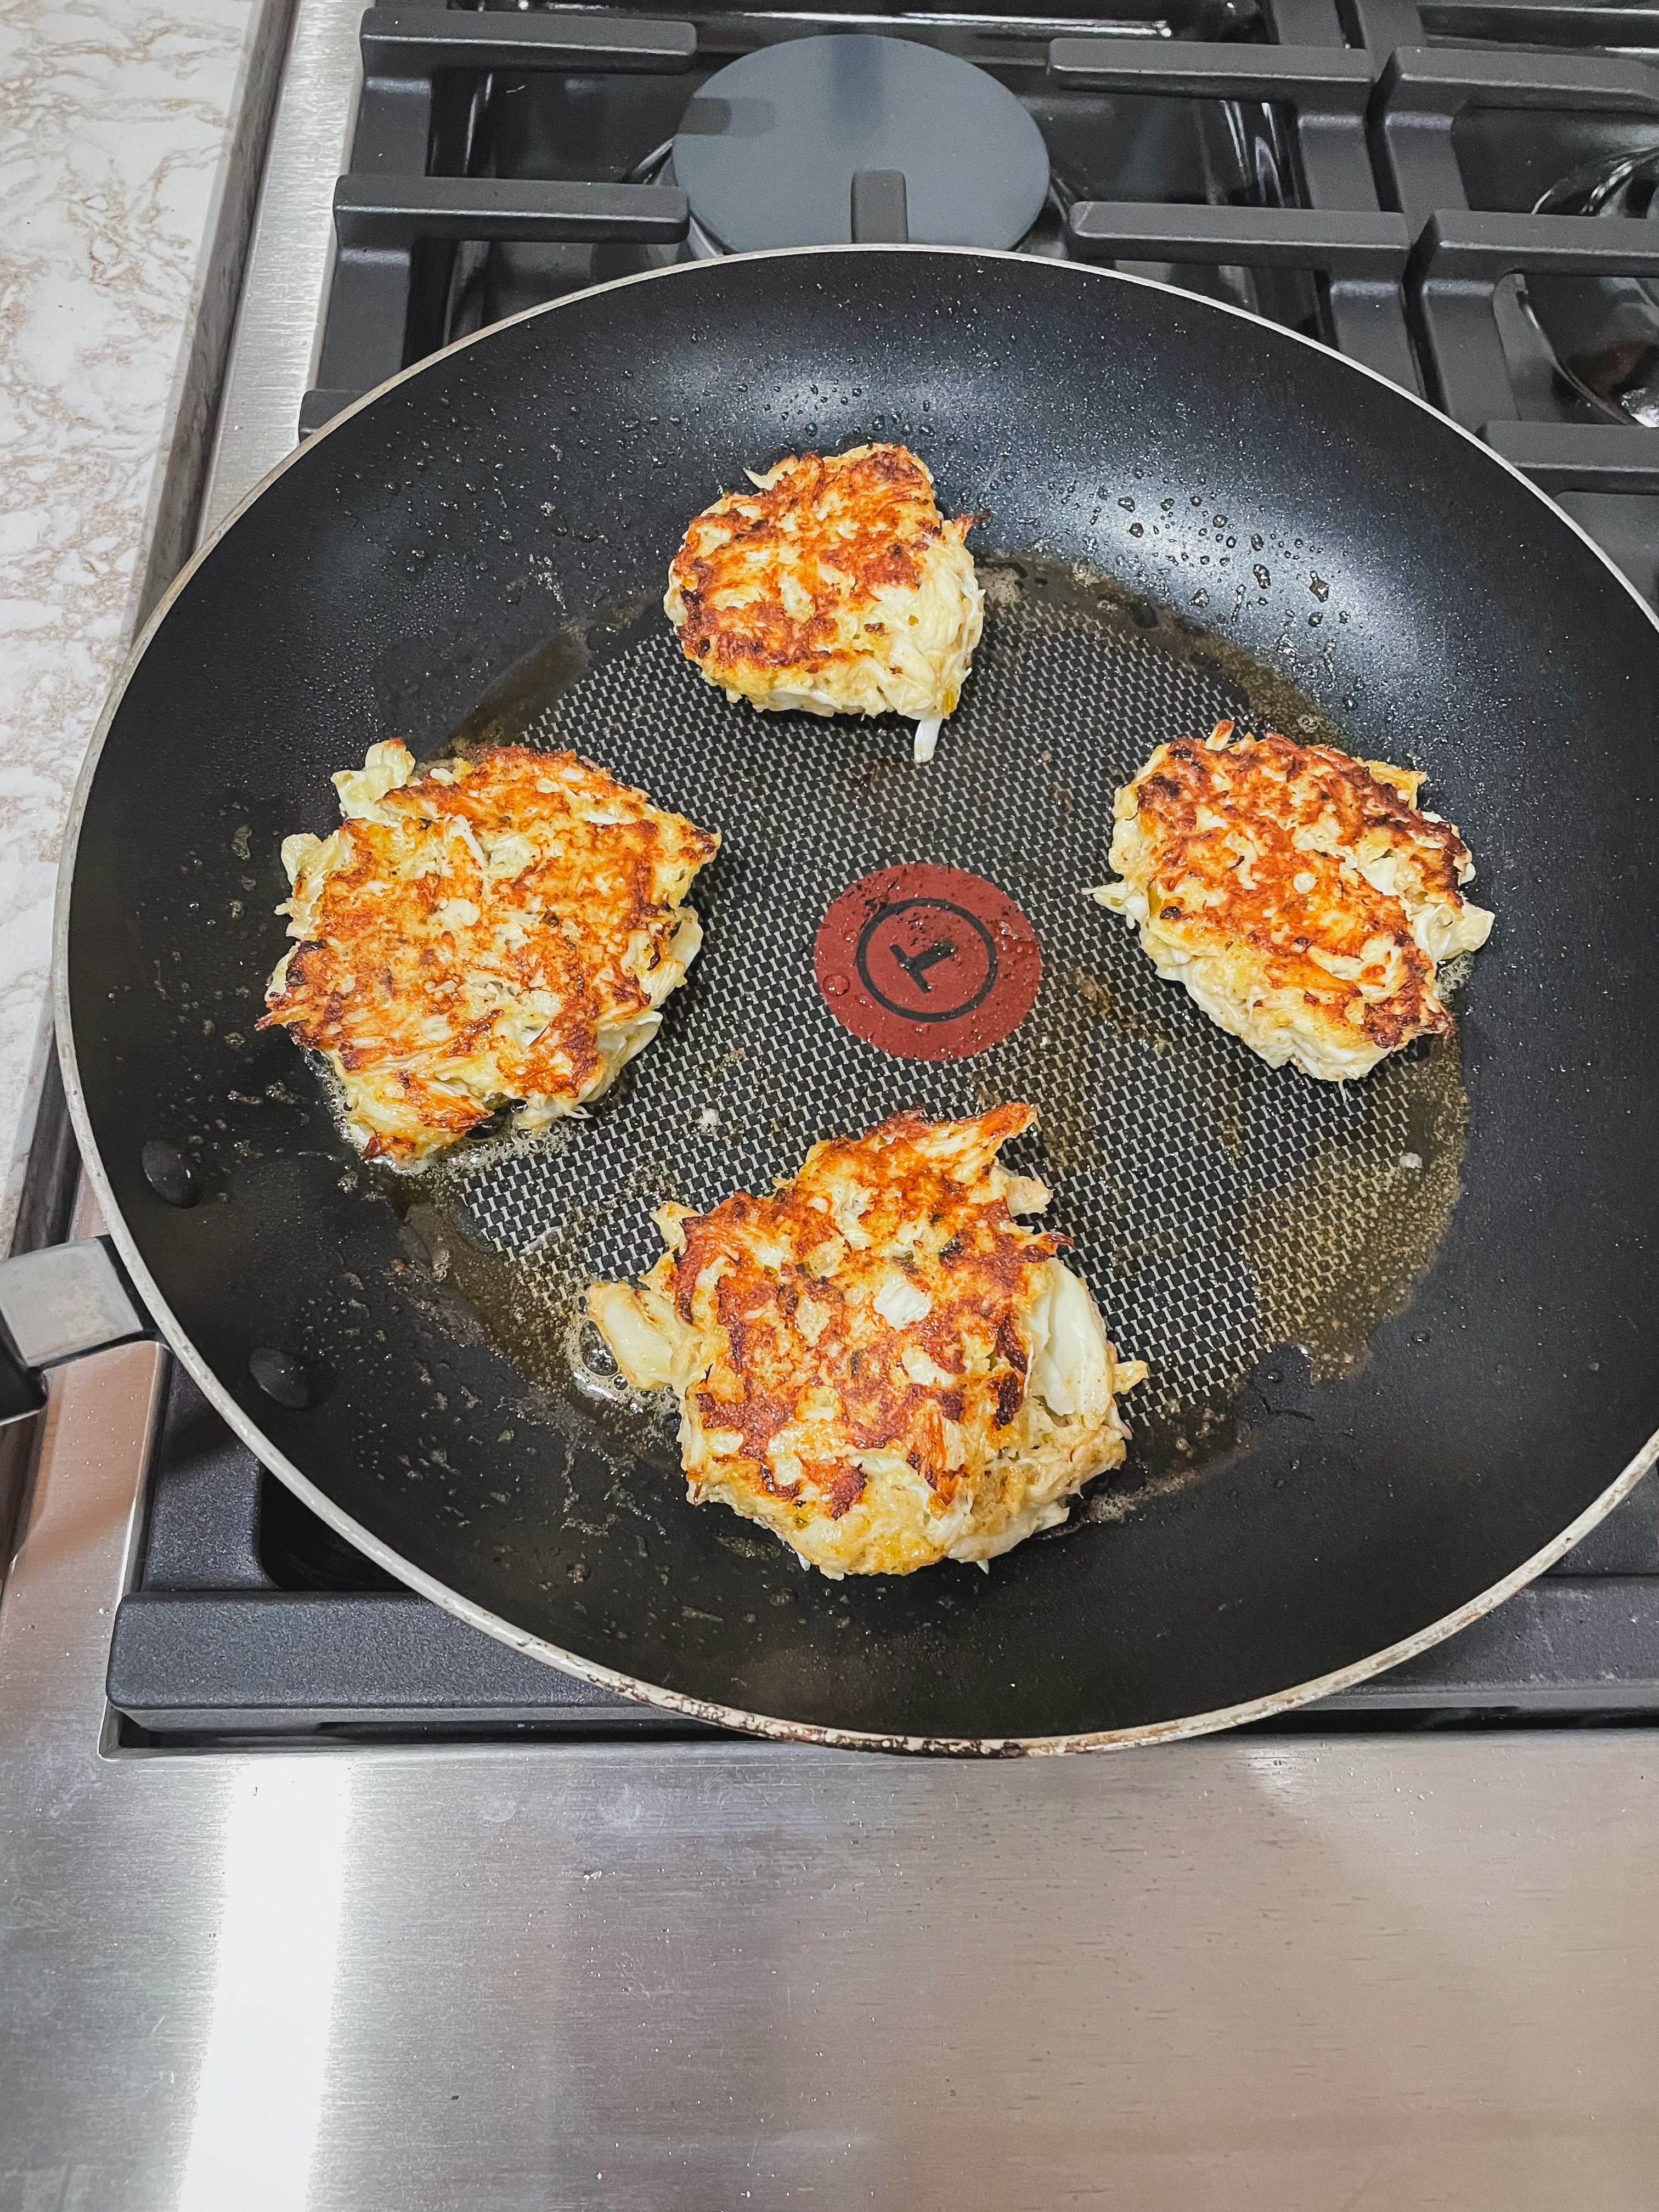
Heat a non-stick pan and lightly coat the bottom with oil, when the pan is hot add in the crab cakes and cook for about 3-5 min each side, until the bottoms are golden brown.
To make the aioli: mix all the ingredients in a small bowl together, salt to taste.
I think there is something special about making something yourself that you could easily buy at the store, like pickles! This is my second year with making my own pickles and canning them, it makes me feel so sustainable, especially when using my own produce. Canning to me is a lost skill, mostly something my grandparents and those before them did, so I am excited to start learning this for myself and fill up my shelves! Foodie with Family helped me with the canning basics. I was going for a super garlicky-dill pickle here and I revamped the recipe a little from last year, as it takes 6-weeks before I can try them out I will comeback with a flavor-update. I made 2 quarts worth, so edit this recipe as you need.
Ingredients
You’ll need pint-sized Mason jars and a large pot with a lid and rack in order to seal the jars, it is helpful to have the rack but not necessary.
First things first you need to sanitize your jars & lids. I submerge my jars & lids in boiling water for 5 minutes, then safely remove and let cool.
Prep all your ingredients, cut your cucumbers, peel and smash your garlic.
Prep the jars: to each jar add, 2 smashed garlic cloves + 1 bay leaf + 4 stalks of dill [ go crazy with it ] + 4 peppercorns + 1/8 TSP Allspice + 1/4 TSP Mustard Seeds + 1/8 TSP Red Pepper flakes. Add in the cucumbers on top, I went about 10 cucumbers per jar, they can be a little packed, but don’t force them in.
To make the brine, scale it according to the amount you’re making. In a saucepan, combine Apple Cider Vinegar + White Vinegar + Pickling Salt + Water and bring to a boil. Once boiling, pour into your prepared jars, making sure you leave 1/2″ headspace at the top.
Place the lids on the jars and gently tighten the ring around the jar, just enough that it has some resistance. This is when your huge canning pot comes in handy.
Bring the water to a rolling boil in your canning pot. Once boiling, add in your sealed jars, since I used pints, Foodie with Family noted I needed to boil for 15 minutes before removing and letting cool. The popping sound you may hear while cooling is completely normal! Allow to cool overnight before checking the seal. If the lid bounces back after pushing in the middle then be sure to move to the fridge, if there is no give they are good to sit on the shelves! Be sure to date the lids with the date the pickles were made. The pickles are ready in 6 weeks, so see you then for the taste test!
With it being the middle of July we can finally begin to reap benefits from our harvest! Though I did not grow these zucchini’s myself, my mom gave me TONS from the farmers market. After making 2 loafs if zucchini bread [I recommend trying out my chocolate zucchini bread], I was not sure what else to make. I came across this zucchini fritter recipe from Bon Appetit and I figured it was the perfect side dish. It was a fantastic use of the zucchini that is great on it’s own or topped with your own creation.
Ingredients
1 1/2 LBS Zucchini, grated
1/2 TSP Salt
1 Large Egg
1/4 Cup All Purpose Flour
3 TBSP Chives, finely chopped
1 TBSP Cornstarch
Fresh Cracked Pepper
1/3 Vegetable Oil
Let’s Get Cooking
Place the zucchini in a strainer and toss with 1/2 tsp salt. Let sit for 10 minutes then wring the zucchini dry with a cheese cloth or kitchen towel.
Place the zucchini in a large bowl, add in the egg + flour + chives + cornstarch + salt + pepper.
Heat the oil in a large skillet over MED heat. Working in batches, drop 1/4 cupfuls into the skillet, flattening slightly. Cook until golden, about 3 sides each. Transfer to a paper-towel lined plate & season with salt.
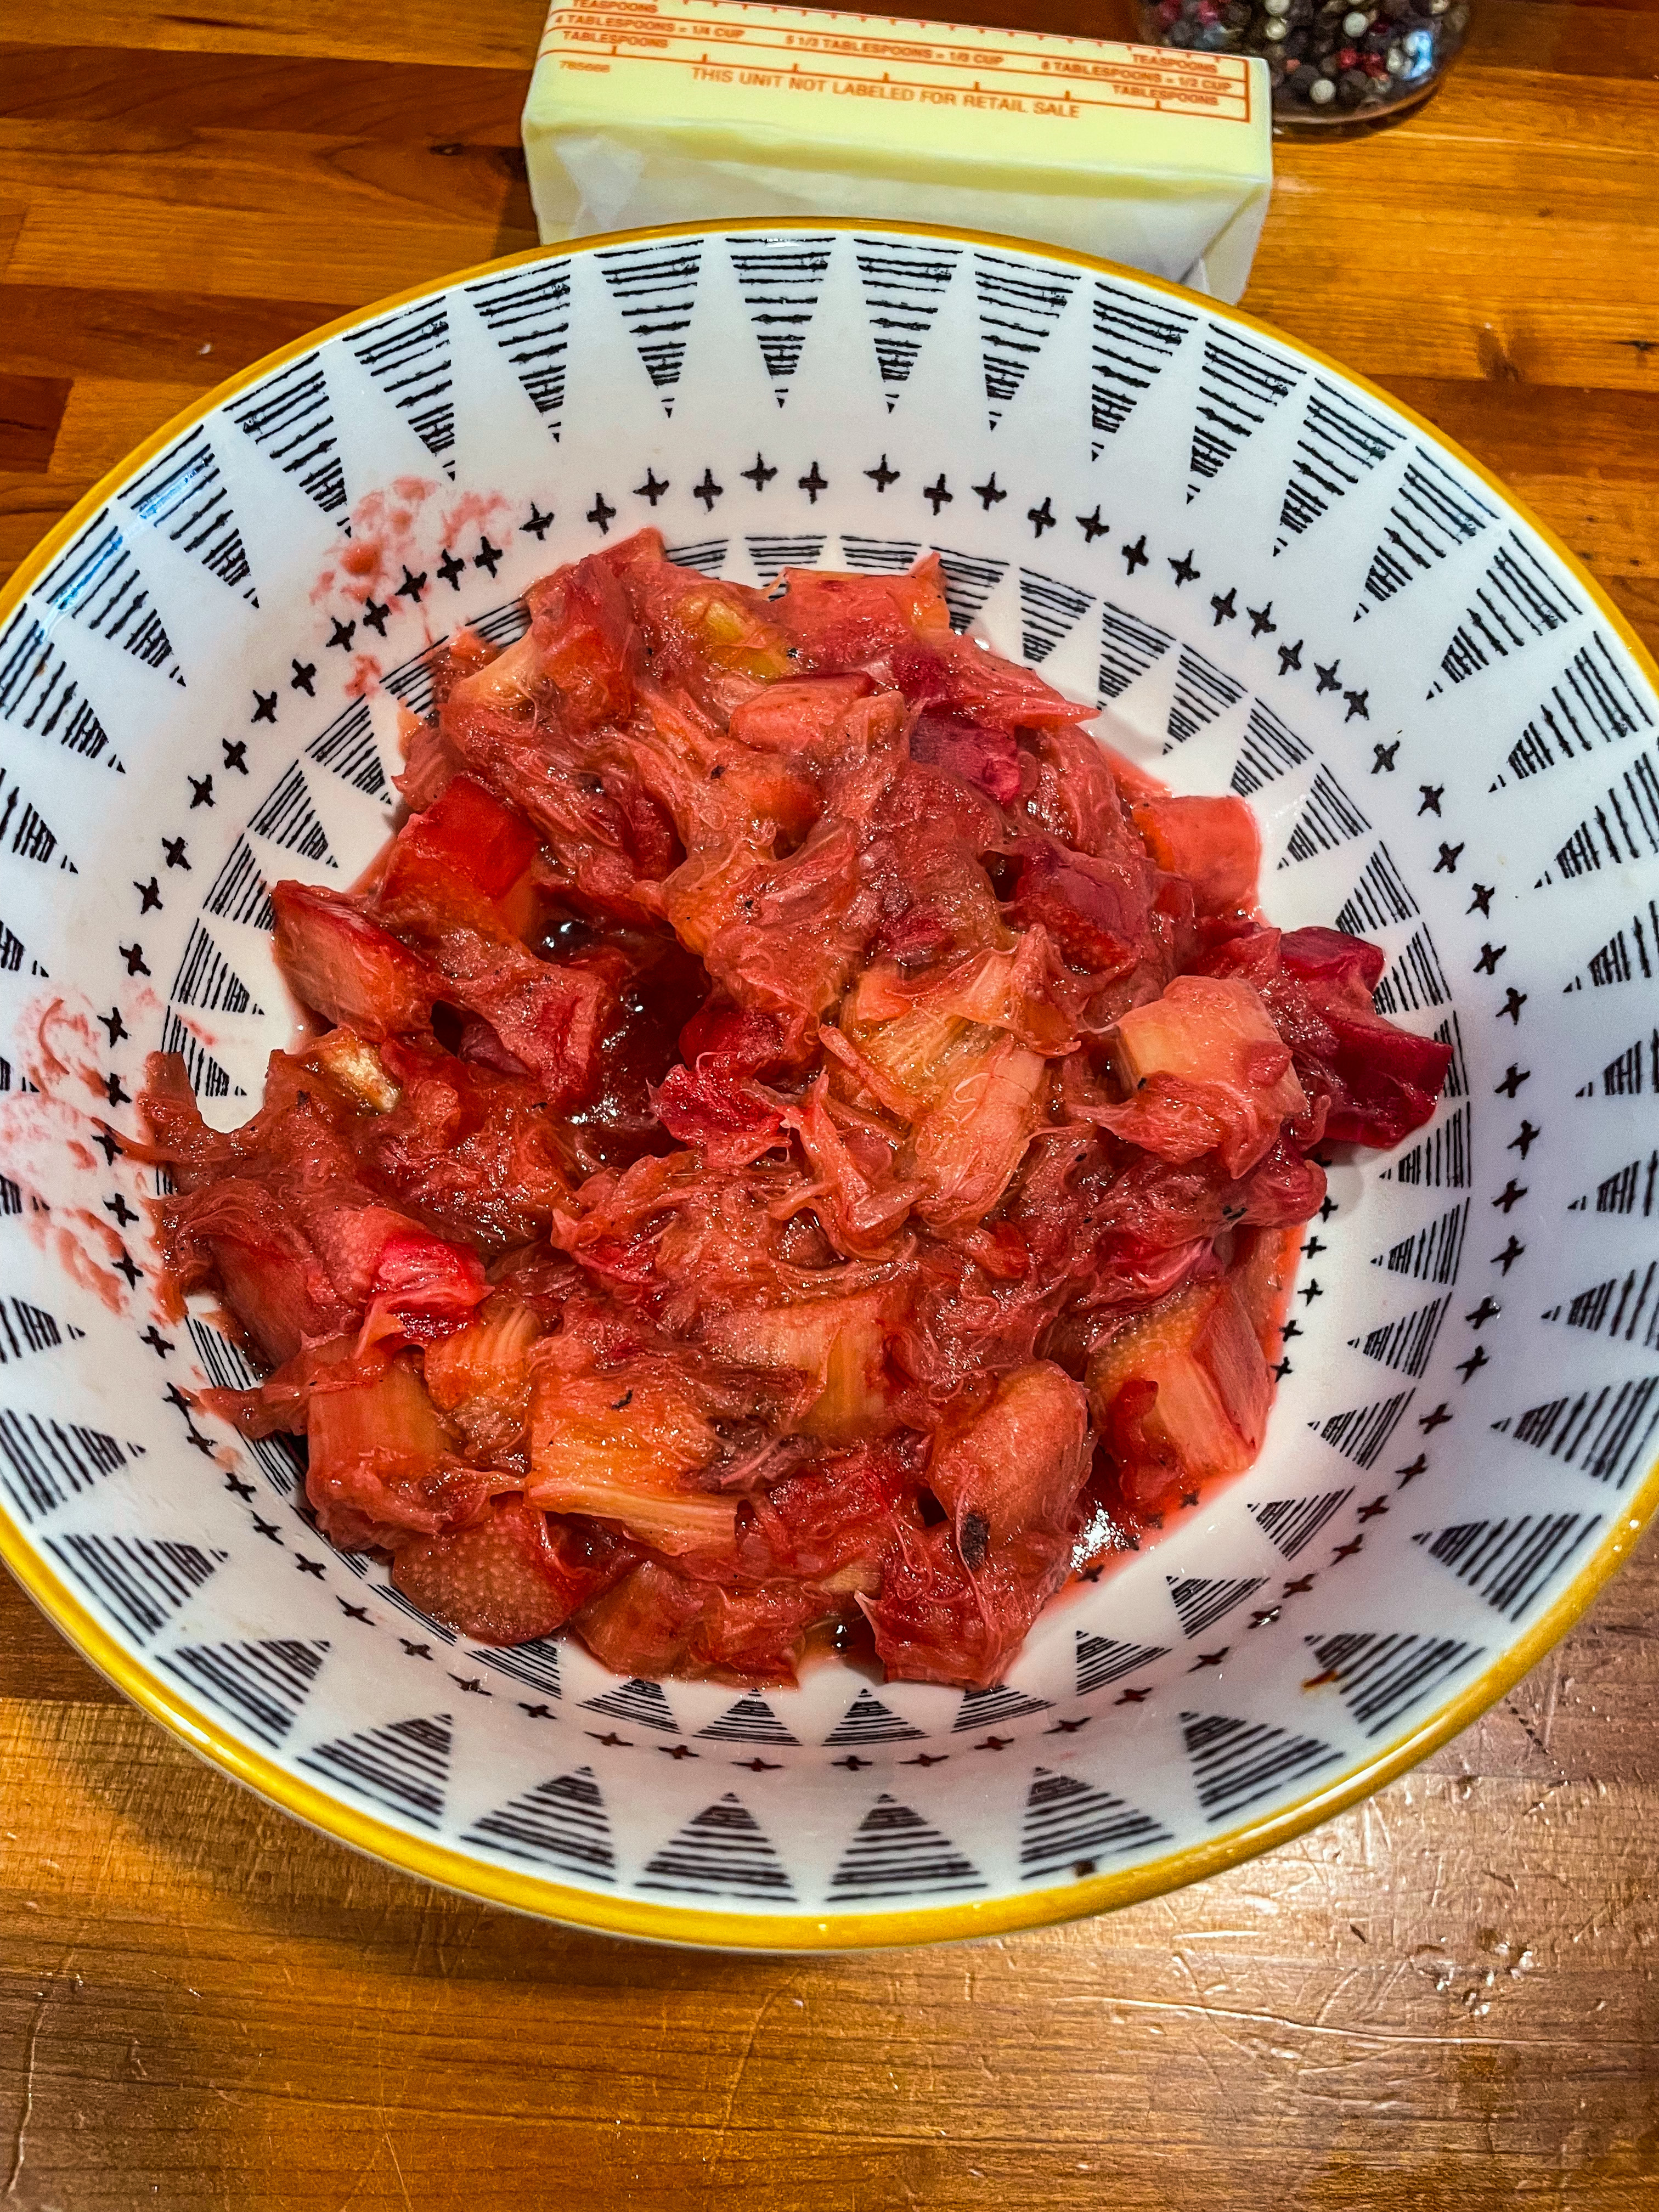
I’m new to this rhubarb game, but from what I know of it, rhubarb can be tart, which is right up my alley. My mom and I were invited up to Maine to celebrate her friend’s husband’s birthday. I was digging through my cookbooks to figure out something good to bake and BAM, I come across this recipe from our girl Claire. As we know I love a recipe that features seasonal produce and so when I saw a rhubarb cake I was in! It is absolutely delicious, sweet and tart, and incredibly moist. Claire notes to bake this cake longer than you think & I totally agree, I would have baked mine an additional 10 minutes. For the life of me I could not find Demerara sugar that she calls for so I just used regular sugar.
Ingredients
You will need an 4 1/2 x 8 1/2 in loaf pan
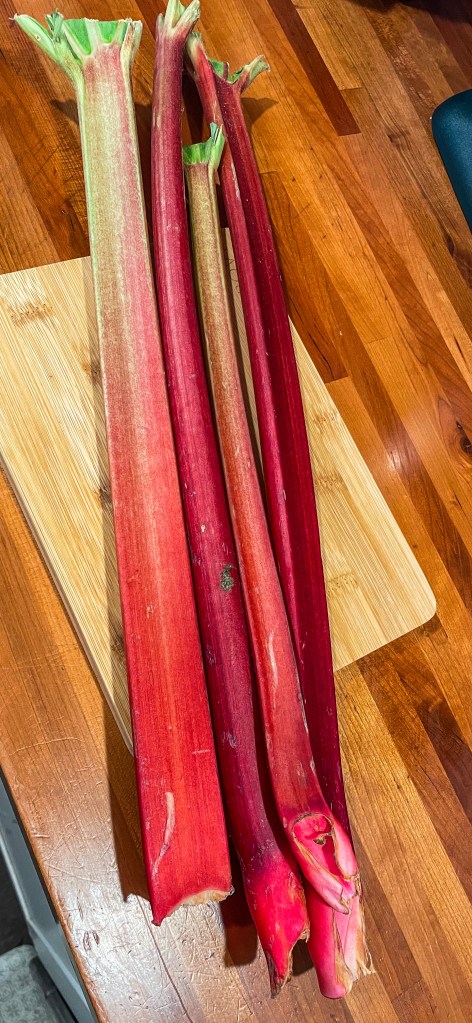
1 LB (454g) Rhubarb Stalks
1/2 TSP Baking Soda
Butter & Demerara Sugar for the pan
1 3/4 (228g) Cups All Purpose Flour
2 1/2 TSP Baking Powder
3/4 TSP Salt
1 1/4 Cup Granulated Sugar
1 Stick Unsalted Butter, melted and cooled
2 Large Eggs
1 1/2 TSP Orange, finely grated
1/3 Cup Plain Whole-Milk Greek Yogurt
1 TSP Vanilla Extract
Demerara Sugar for sprinkling on top [I used regular sugar]
Let’s Get Baking
Preheat the oven to 350F and coat the pan with butter. Line with parchment paper and sprinkle sugar on the bottom.
Choose the thinnest rhubarb stalks, or trim accordingly, making about 4-5 pieces that are about 8 1/2 in in length. Set these pieces aside.
Chop up the remaining rhubarb into 1/2 in pieces. Transfer 227g into a small sauce pan and set aside the remaining 113g to fold into the batter later.
Add 1 TBSP water to the saucepan and cook the chopped rhubarb over MED heat, stirring often and mashing with the back of a wooden spoon, until the pieces have broken down. Claire notes the mixture should begin to resemble applesauce, which will take about 5-7 minutes. Remove from heat and set aside to cool. Once the mixture is cooled, stir in the baking soda, it will bubble and turn a grayish color which is normal! Set mixture aside.
In a medium bowl, whisk the flour + baking powder + salt, set aside.
In a large mixing bowl, whisk together the granulated sugar + melted butter + eggs + orange zest. Whisk in the yogurt, vanilla, and rhubarb mush until smooth. Scrape the bowl as needed until all the dry ingredients disappear. Switch to a flexible spatula and fold in the remaining 113g of chopped rhubarb into the batter.
Scrape the batter into the prepared pan and smooth the top. Place the reserved rhubarb stalks over the top of the batter in parallel lines. Sprinkle with Demerara sugar [ or regular sugar] and bake for 60 minutes. Reduce the temp tp 325F and cook for an additional 30-40 minutes or until the cake tester comes out clean. Tent the top with foil if it starts to get too brown.
Let cool for 20 minutes in the pan before removing it from the pan and letting it cool completely.
If you’re a rhubarb person, trust me you’ll love this!
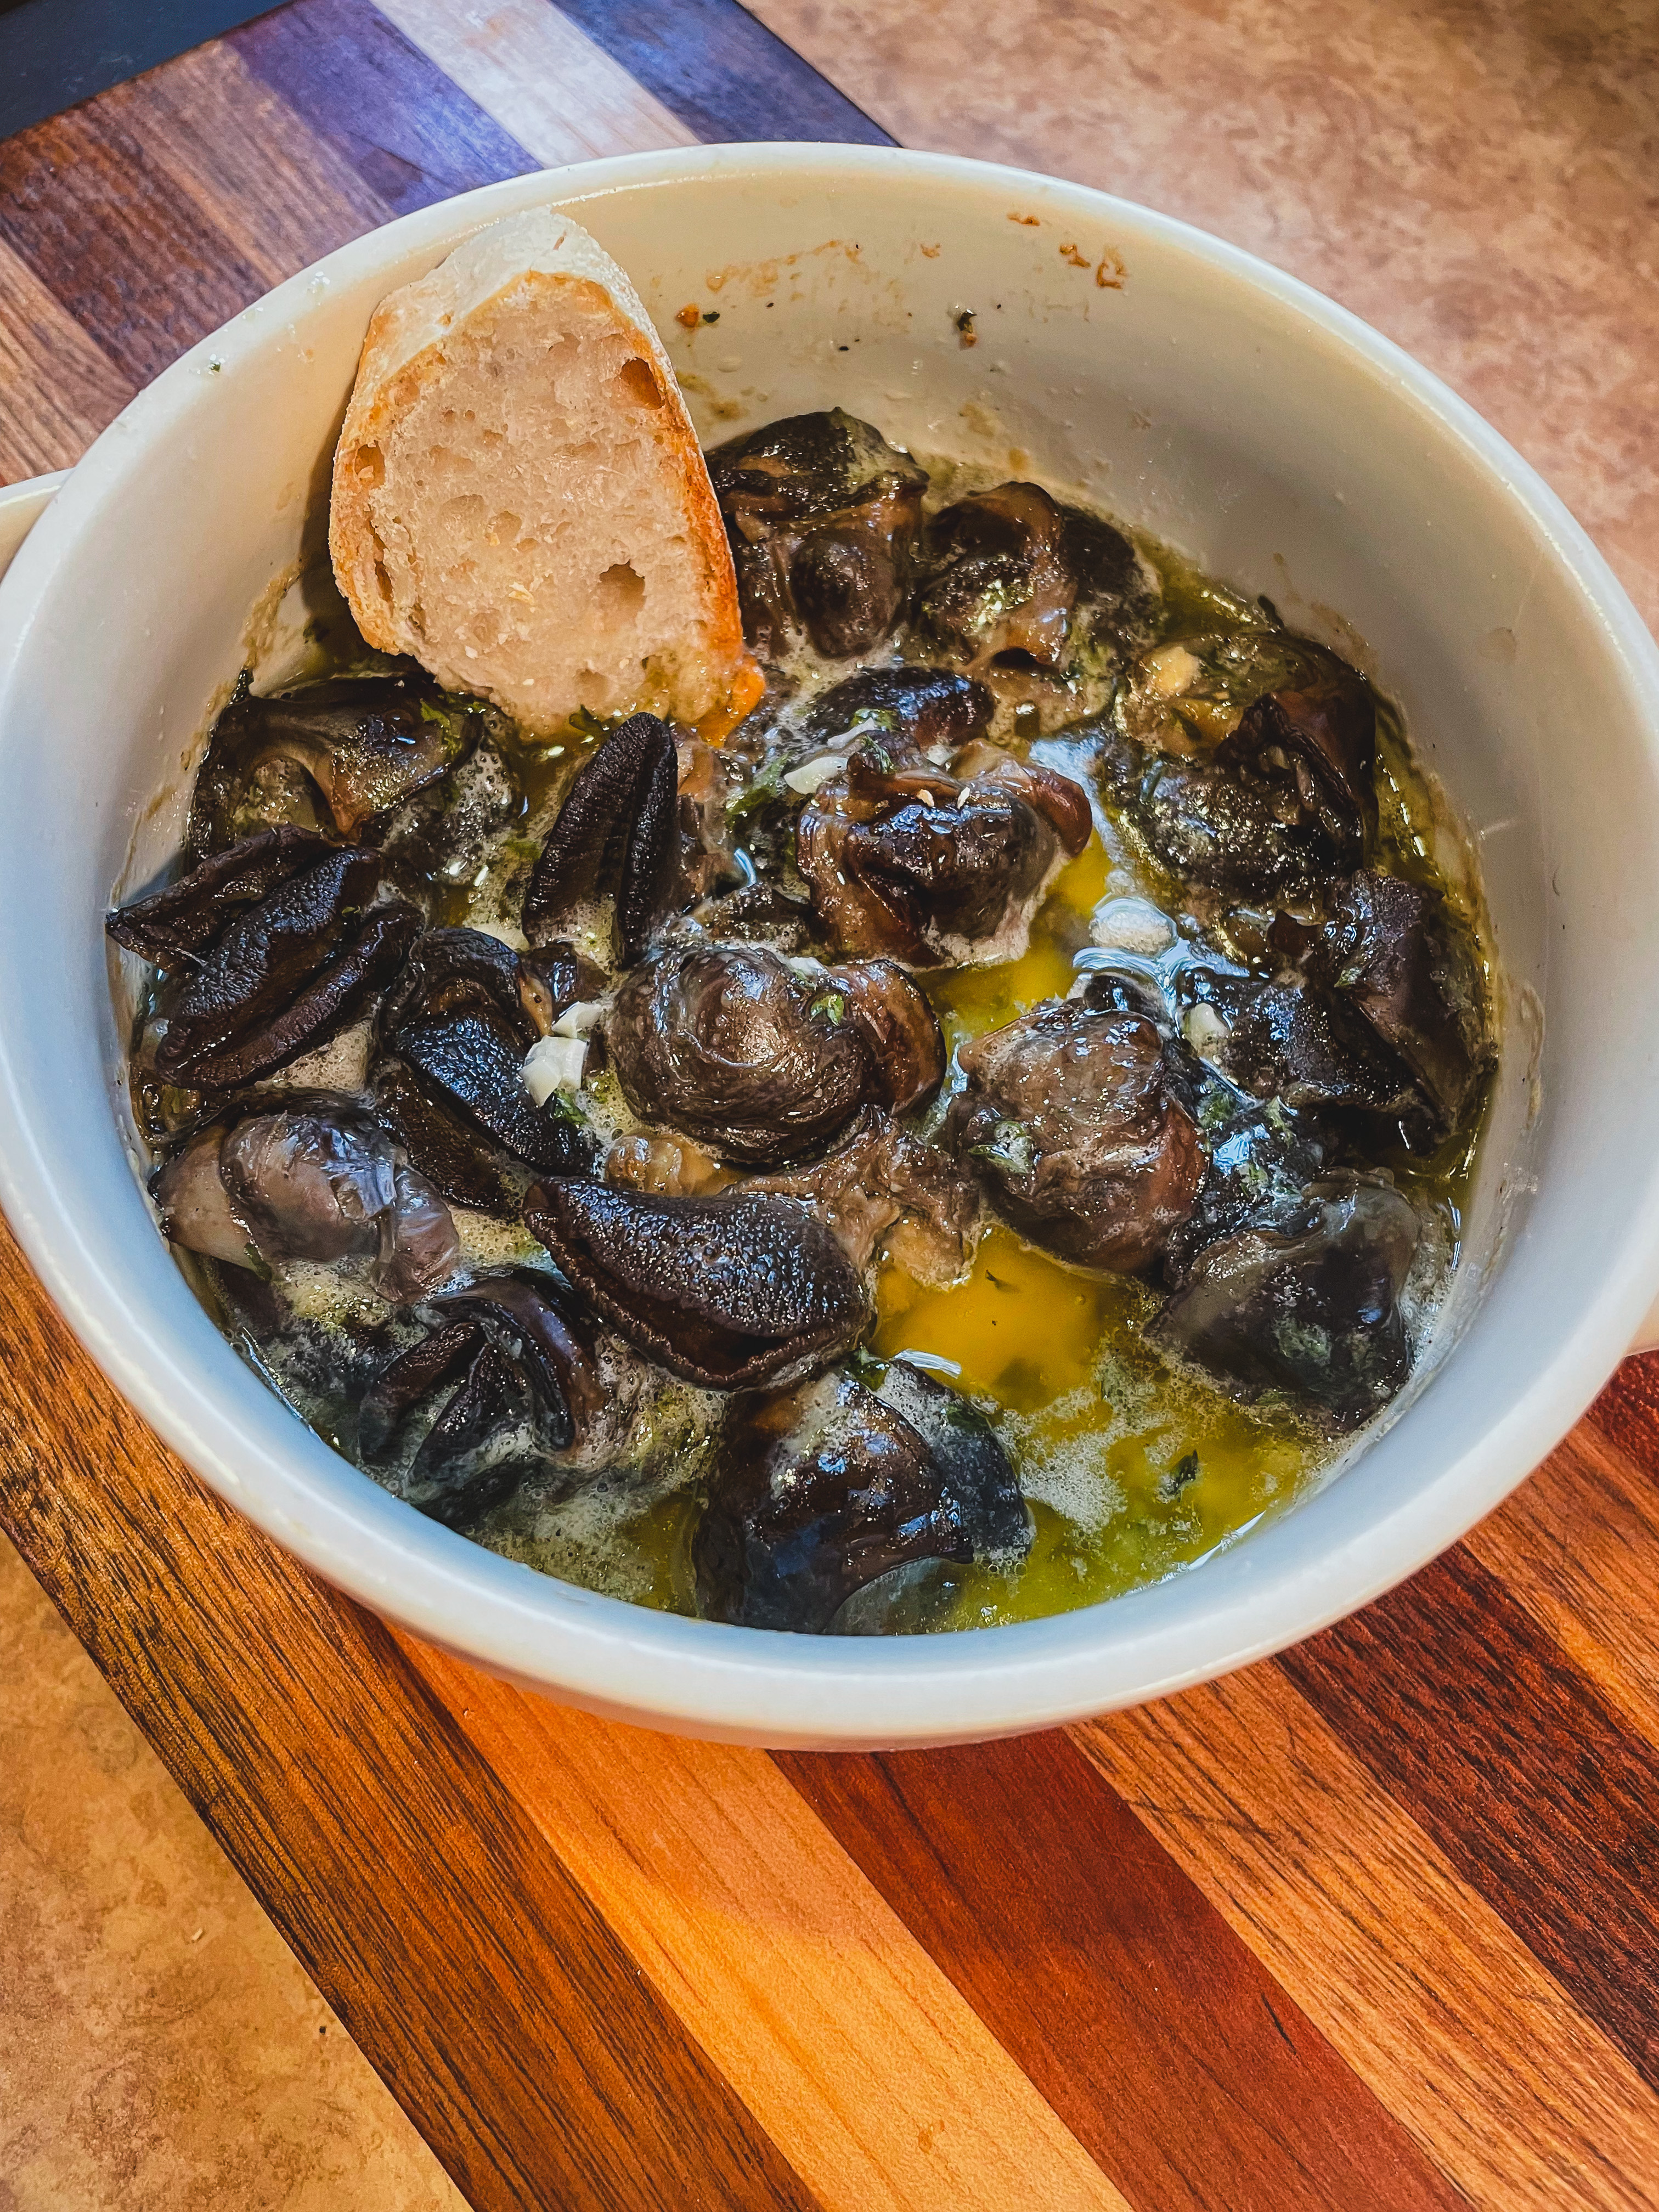
I stopped down at my hometown fish market, Great Depths for some scallops as they are my mother’s favorite, and we left with so much more. The thing that I was most excited about was this tinned escargot from Roland’s. I freaking LOVE escargot, I mean how can you go wrong; but I was thinking, “how in the hell can tinned snails be any good?” Well I’m here to let you know the truth.
With the first step of the recipe on the can is also my first barrier. The recipe notes to place the snails in the shell… The can doesn’t come with shells and I later discover you have to buy them seperately. My whole escargot world has been shattered as I just assumed these snails were harvested with their shells. So I decide, screw it I am cooking them in butter and garlic anyways so we will be okay.
In a small crock, I add 2/3 cup melted butter + 2 garlic minced cloves + thyme. I add in the drained escargot and bake at 350F, covered, until the butter is bubbling, about 25 minutes. I served it with some toasted french bread and a crisp white wine.
As surpising as it sounds, tinned escargot was the move! I put on some French jazz and was pretending to be back in Paris. It was buttery, garlicy, and so perfectly savory. I absolutely will be buying it again and I recommend you try it out yourself!