I feel that people are very split on the best part of chicken pot pie, the crust or the filling. Crust people, don’t get mad at me, but we are focusing on filling today. This soup is all about the creamy savory goodness that is the filling of a chicken pot pie. The next time you are needing a big bowl of comfort try out this recipe from Iowa Girl Eats.
Ingredients
4 TBSP Butter
1 Cup Carrots, sliced
4oz Mushrooms, sliced
1 large Celery Stalks, thinly sliced
1 Large Shallot, chopped
2 Cloves Garlic, smashed and minced
1 TSP Poultry Seasoning
Pinch of Thyme
Salt & Pepper
3 TBSP Flour
2 Cups Chicken Stock/Broth
1 Cup Milk
12 oz Package of Gnocci
1-1/2 Cups Shredded Chicken Breast, precooked [I used a rotisserie chicken]
1/2 Cup Frozen Peas
Let’s Get Cooking
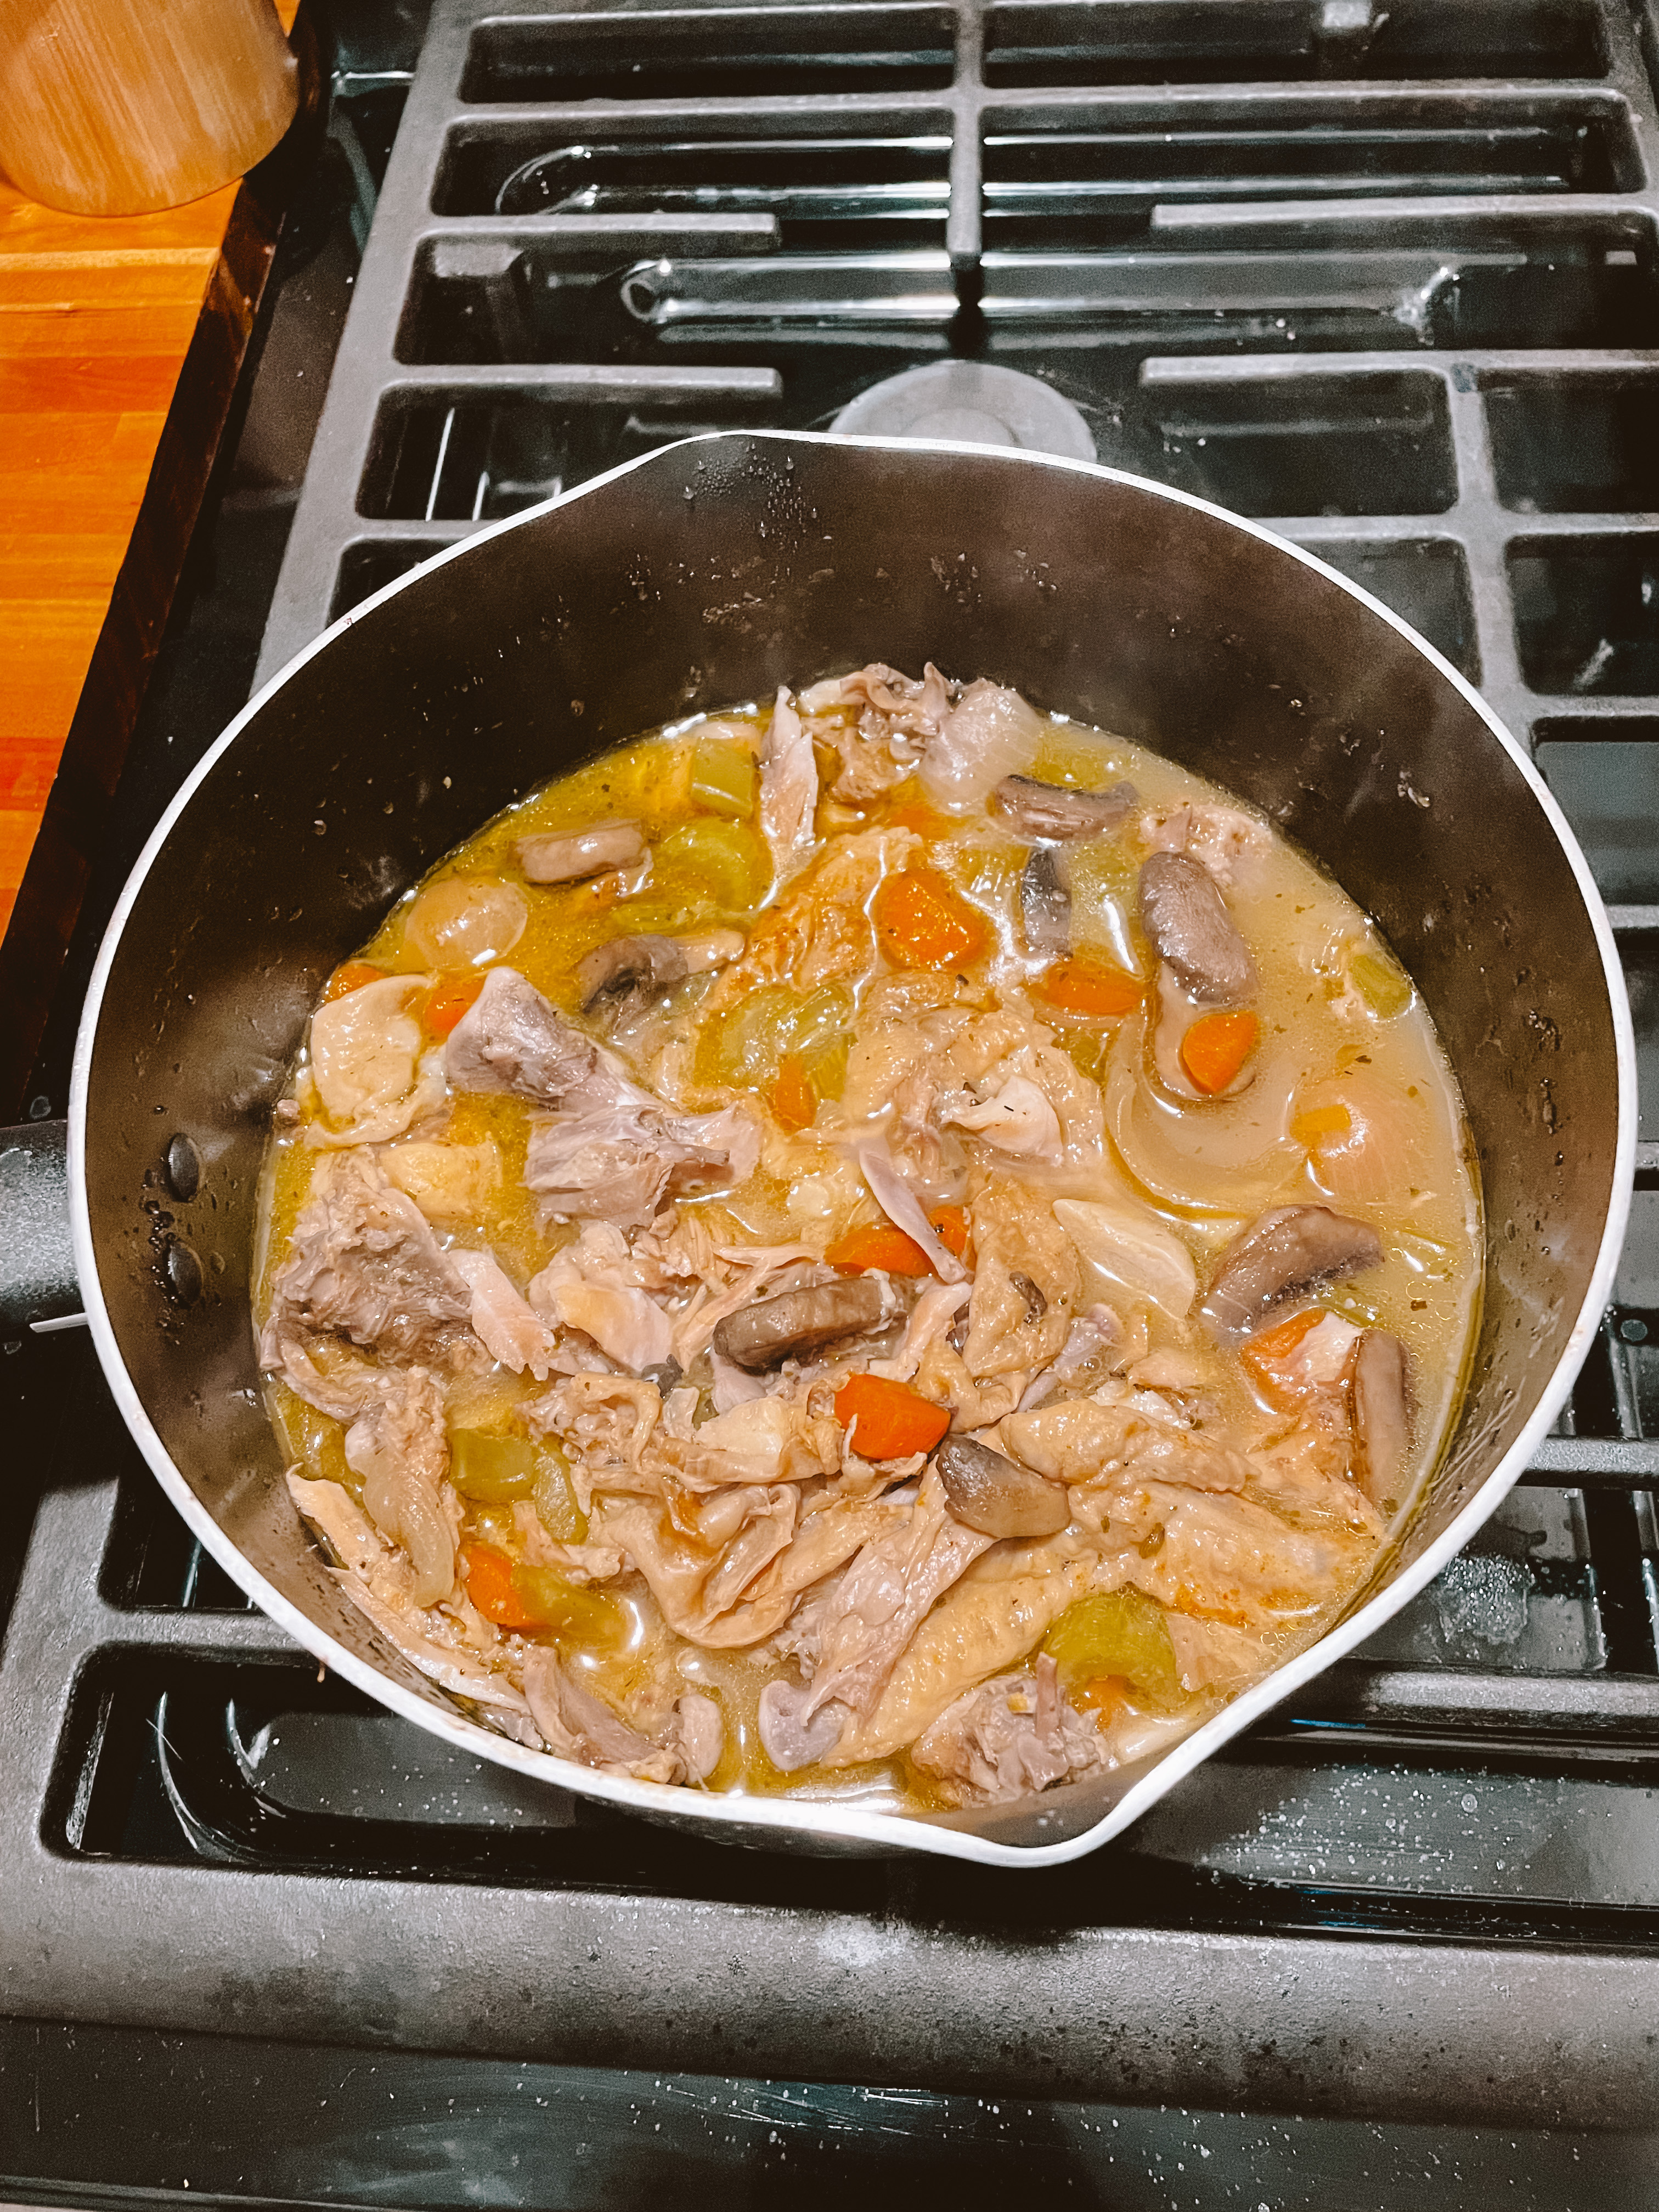
In a large pot, melt the butter over MED-HIGH heat. Once the butter is melted add in the carrots + mushrooms + celery + shallots. Saute the vegetables for about 3-4 minutes. Add in the salt + pepper and turn down the head to MED-LOW, cook for an additional 6-7 minutes.
Add in garlic + poultry seasoning + thyme. Saute for about 1-2 minutes or until you can smell the garlic. Add in the flour and stir the vegetables to coat. Slowly add in the chicken broth, stir while pouring so there are no lumps. Slowly add in the milk as well and turn up to MED-HIGH heat. Bring to a gentle boil, add in the gnocchi, and stir. Let cook for about 5-6 minutes.
Stir in the cooked & shredded chicken + peas. Add in any additional salt & pepper to taste.
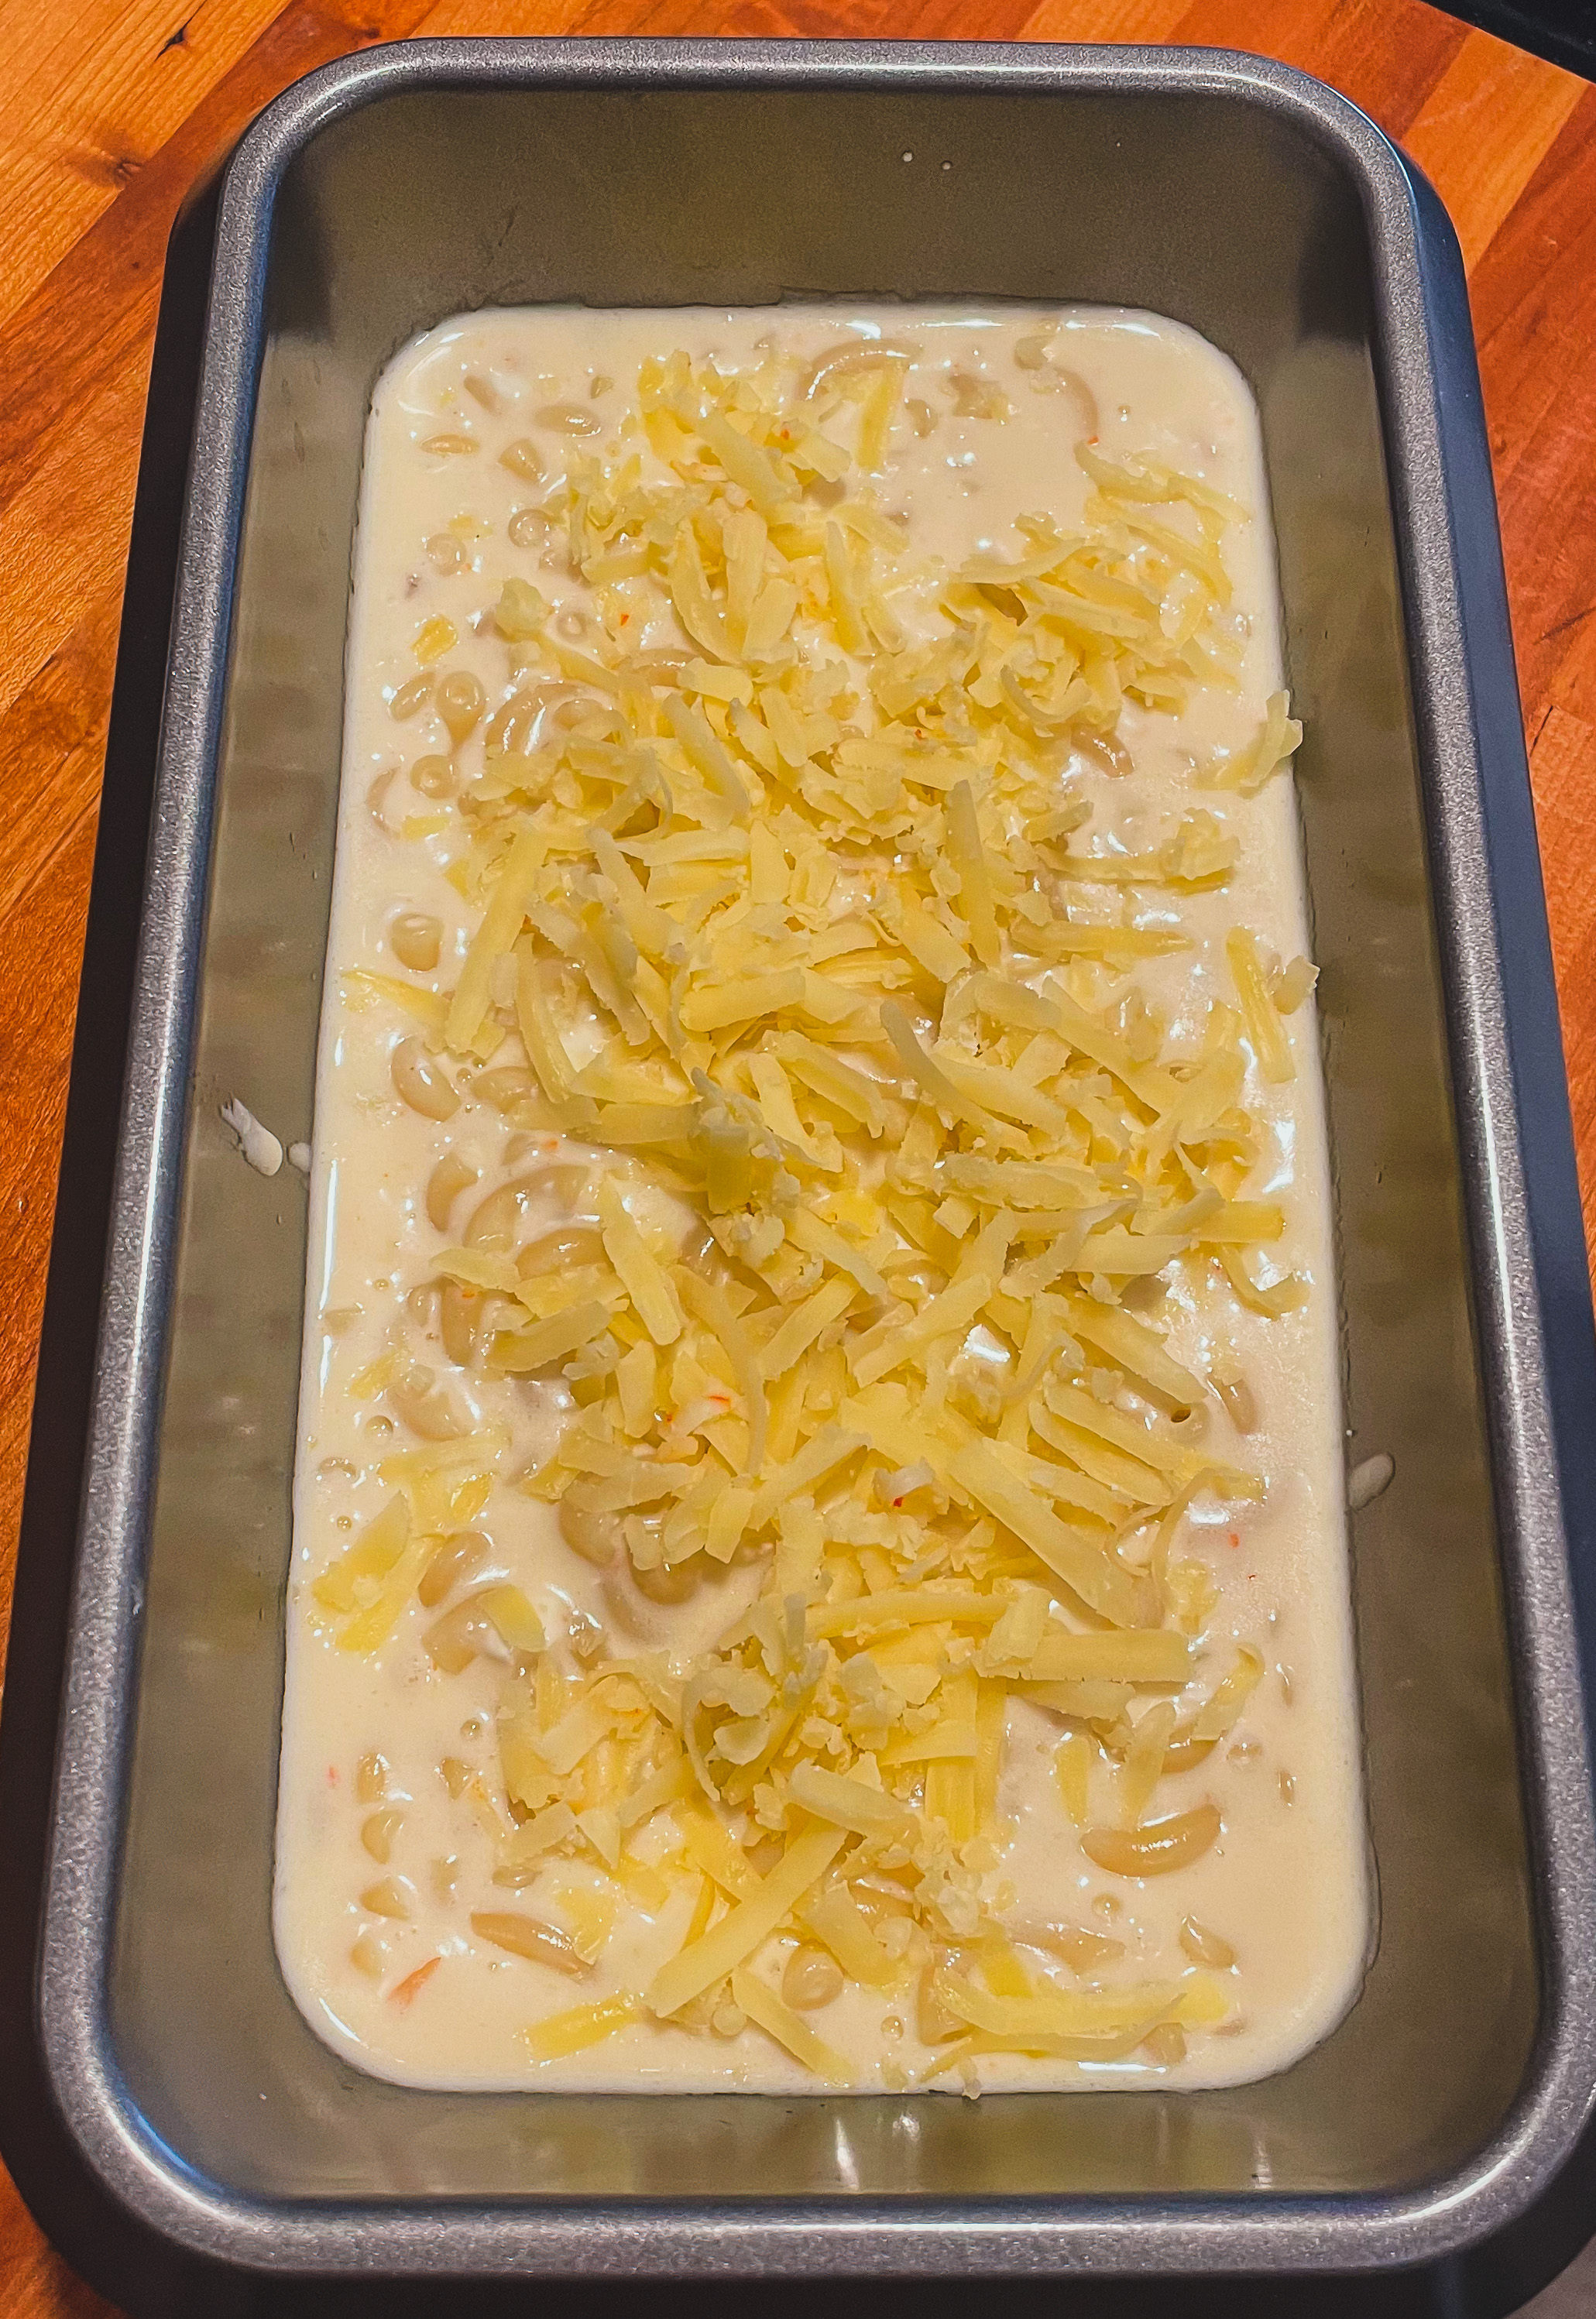
I love a charcuterie board and trying out new and interesting cheeses. Recently, I came across this Tequila Habanero Cheese from DeerCreek called The Rattlesnake. So obviously I had to try it out. It’s a delicious and creamy sharp cheddar with a kick of habanero. It’s definitely hot, but it has an amazing flavor. With a cheese this amazing I had to try and incorporate it into other dishes, so obviously I made mac & cheese. It’s spicy, it’s creamy, and it’s definitely cheesy.
Ingredients
1 Clove Garlic, finely diced
1 1/2 TBSP Butter
1/2 Cup Heavy Whipping Cream
3/4 Cup Milk
2 TBSP Flour
5 TBSP Cream Cheese
1 1/2 Cup Rattlesnake Cheese
1 Cup Sharp Cheddar + more for on top
8 oz Macaroni Noodles
2 32 oz Chicken Broth
Let’s Get Cooking
Bring the chicken broth to boil and cook the macaroni noodles per box instructions. Strain and put to the side.
Preheat the oven to 425 F
In a large pot, on MED HIGH melt the butter and add in the garlic. Add in the flour and stir well, making sure all the flour is coated. Turn the heat down to LOW and slowly add in the heavy cream + milk, stirring as you pour in. Add in the cream cheese + rattlesnake + cheddar [save some for on top].
Stir to make sure all the cheese melts. Once all the cheese is melted, add in the cooked and strained noodles. Stir to combine.
Pour the mac and cheese into a non stick pan and top with the extra cheddar cheese.
Bake for 20-25 minutes or until golden brown on top.
As we’ve seen from my recent postings, I’ve been wanting to put Kimchi in just about everything I can. I’m late to the party in being obsessed with it I know. But it’s packed with such good probiotics, and as a girl with gut issues, how can I not love it. I love using burgers as a medium to fuse different cuisines together, it’s the perfect mix of silky egg, and spicy kimchi.
Ingredients
4 Burger Buns
1 LB Ground Beef
Romaine Lettuce
4 Eggs, Fried
4 Slices Sharp Cheddar Cheese
1 Cup Kimchi, split amongst the 4 burgers
Salt & Pepper
Olive Oil
Let’s Get Cooking
To make your burger, grab a slice of cheese and place it in the middle of the ground beef, form the burger around the cheese. Place on a plate once formed and season both sides with salt and pepper.
Cook your burgers to your liking, I go med-rare so about 6/7 minutes each side. While the burgers are cooking, grab a small frying pan and fry up the eggs in a small amount of oil. Once done, remove from the pan and place on a paper towel.
To build the burger start with the bottom bun, lettuce, burger, kimchi, fried egg, then top bun.
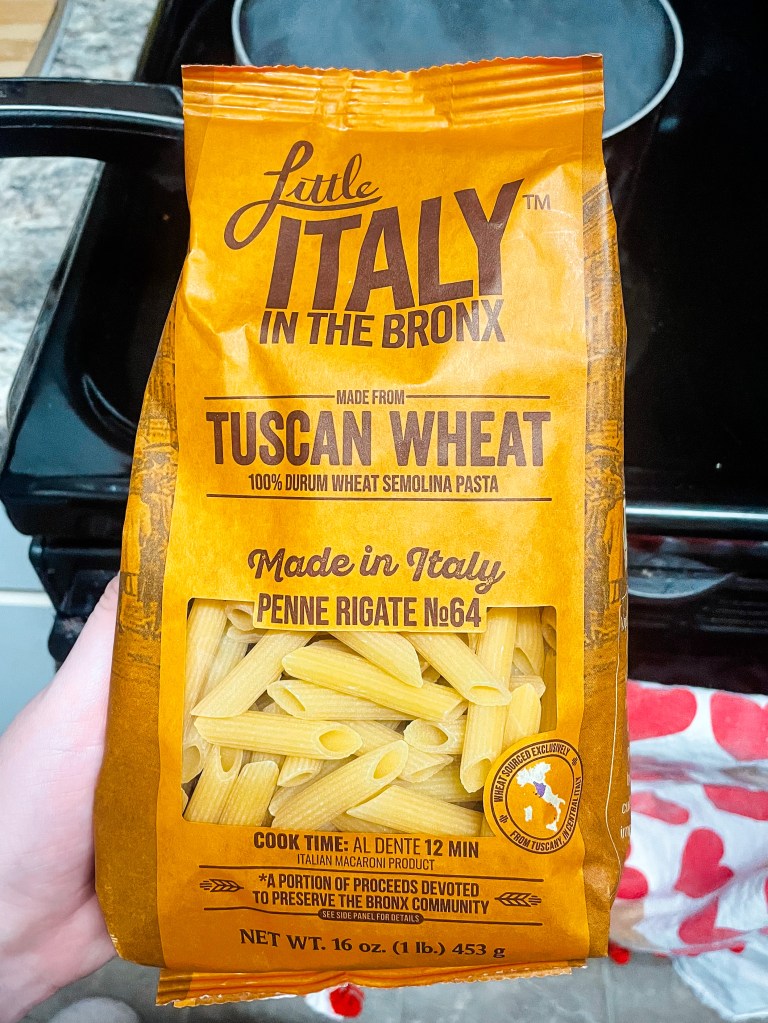
I’ve been wanting to make this recipe for a little while and I finally had all the ingredients in my pantry this week. This pasta dish is incredibly simple, focusing on the two stars of the show, cheese and pepper. I followed Bon Appetit’s recipe for this dish.
Ingredients
6 oz Pasta, your choice
3/4 Cup Pasta Water
3 TBSP Unsalted Butter, cubed, divided
1 TSP Fresh Cracked Pepper
3/4 Cup Grated Parmesan
1/3 Cup Grated Pecorino
Lets Get Cooking
Bring water to a boil and season with salt. Cook the pasta per package instructions, making sure it’s just to al dente. Reserve 3/4 cup pasta water.
In a large skillet melt 2 TBSP butter. Add in the pepper and lightly toast for about 1 minute.
Add 1/2 cup of the reserved pasta water to the skillet and bring to a simmer. Add in cooked pasta + remaining butter.
Reduce heat to low and add in the cheeses until they melt. Add in the extra pasta water if the sauce seems dry.
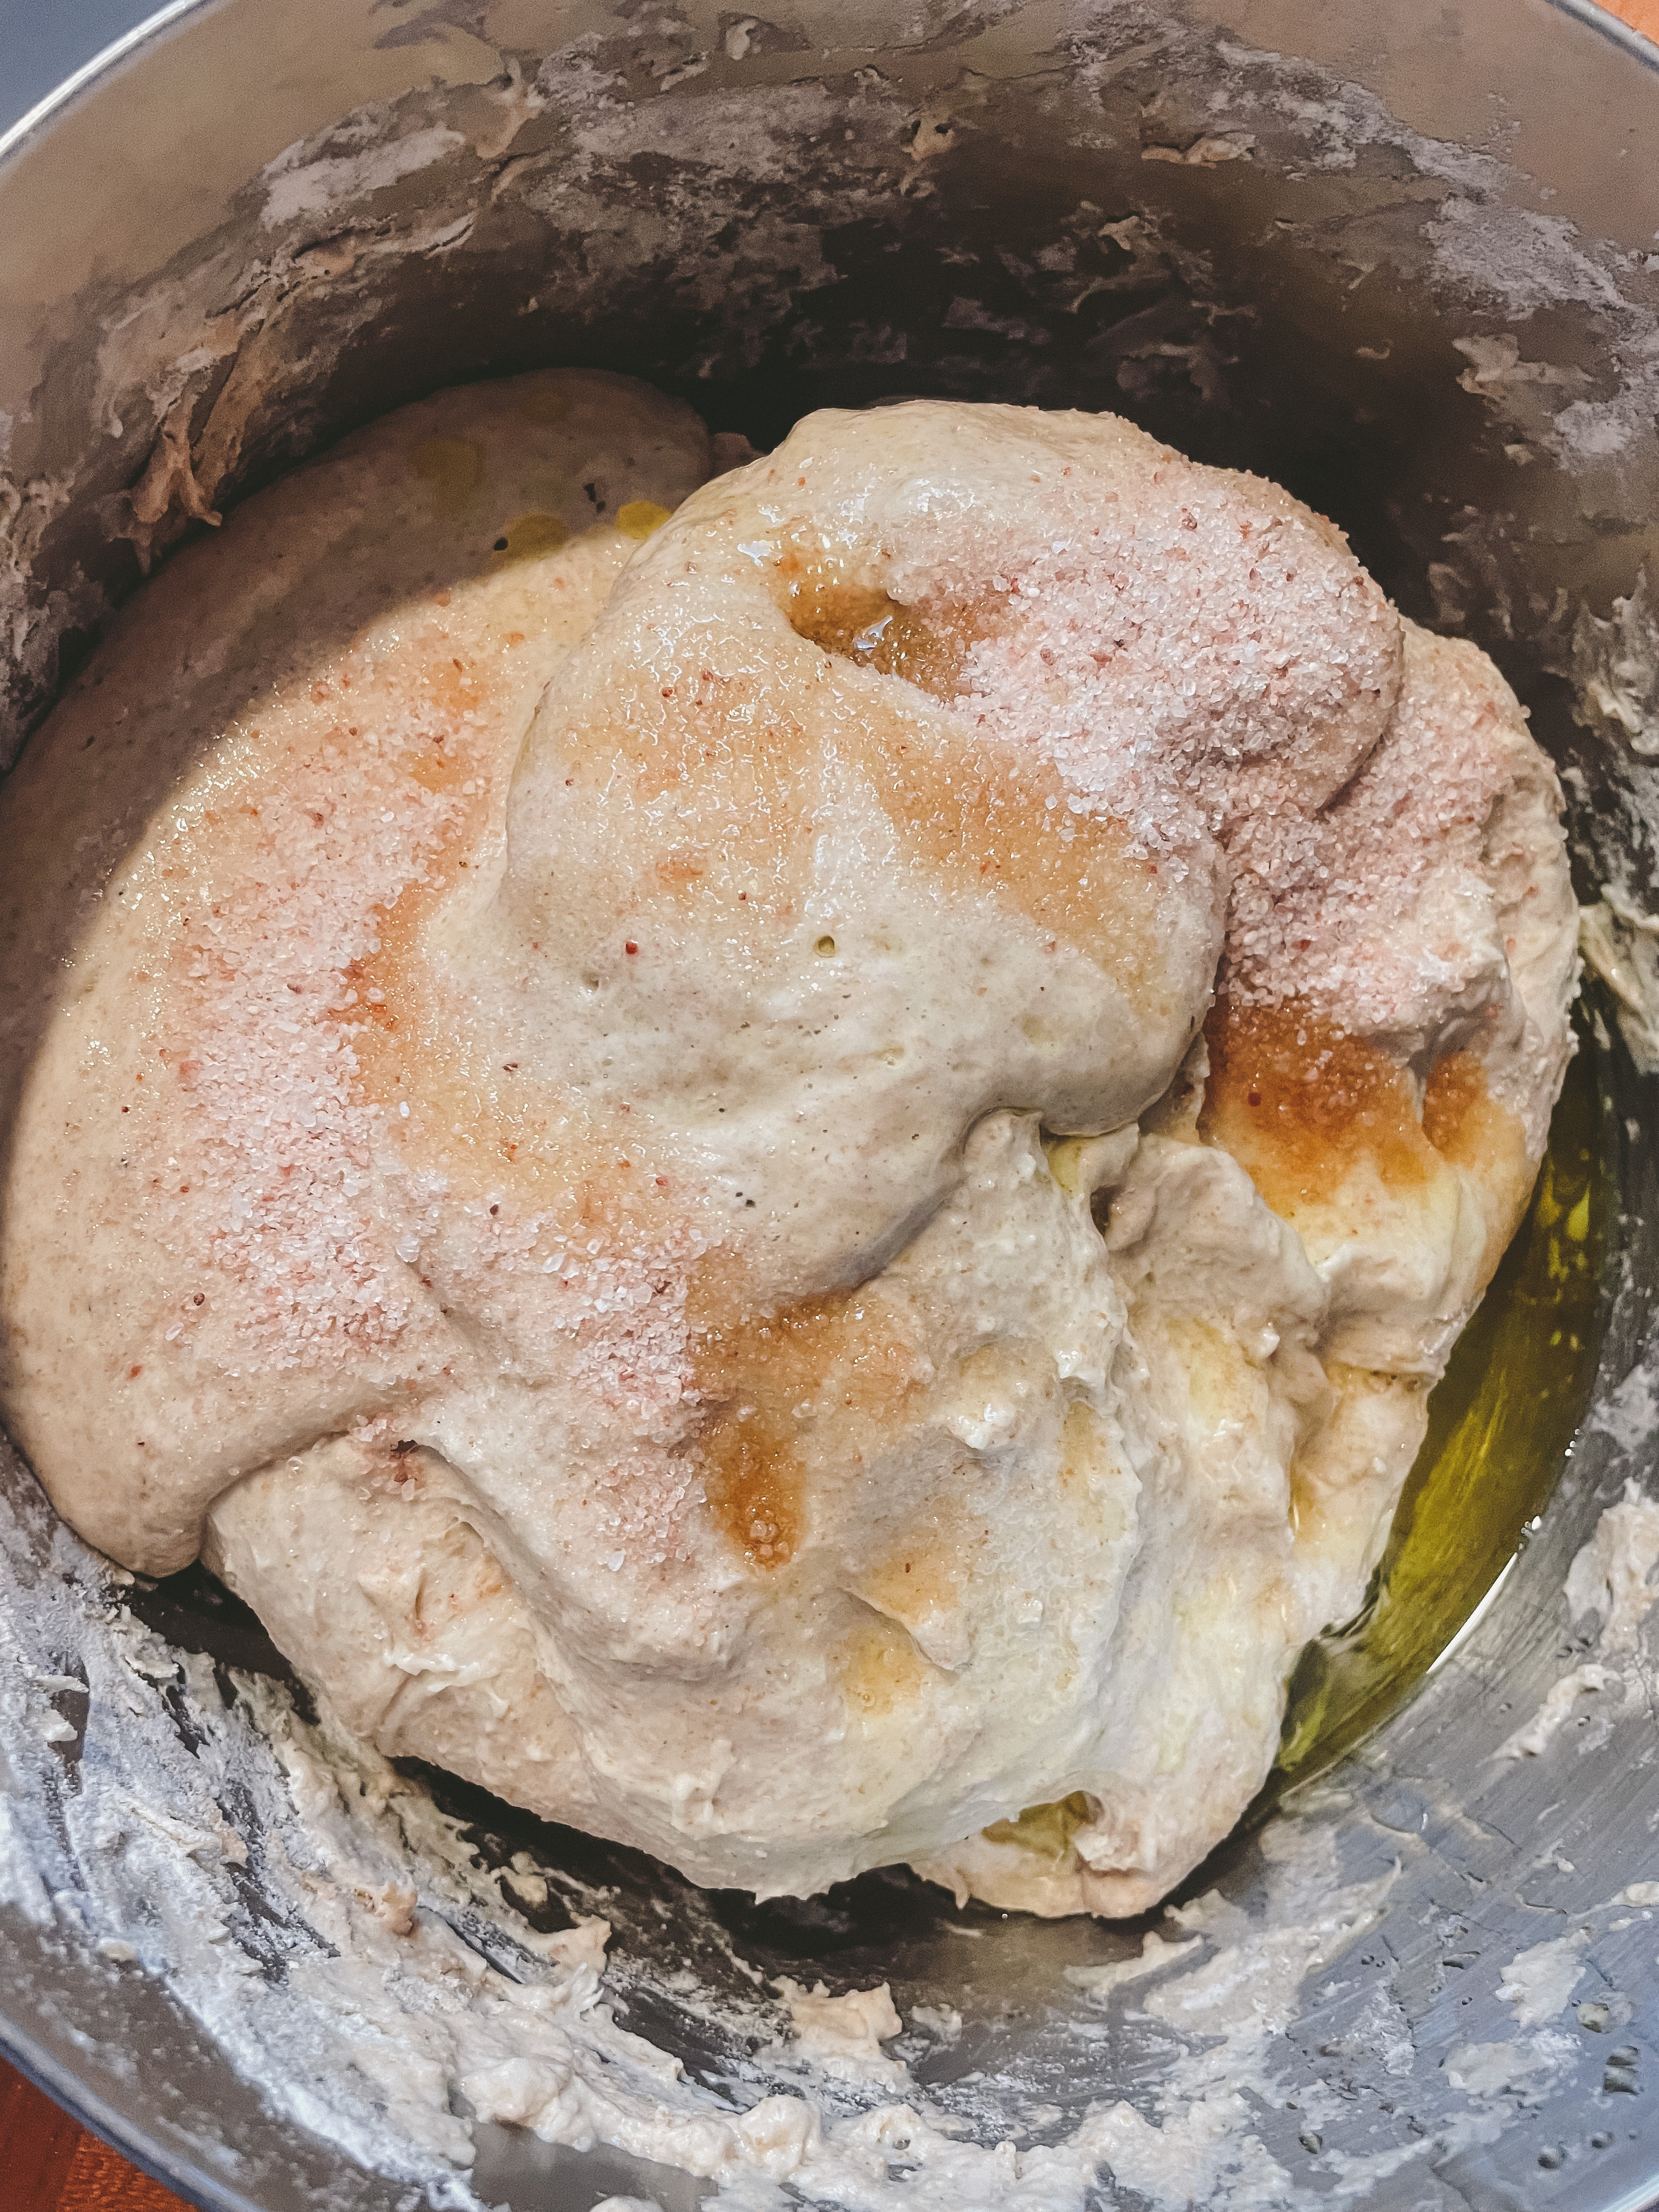
We all know that I love Brad Leone, my sourdough starter is named after him. I got his new cookbook for Christmas and was excited to see that he shared his sourdough recipe. Brad’s recipe is completely different from Claire Saffitz recipe that I had been using from the New York Times. Brad’s recipe incorporates olive oil which brings out a fatty flavor that I love in the bread. Brad also doesn’t require you to knead the dough for 20 minutes, which my arms appreciate. If you’re making bread at all it’s increcibly important to have a kitchen scale.
Ingredients
You need a total of 1000g of flour, it can be of different types, but Brad notes it also can be 1000g of all the same
700 g Bread Flour
150g Rye Flour [I used whole wheat]
150 Fine Italian Flour/type “00” [ I just used the bread flour again]
750g Filtered, Room Temp Water
15g Fine Salt
30g Extra-Virgin Olive Oil [I had a little fun here and used my herbs de provence oil]
150g Active Starter, fed the night before
Lets Get Cooking
Sift the flours together into a large bowl and mix in the water. You want the flours to autolyze which will help build up the gluten development. Make sure there is no dry flour left in the bowl. Cover and let sit for at least 30 minutes, you can let it sit for longer.
Once you’re done letting the flours autolyze, add salt + oil + starter to the flour mixture. Using your hands, knead the mixture into a smooth uniform ball. You can knead by gently pulling the dough and folding it over itself, or whatever kneading method works for you. Once you get the dough how you like it, place it back in the bowl and cover with plastic wrap. This will begin the fermenting process. Be sure to leave the dough at room temperature.
Here’s the part where you need to watch.
Every 60 minutes during the fermenting process you’re going to have to ‘turn’ the dough. This is done by wetting your hands and pulling up a side of the dough and folding it over itself. Turn 90 degrees and complete these ‘turns’ on all 4 sides. After each turn, cover again and let the dough rest. Depending on how your dough is fermenting you may do 3 turns, you may do 6. Once you’ve noticed that the dough has about doubled in size in the bowl and has a light and airy texture.
Once your fermentation is done it’s time to shape and bake! Flour a surface and let the dough fall out. Cut the dough in half if you are making bread, if you are making pizza dough, cut it into 4 equal pieces. With a bench scraper, slide it under the dough and turn, making it into a ball almost. Have floured bowls ready to place the shaped dough back into it and cover. Flip the dough into the floured bowl so that the bottom of the loaf is facing up. You can refrigerate for a day, which I recommend. Or you can bake that day.
Preheat the oven to 500F and place the dutch oven with the lid on into the oven. Gently flip out the dough onto a floured piece of parchment paper. Cut the top of the dough so it can release steam while baking. Place the dough/parchment into the dutch oven, cover, lower the temp to 460F and bake for about 20-25 minutes. Remove the lid and then let bake for another 45 minutes.
Let sit for about an hour before cutting into it!
If you’re making pizza with the dough, follow along with my sourdough pizza recipe after making the dough!
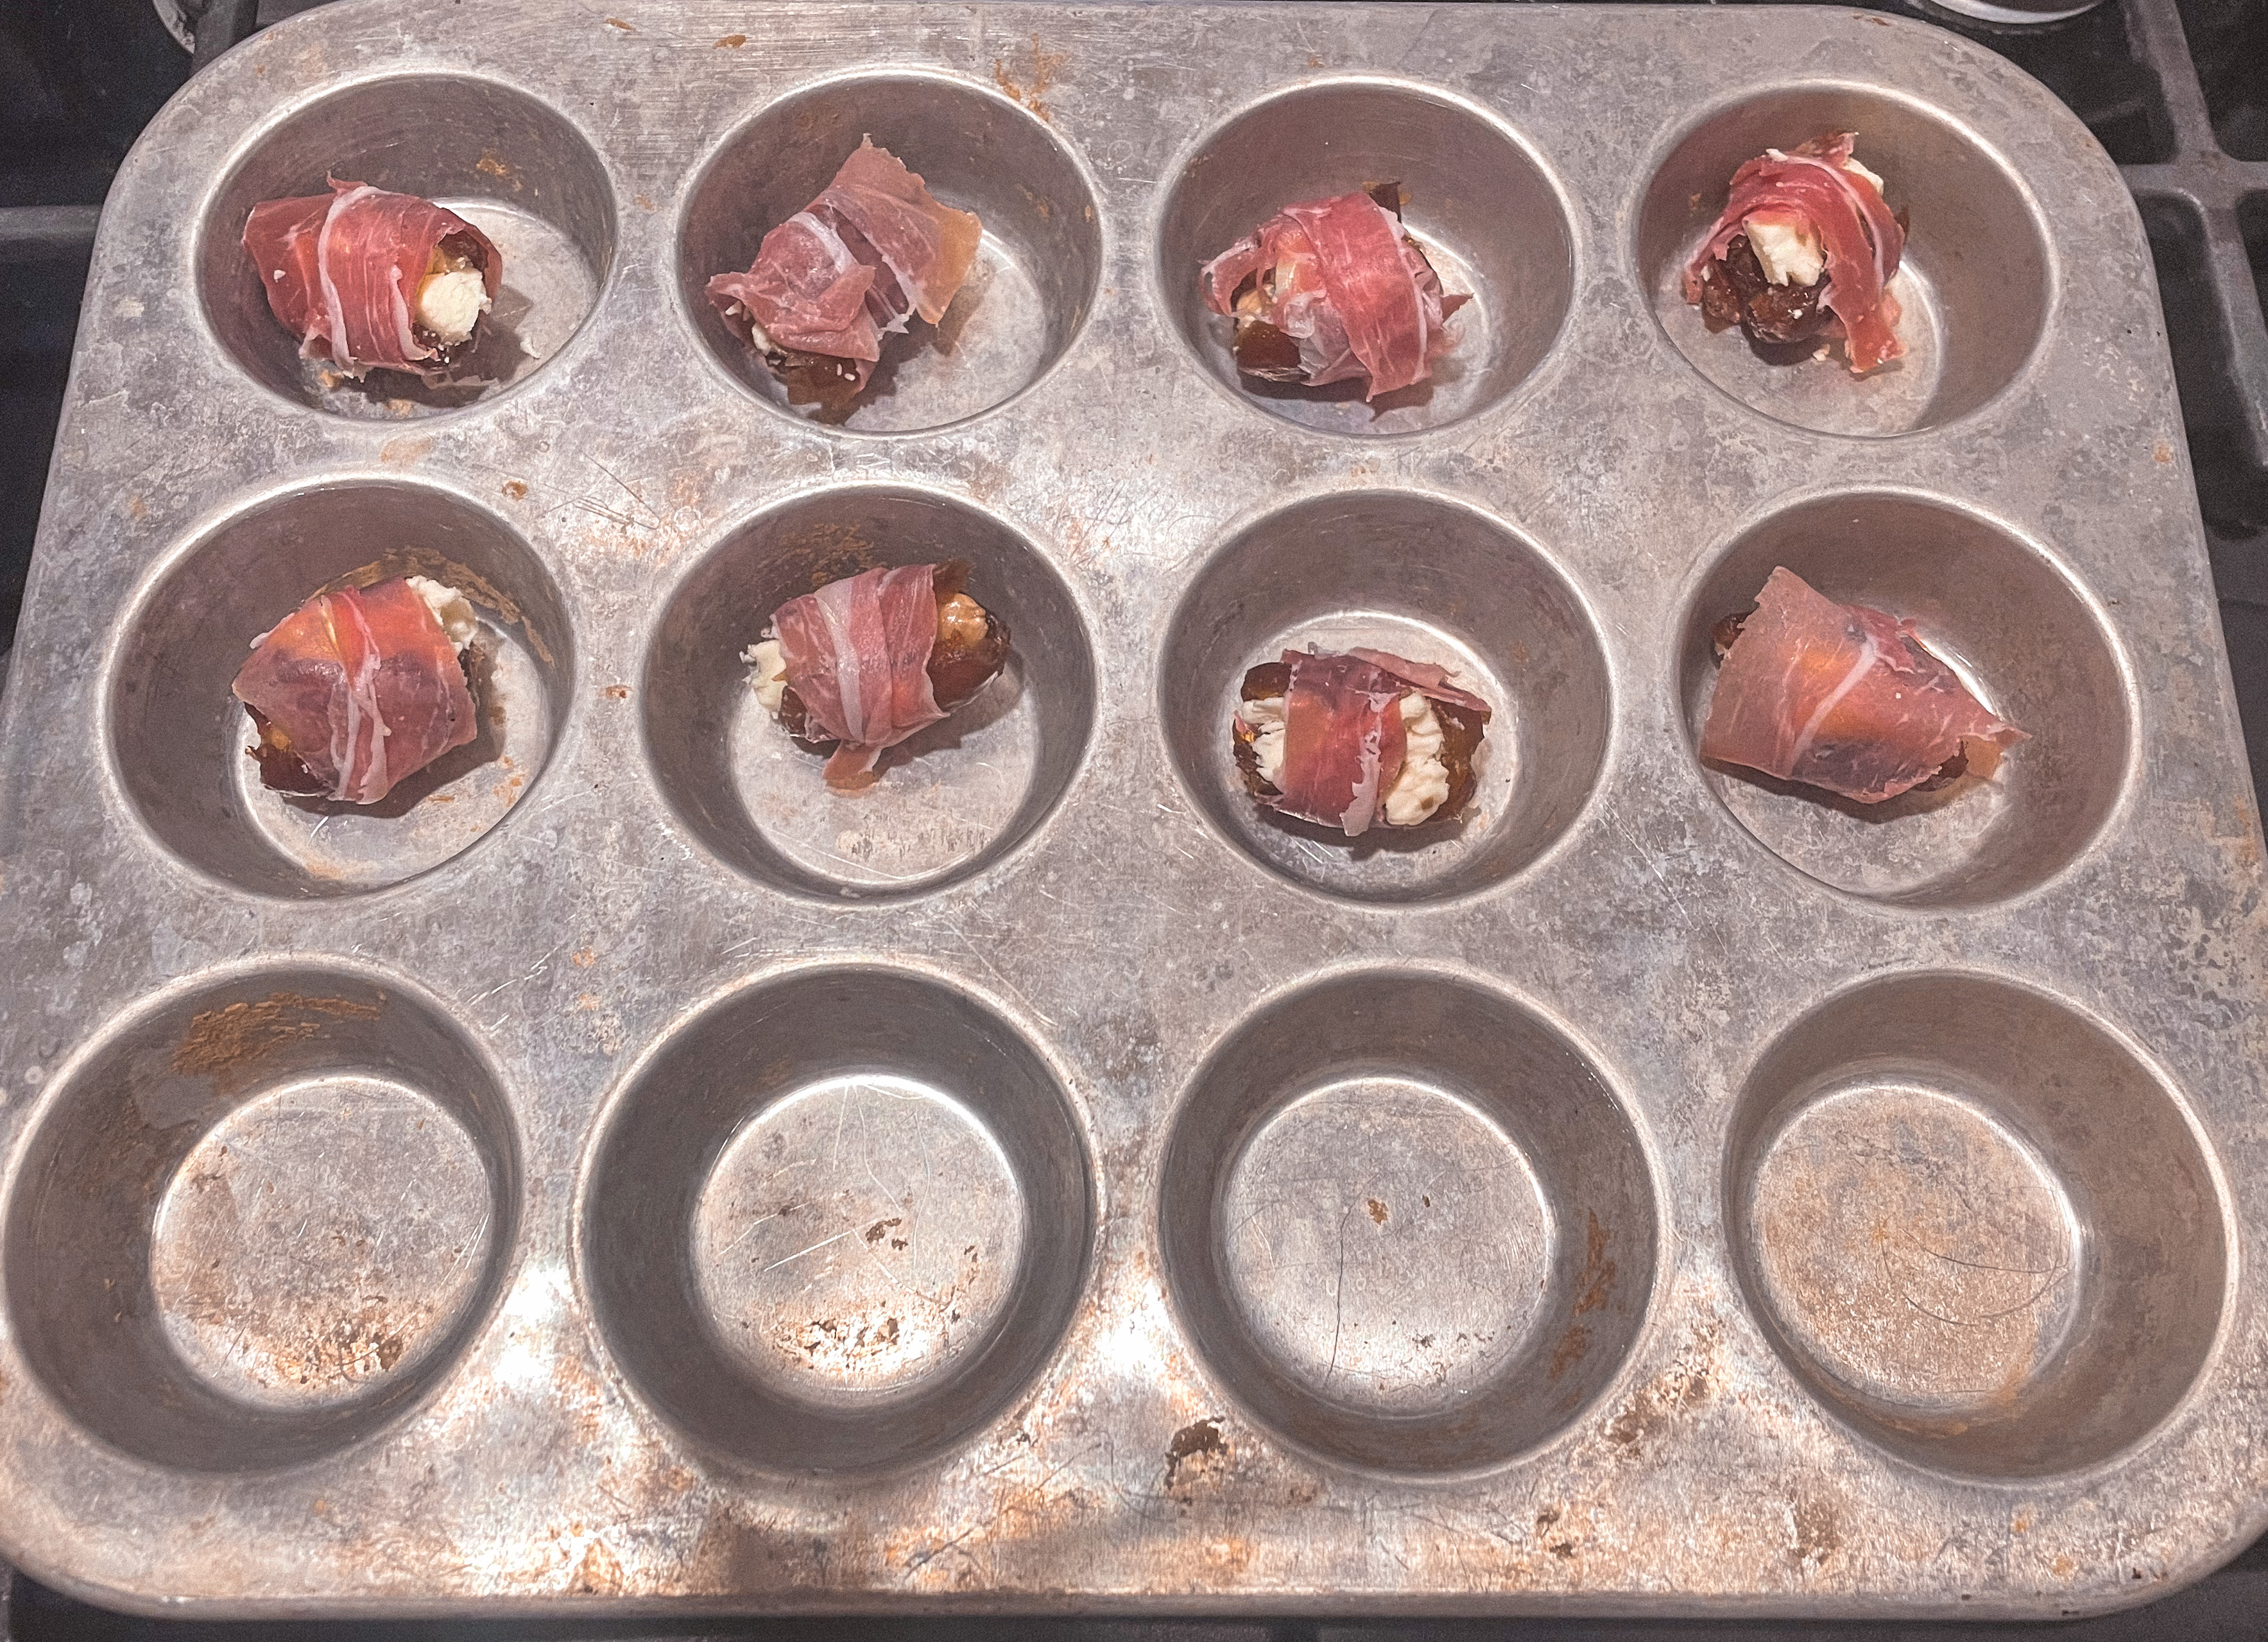
Ever since I’ve had Antoni’s cookbook I’ve wanted to make these dates. I never knew the right time. I just moved into my own apartment and I thought, YES, I CAN MAKE THOSE DATES FOR A HOUSE WARMING PARTY. I know, what a necessary thing to think about when you are moving. Though my housewarming party got canceled due to weather, I still made these dates and enjoyed them on the couch. Antoni’s right, it really is the perfect bite. Salty, sweet, savory, and a multitude of textures as well. See if you agree.
Ingredients
24 Medjool Dates, pitted
1/4 lb Thinly Sliced Proscuitto
3 oz Blue Cheese
24 Roasted Salted Almonds, preferably Marcona
Let’s Get Cooking
Preheat the oven to 375F and line a baking sheet with parchment paper. [ I didn’t have a baking sheet yet so I used a muffin tin & that worked too].
Tear the pieces of Proscuitto lengthwise to get about 24 strips
Cut the dates along the side and stuff with about 1/2 tsp blue cheese and one almond. Gently close the date and wrap with Proscuitto. Place on baking sheet cut side up so the cheese does not melt out.
Bake for about 7-10 minutes until the cheese is bubbling. Let sit for a little before eating, it will be difficult to wait but you don’t want to burn your mouth.
Poke bowls have been my recent food obsession, mostly because I can have a heaping helping of kimchi with it. Poke, which means to cut, is a native Hawaiian dish. You can make it with a variety of different fishes, vegetables, and fats. This has been a favorite lunch/dinner of mine that is easy to throw together. You can get sushi-grade tuna from your local fish monger or you can get frozen tuna and thaw it in a bowl of water in the fridge.
Ingredients
1/2 Cup Sushi Rice/ whatever rice you have
1 piece Frozen/Fresh Tuna, cut into bite sized pieces. I’ve also used canned tuna and salmon
2 TBSP Rice Wine Vinegar
Soy Sauce
1/2 TSP Ground Ginger
1/2 Avocado, diced
Cucumber, diced
1 TBSP Cream Cheese (I like it for that extra tang)
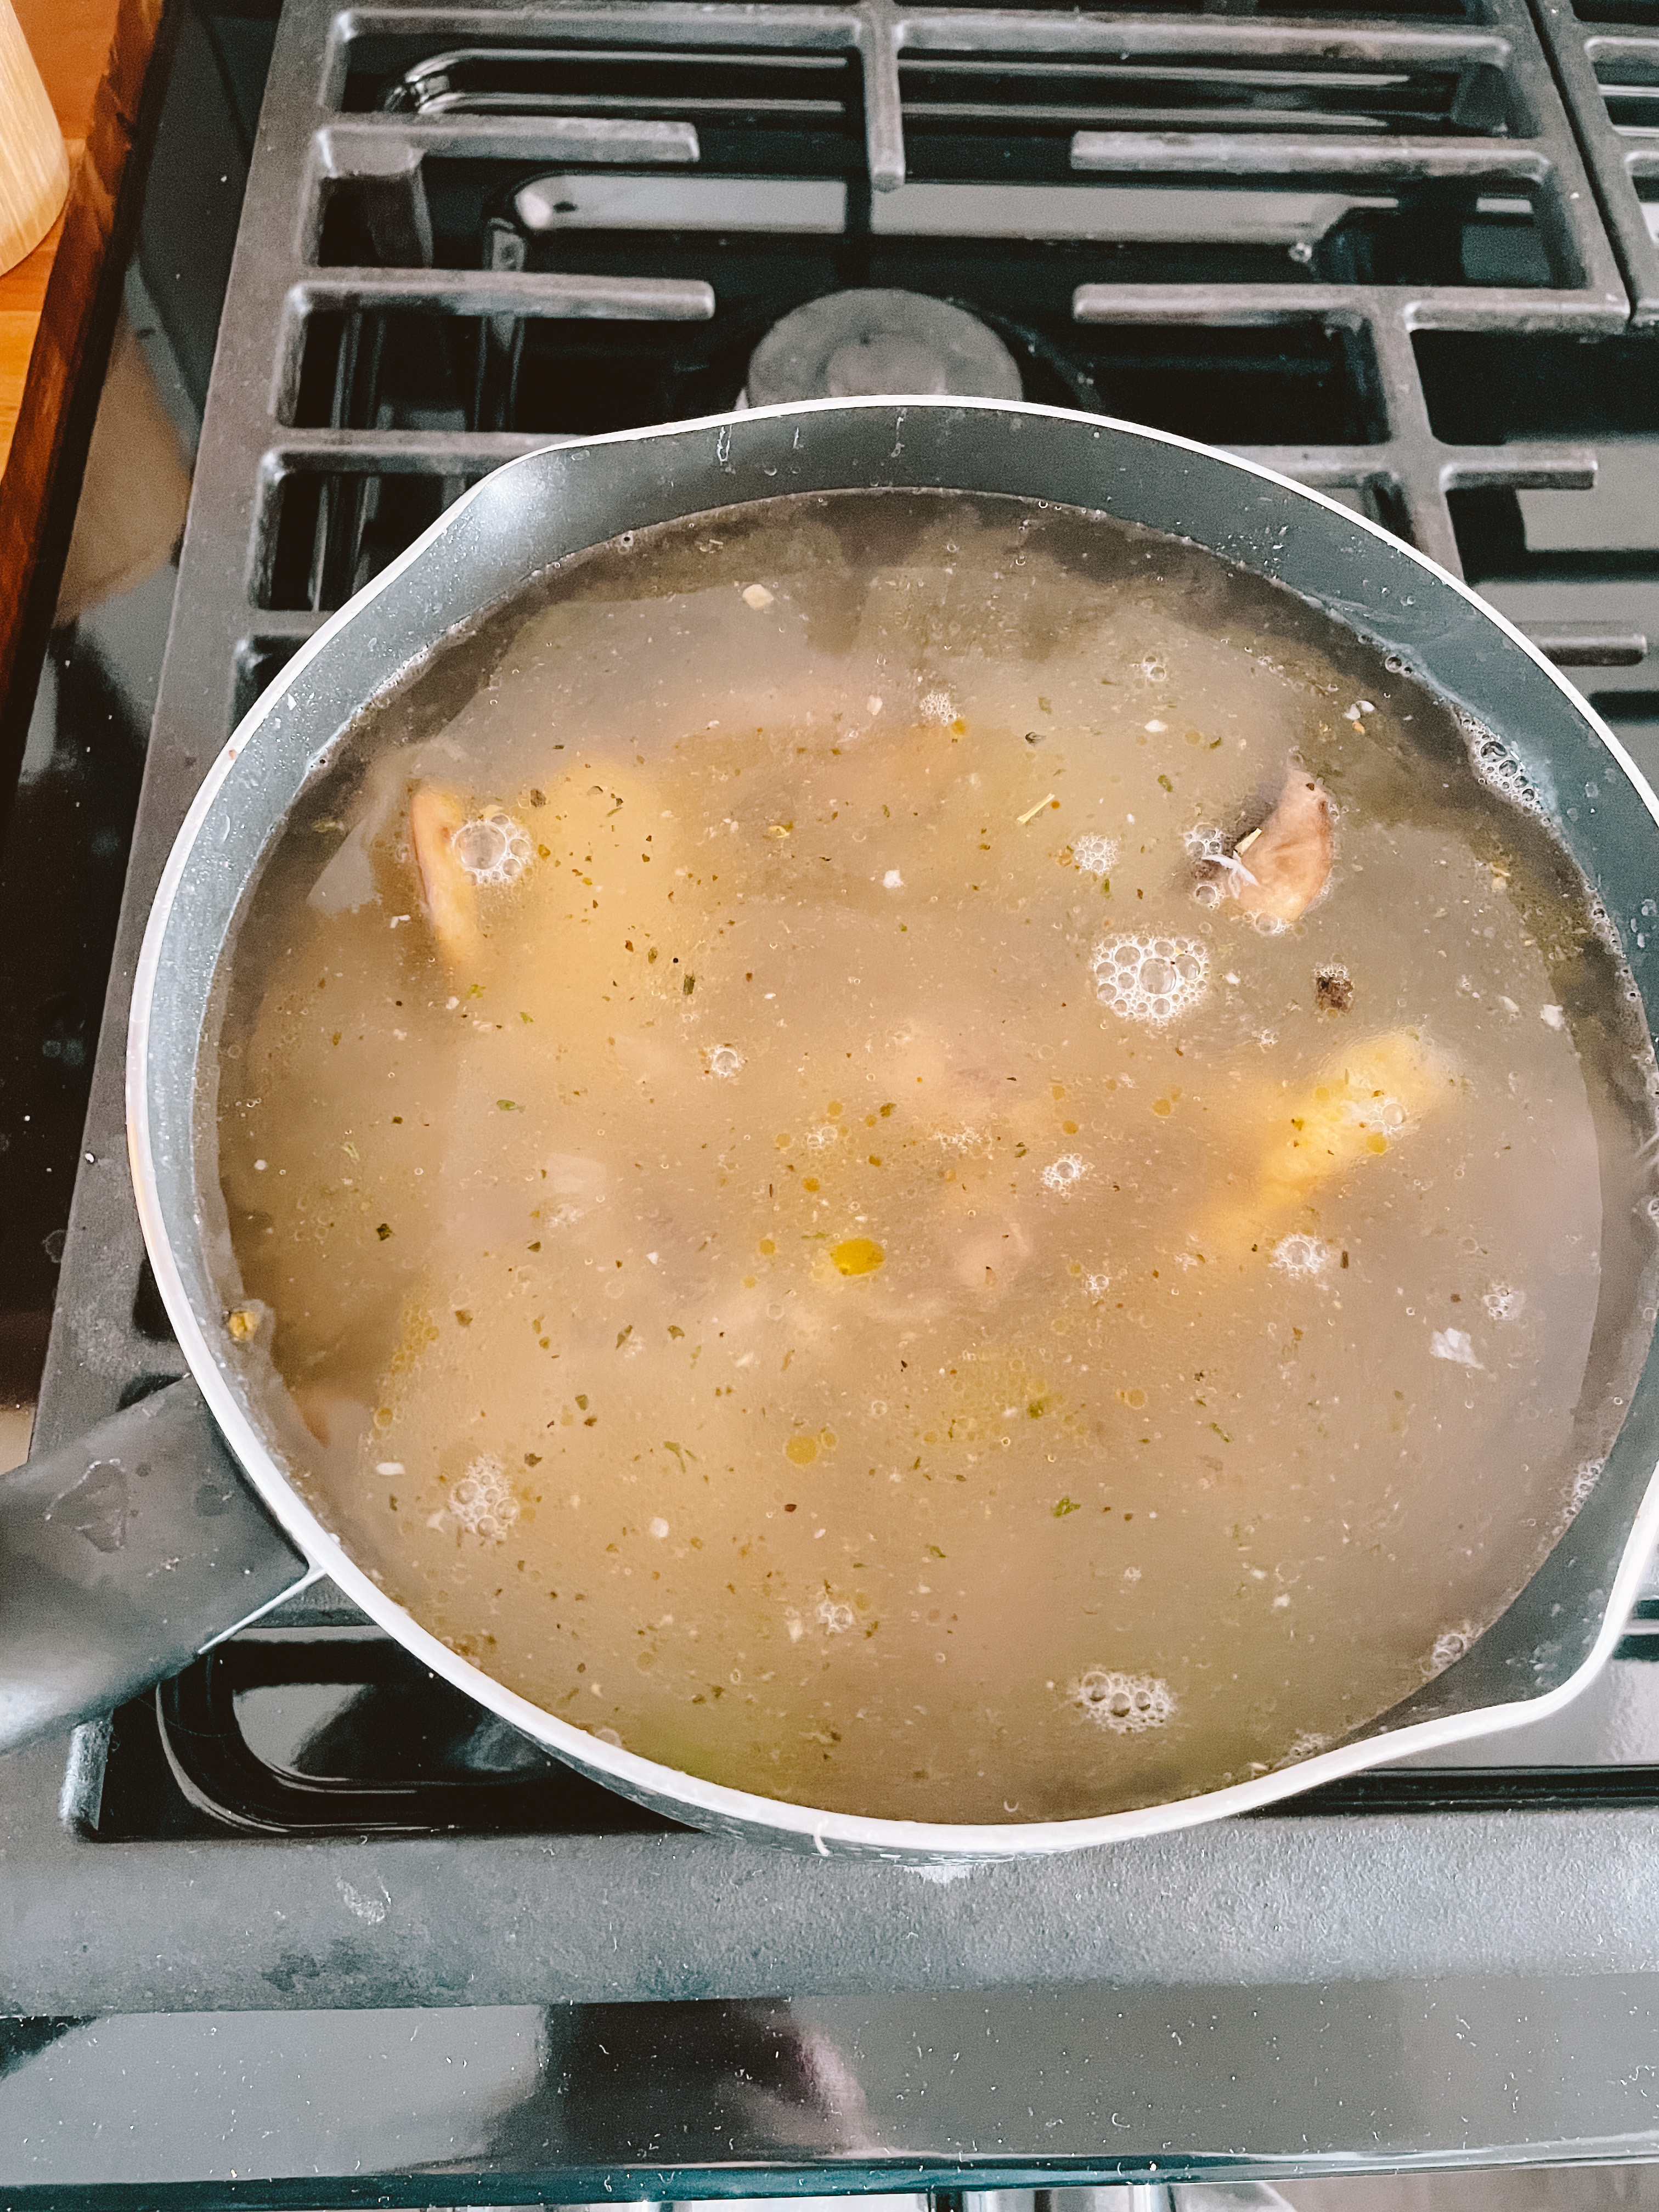
I love Brad Leone, I named my sourdough starter after him. He is what got me into learning about fermentation and the science of food. I love how focused he is on farm to table, and taking what you can from nature while being sustainable. This is Brad’s stock recipe from his new cookbook Field Notes for Food Adventures. You can use this stock in a variety of different recipes. I used it this past week to make use of the rotisserie chicken bones I saved from meal prepping. You can cut down this recipe as needed, since I only had about 2lbs of bones I cut back on a few items. Do what feels right to you.
Ingredients
1/4 Cup Extra Virgin Olive Oil
3 Medium Onions, halved
1 Cup Sliced Mushrooms
2 Medium Carrots, chopped
3 Celery Stalks, chopped
10 lbs Mixed Bones, I used chicken, you can use whatever you have
1 Parsley Bunch
Additional Herbs, like thyme, rosemary, whatever you want
2 Garlic Heads
6 Bay Leaves
1 TBSP Whole Peppercorns
1 Cup White Wine
4 Gallons Filtered Water
Salt
Let’s Get Cooking
In a large pot heat up the oil and brown off the onions + mushrooms + carrots + celery.
Add in the bones + parsley + additional herbs + garlic + bay leaves + peppercorn and stir.
Add in the wine and let reduce down for a few minutes. Then add in the water and bring to a low simmer.
Turn down the heat to LOW, allowing it to gently simmer.
Let this go for hours until it reduces. I let mine go for about 6 hours. The color will darken and the stock will thicken.
Strain the stock and taste, salt now if the stock needs it.
Store in the fridge or put in the freezer to use later.
I just had a huge move, from living with my best friend since pre-school to living alone. I have never lived alone before so it was a transition. I’m beginning to get back into some resemblance of a routine and part of that is making lunches for the workweek. I found this recipe in Antoni’s new cookbook Let’s Do Dinner and it is the perfect lunch that you can pop in the microwave [ if you want ] and you’re good to go.
Ingredients
2 TSBP + 2 TSP Extra Virgin Olive Oil
1/2 Small Onion, Chopped
2 Garlic Cloves, thinly sliced
1/2 TSP Chili Powder
Salt
2 15oz Cans Black Beans, rinsed and drained
1 TSP Grated Lime Zest
2 TBSP Fresh Lime Juice (about 1 lime)
6 Cups thinly sliced napa/green cabbage
1 1/2 Cups cubed Pineapple
1 Large Serrano/Jalapeño pepper, thinly sliced
2/3 Cup Chopped Cilantro
2 Scallions, thinly sliced
2 Cups Shredded cooked chicken, (can use rotisserie chicken)
4 Large Flour Tortillas
Hot sauce & Sour Cream (For serving)
Let’s Get Cooking
If you’re eating these at home now, preheat the oven to 400F. If making for the weekly lunches you can skip this part
Heat 2 TBSP of olive oil in a saucepan over MED heat. Add in the onion + garlic and cook until soft. Add in the chili powder + 1/4 TSP salt + beans and cook until warmed through. Stir in the lime zest + juice and remove the beans from heat.
In a large bowl, combine the cabbage + chile + cilantro+ scallions + remaining oil + salt + pineapple.
Lay out a piece of foil and place the tortilla on top. Layer the burrito beans + chicken + cabbage and then tightly roll and wrap in the foil.
If you’re eating these at home, place the burritos in the oven for 15 min.
If you’re eating at work, place it right in the fridge. Be sure to pack a plate or something to unwrap and reheat the burrito in.
I’ve seen this pasta across a variety of different platforms and called a bunch of different names, like ‘The Gigi Hadid Pasta’. Gigi Hadid did not invent vodka sauce, so no, I’m not calling it that. In my hometown, a local restaurant, Combine Brothers, calls this pink pepper sauce. It’s spicy, creamy, tomatoey, garlicky, and brilliantly delicious. You can add vodka to this, but I didn’t and it is still spot on.
Ingredients
6 oz Tomato Paste
1 TBSP Olive Oil
1 Cup Heavy Cream
1 TBSP Butter
1 Yellow Onion, finely diced
4 Cloves of Garlic, finely chopped
1-2 TBSP of Red Pepper Flakes, depending on taste
1/4 Cup Parmesan Cheese
1/4 Cup Pasta Water
Pasta of your choice
Salt + Pepper
Pinch of Sugar
Let’s Get Cooking
In a large skillet, heat up the olive oil on MED heat. Add in the garlic + onion and saute until the onions become translucent and fragrant. Add in the heavy cream + tomato paste and stir gently to combine.
Once combined add in the red pepper flakes + parmesan+ butter + pinch of sugar + salt + pepper. Stir to combine. Taste test to see if it is spicy enough for you or add more RPF if needed.
While the sauce is cooking, cook your pasta according to package directions. While the pasta is cooking, take 1/4 cup of pasta water and add it to the tomato sauce.
When the pasta has finished cooking, drain, but DON’T RINSE and add to the tomato sauce. Gently stir to cover the pasta well in the sauce.
Transfer to a bowl and top with additional cheese.